

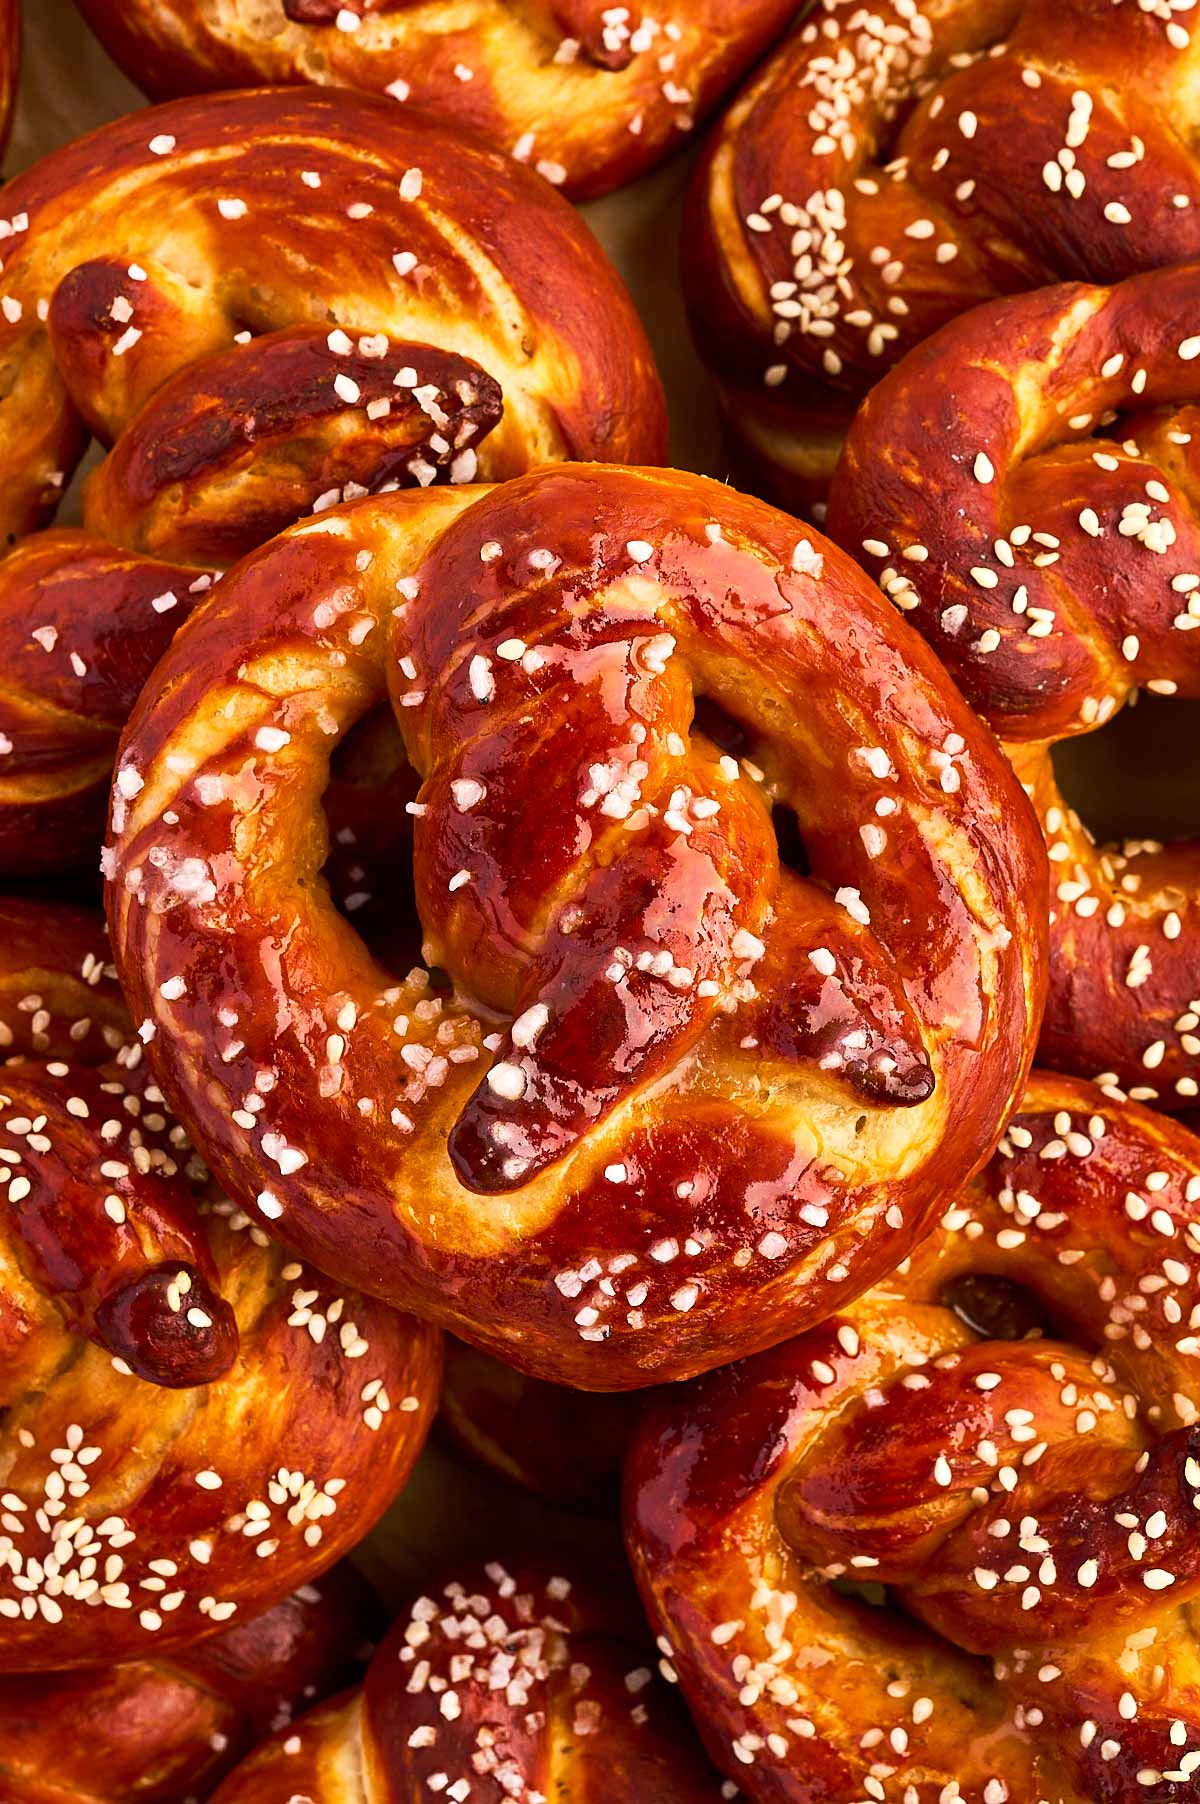
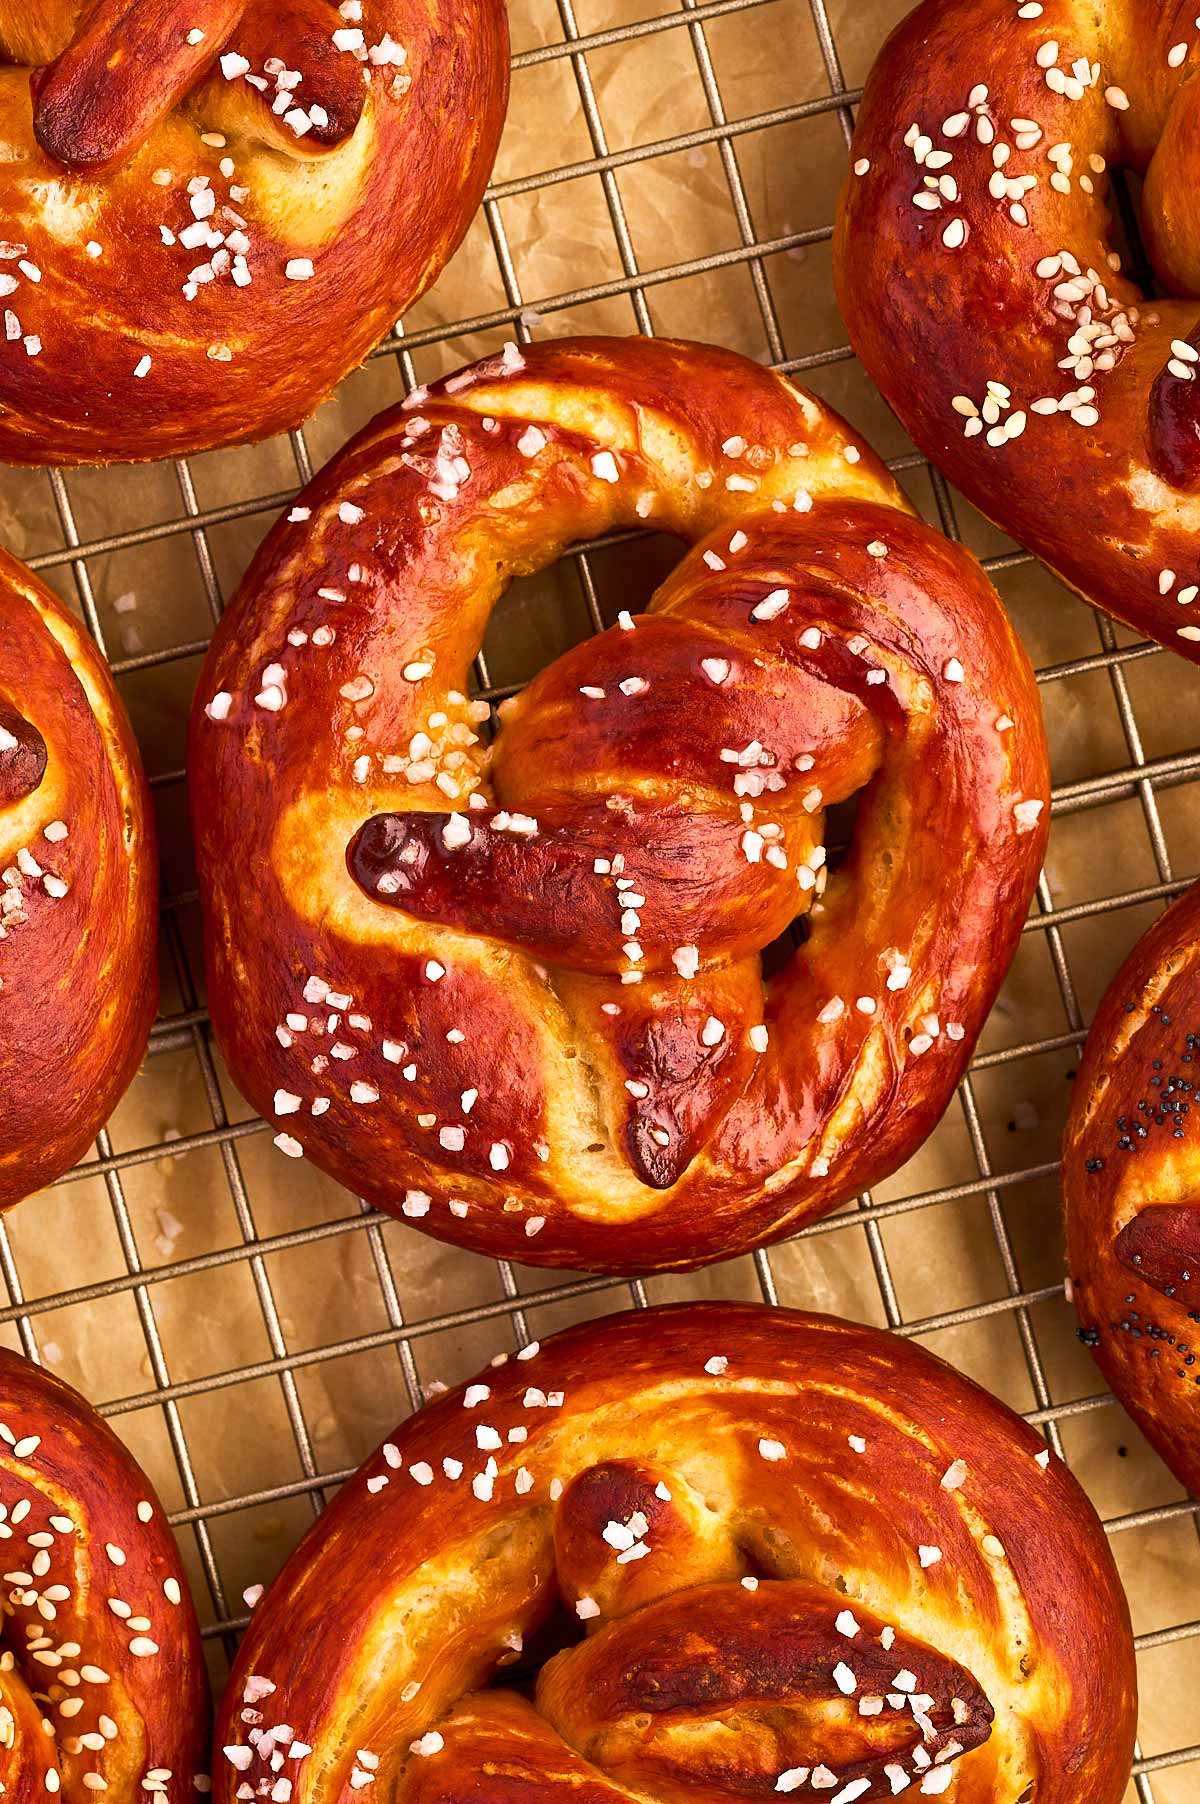
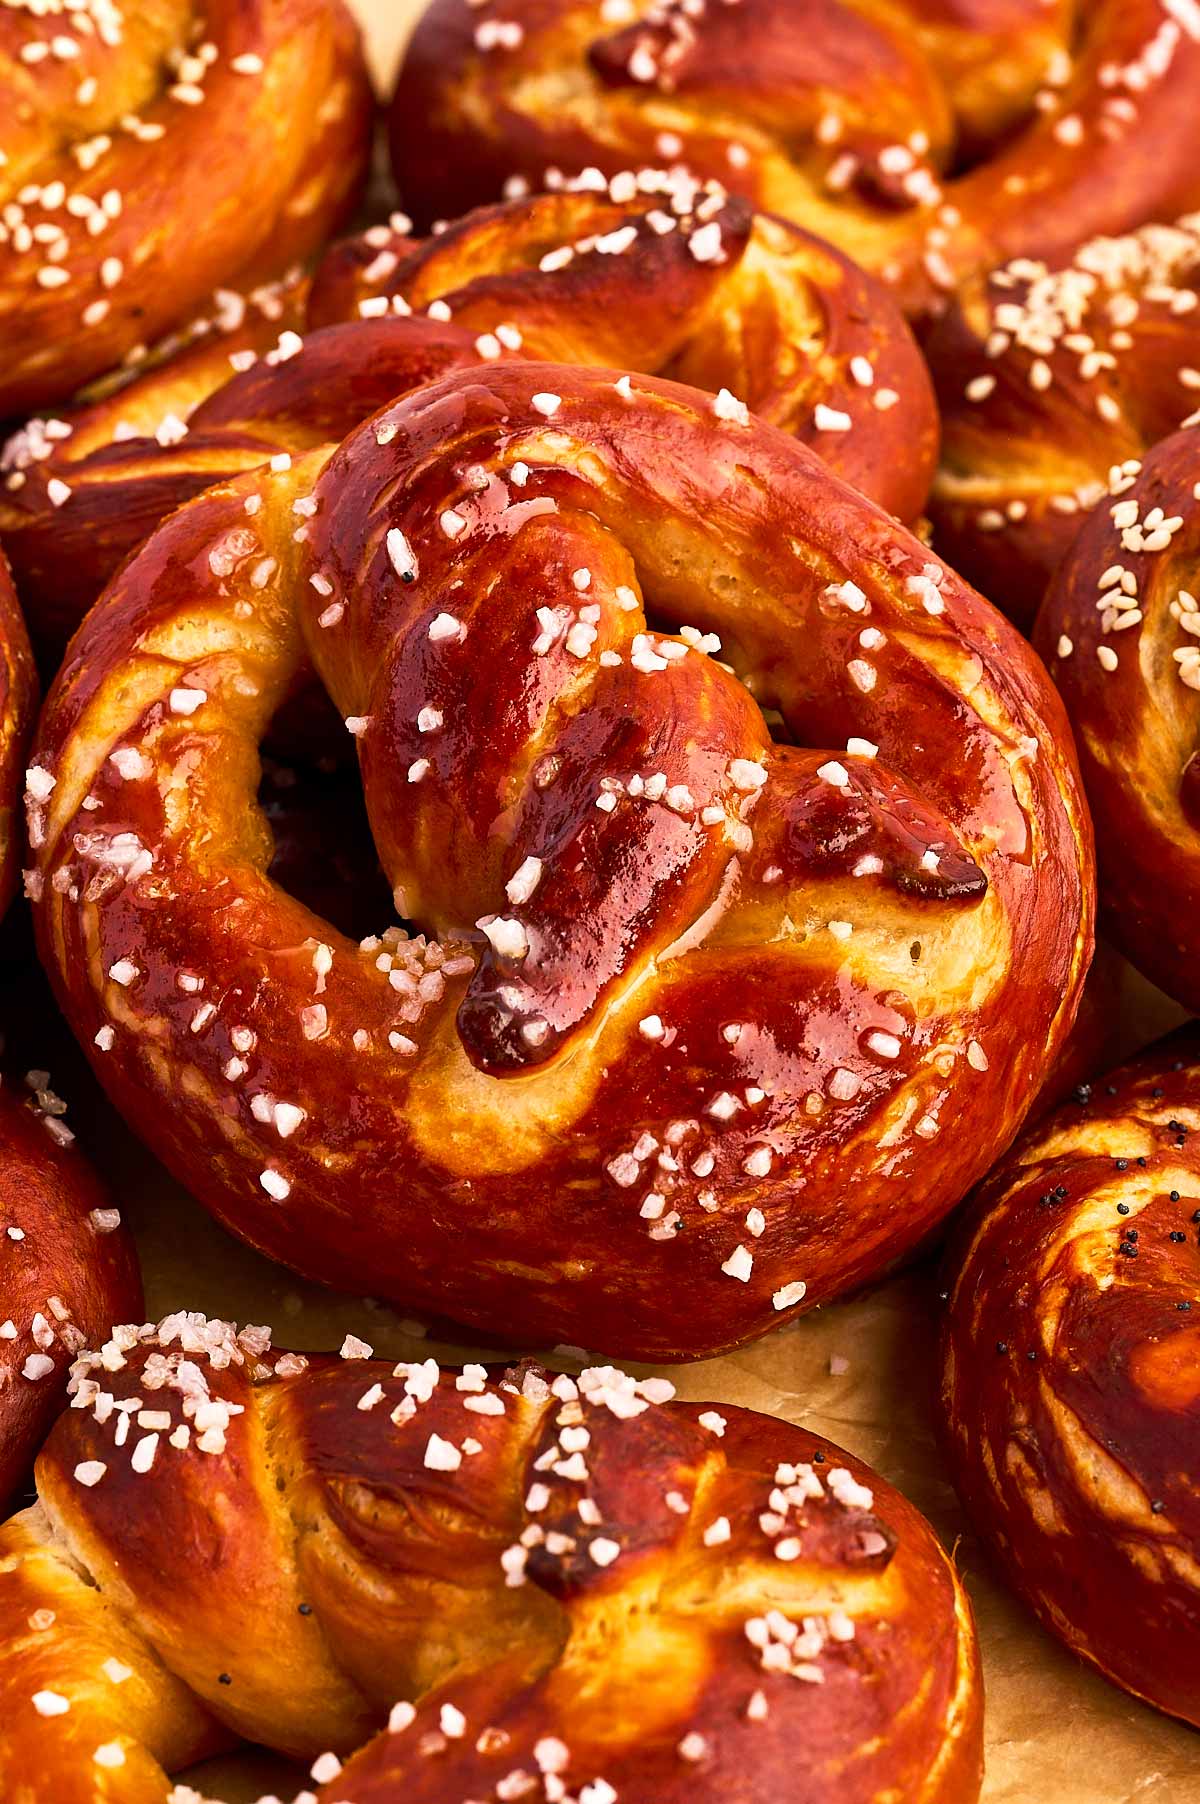
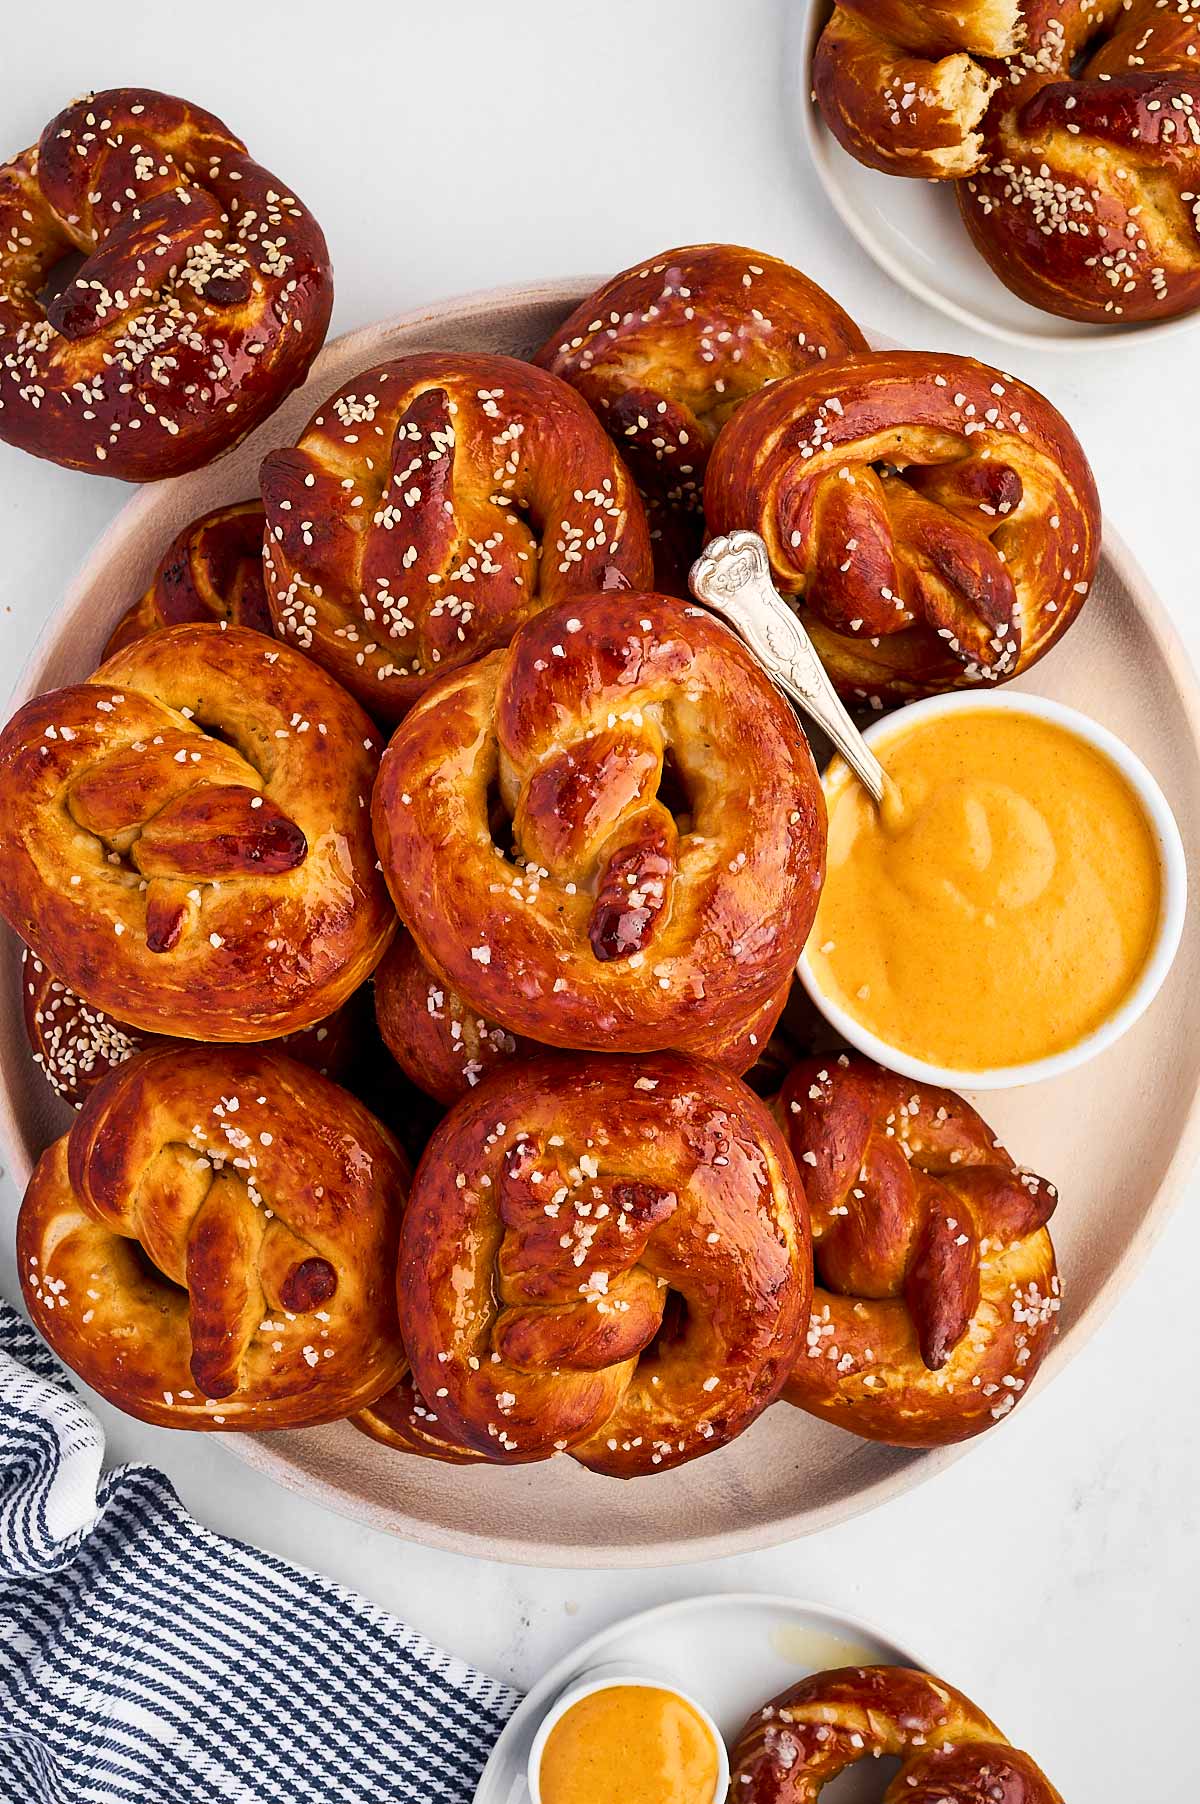
If you’ve been searching for the absolute best soft pretzel recipe – one that’s perfectly chewy on the outside, soft and fluffy on the inside, and sprinkled with just the right amount of salt – you’ve officially found it. These pretzels bake up golden brown with that classic, irresistible flavor you’d expect from your favorite bakery.
Hosting game day? Need an easy snack for the kids? Or maybe you’re just craving that warm, buttery pretzel goodness? Whatever the occasion, this is the recipe you’ll keep coming back to.
Why you’ll love this recipe
I’ve made a lot of soft pretzels over the years – some too dense, some lacking that perfect chewy bite, and some that just didn’t hit the mark. After plenty of experimenting (and a few pretzel fails that my kids still laugh about), I finally landed on the one.
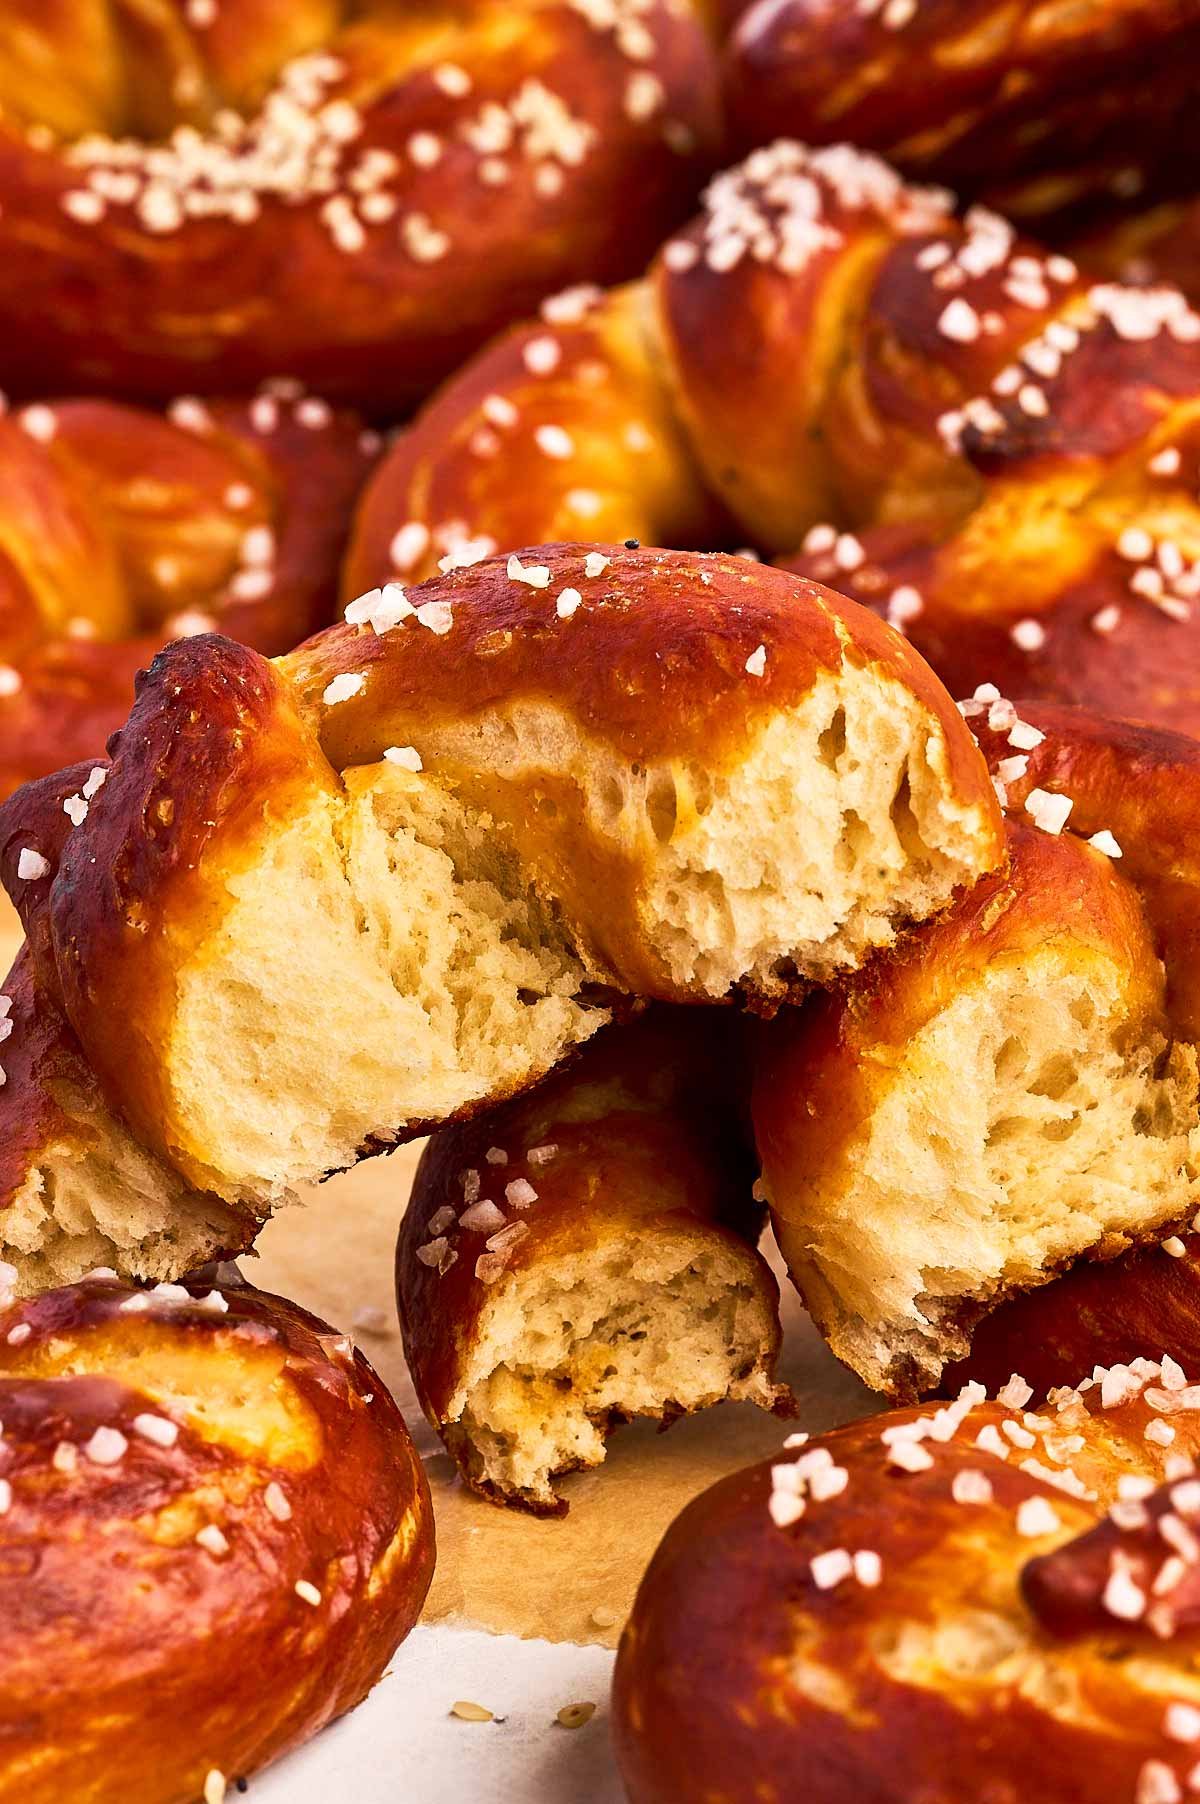
- Perfectly soft & chewy – This recipe has the perfect balance of soft, fluffy insides and that golden, salty crust we all love. It has been on my blog since 2014 and remained pretty much unchanged!
- Simple ingredients, big flavor – No fancy ingredients needed here! Regular pantry staples come together to make the most flavorful, buttery pretzels you’ve ever had.
- Family-friendly fun – This is a recipe the whole family can get in on! My kids love helping shape the pretzels (and sneaking bites of dough), and the best part? They’re ready in under 2 hours from start to finish!
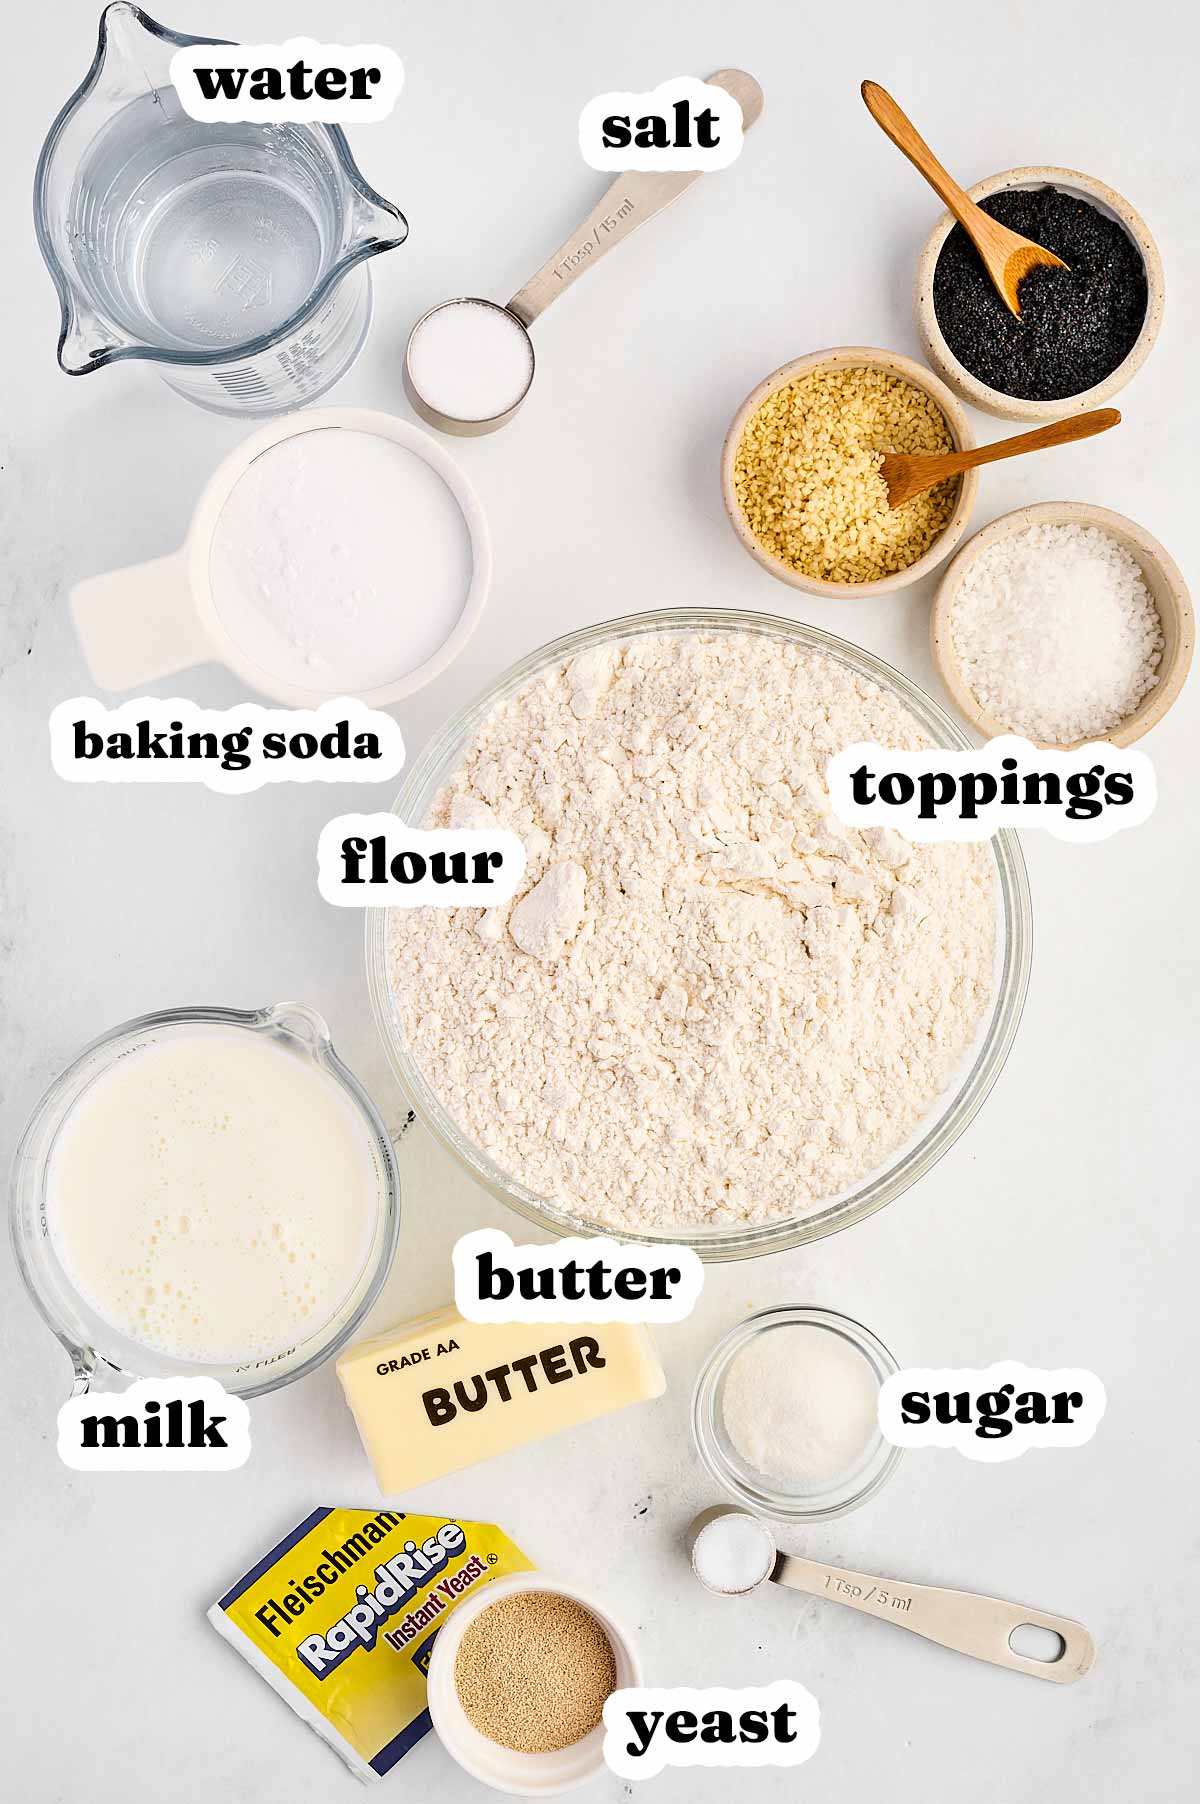
Ingredients you’ll need
Here is a visual overview of the ingredients in the recipe. Scroll down to the printable recipe card at the bottom of this post for quantities!
Ingredient notes
- Flour – I usually stick with all-purpose flour because it’s what I always have on hand, but if you’ve got bread flour, feel free to use it! It’ll give the pretzels a slightly chewier texture (which my kids love).
- Butter – Make sure it’s softened before adding it to the dough. If it’s too cold, it won’t mix in properly. I sometimes cheat and pop it under a warm bowl for a few minutes if I forget to take it out of the fridge!
- Yeast – I use instant yeast because it’s quick and easy (and let’s be honest, I don’t have time to wait around all day with three kids!). You can use active dry yeast too, just expect a longer rise time.
- Milk – I like using whole milk for that rich, soft dough, but you can totally swap in a plant-based milk like almond or oat if that’s what you’ve got. Just make sure it’s at room temperature so the yeast doesn’t get shocked.
- Baking soda – This is what gives the pretzels their signature chewy crust and that classic pretzel flavor. Don’t skip this step—it’s a game-changer!
- Toppings – Coarse sea salt is the classic choice, but my kids love to get creative with sesame seeds, poppy seeds, and even shredded cheese. You can also go sweet with cinnamon sugar if you’re feeling fancy!
How to make Soft Pretzels
Alright, let’s make some amazing soft pretzels together! Grab your ingredients, preheat your oven to 360°F, and line two baking sheets with parchment paper. We’re making 12 pretzels today, so make sure you’ve got enough room. Ready? Let’s dive in!
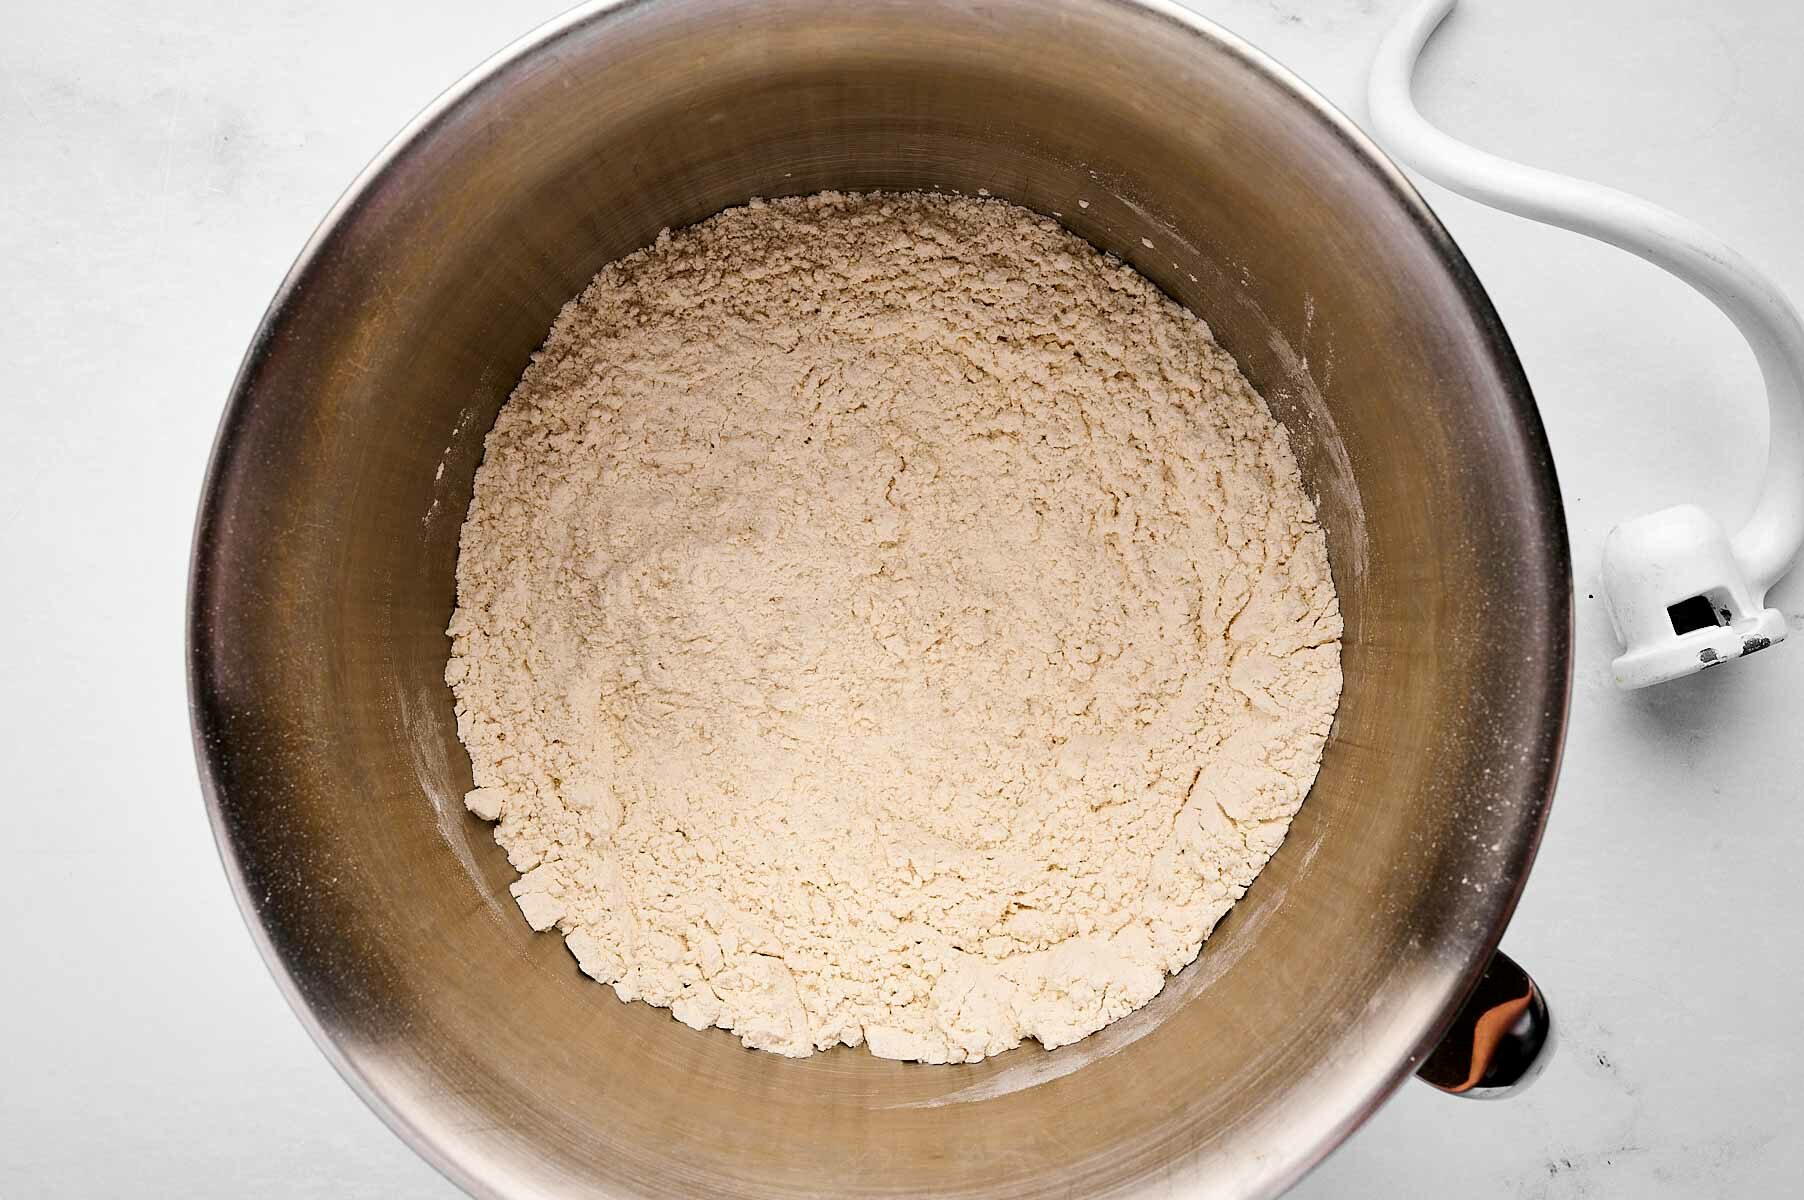
Step 1: Make the dough
In the bowl of your stand mixer fitted with the dough hook, combine 4 cups flour, 1 tablespoon instant dried yeast, 1 tablespoon sugar, and 1 teaspoon salt. Stir everything together to make sure it’s well mixed.
Next, add 4 tablespoons softened butter. If you forgot to take your butter out of the fridge (happens to me all the time!), just pop it under a warm bowl for a few minutes to soften it up quickly.
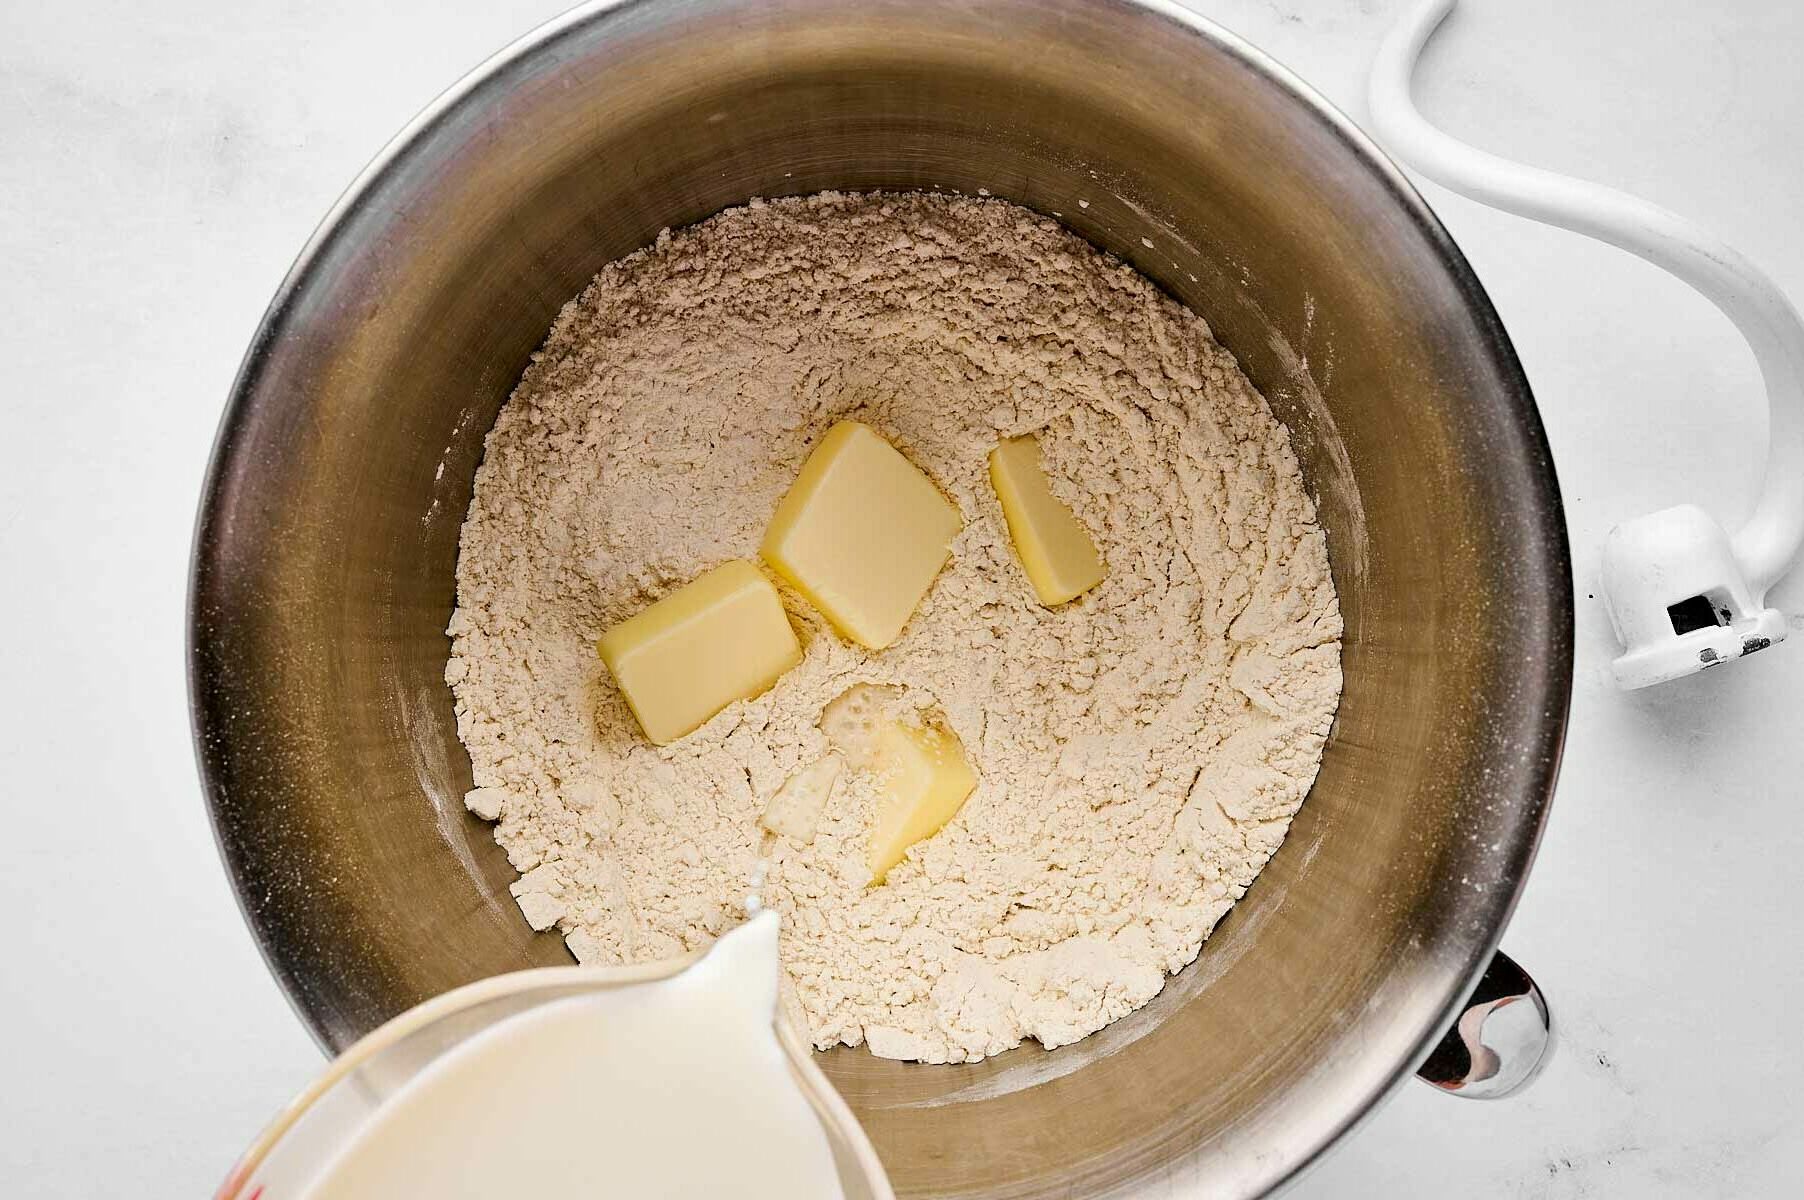
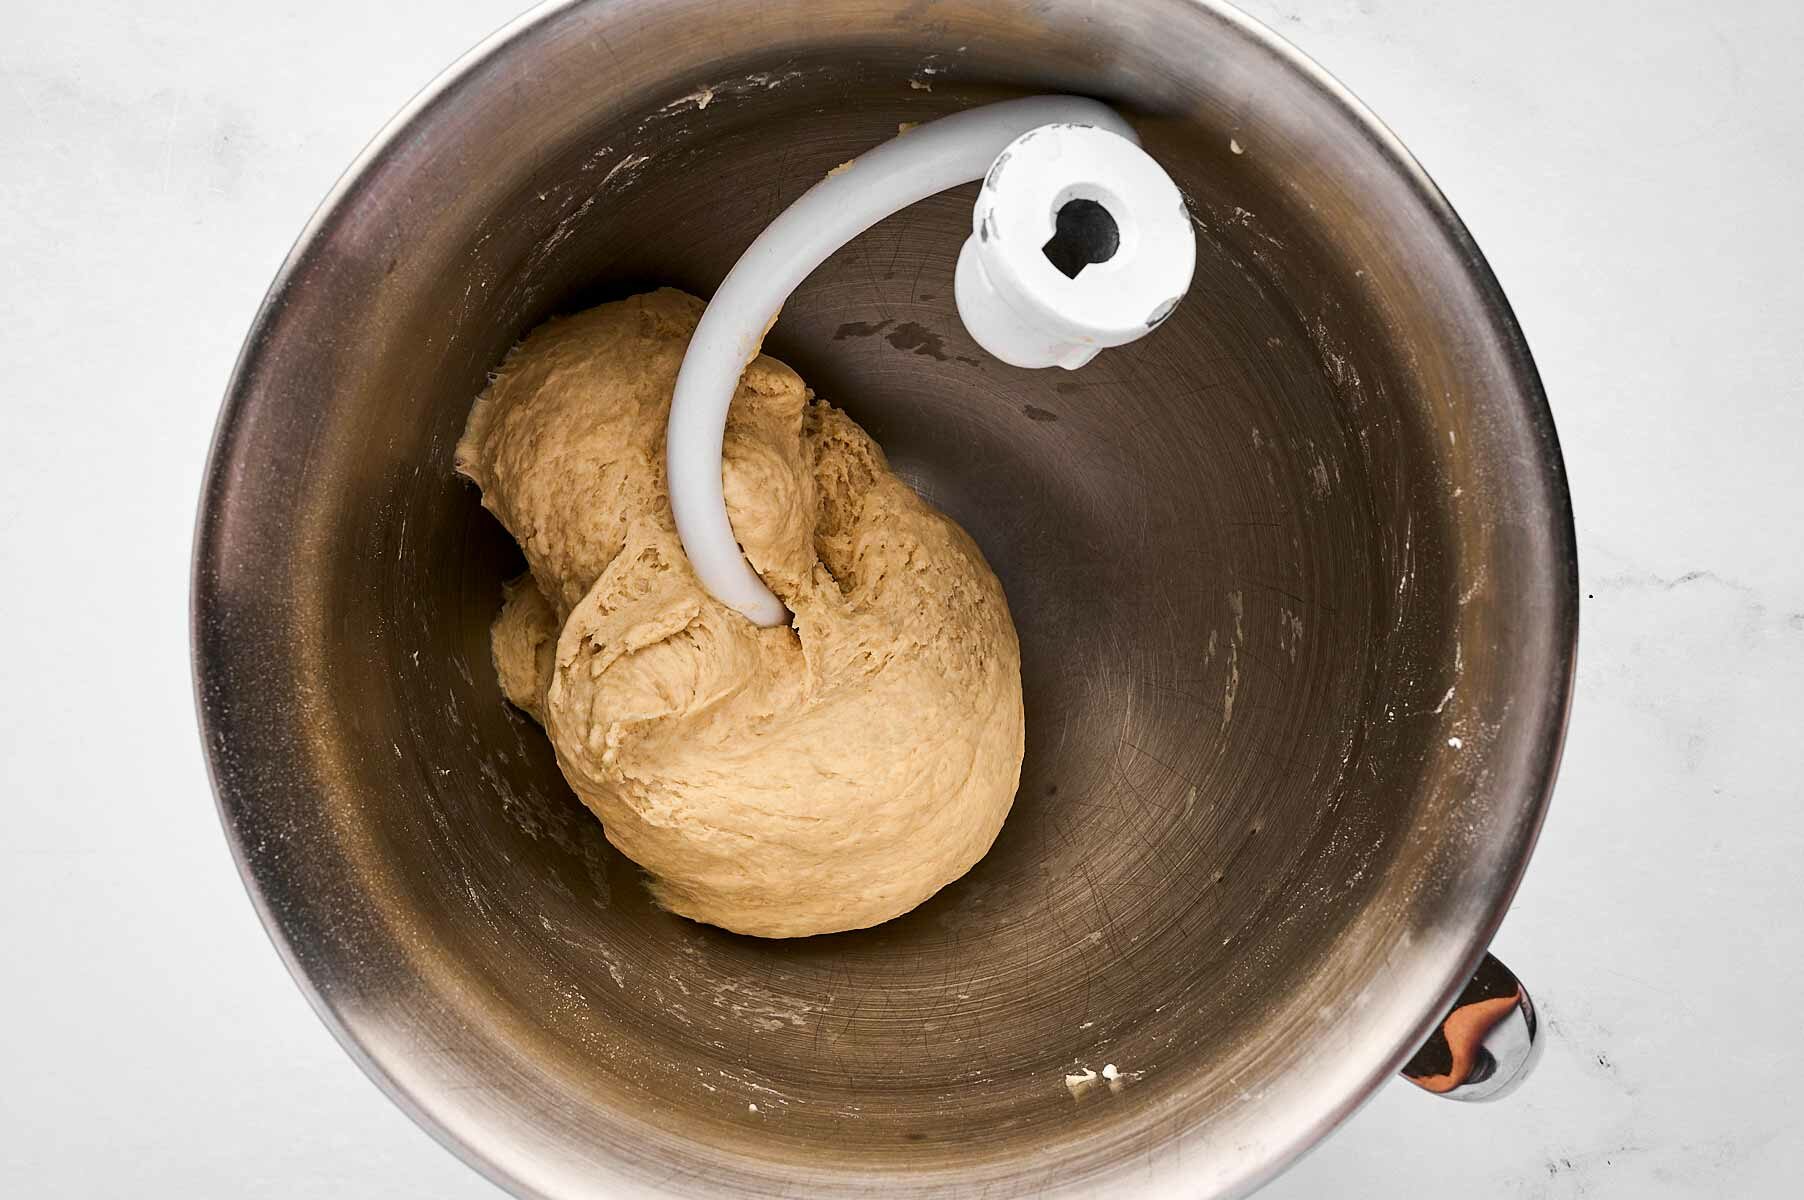
Turn your mixer on low and slowly pour in 1¼ cups room temperature milk. It’s important that the milk isn’t cold – it can slow down the yeast and make the dough rise slower. Let the mixer knead the dough for 5 minutes, until it forms a smooth, slightly tacky dough.
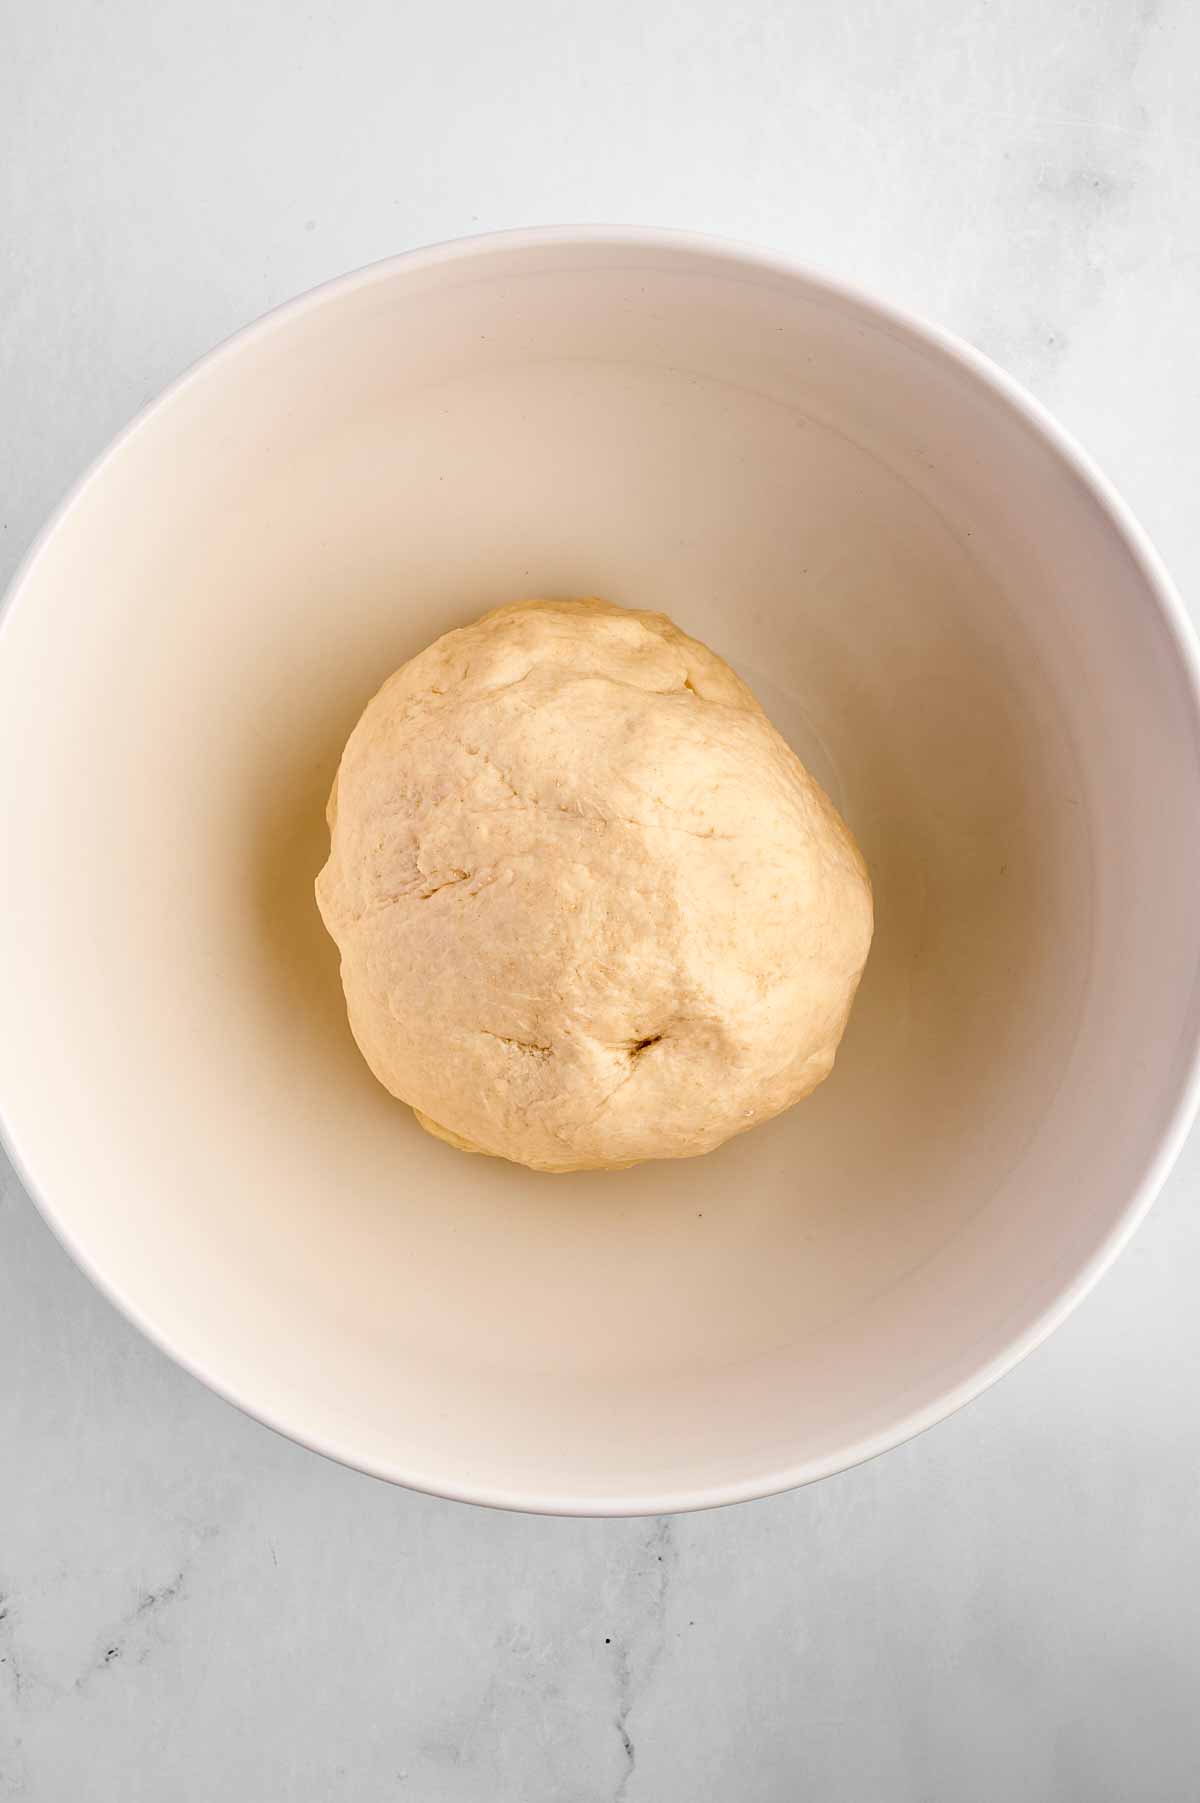
Step 2: Let it rise
Once your dough is smooth, shape it into a tight ball and place it in a new bowl. I highly recommend plastic or ceramic for the dough rising, the metal bowl from stand mixers slows down rising due to being more cool.
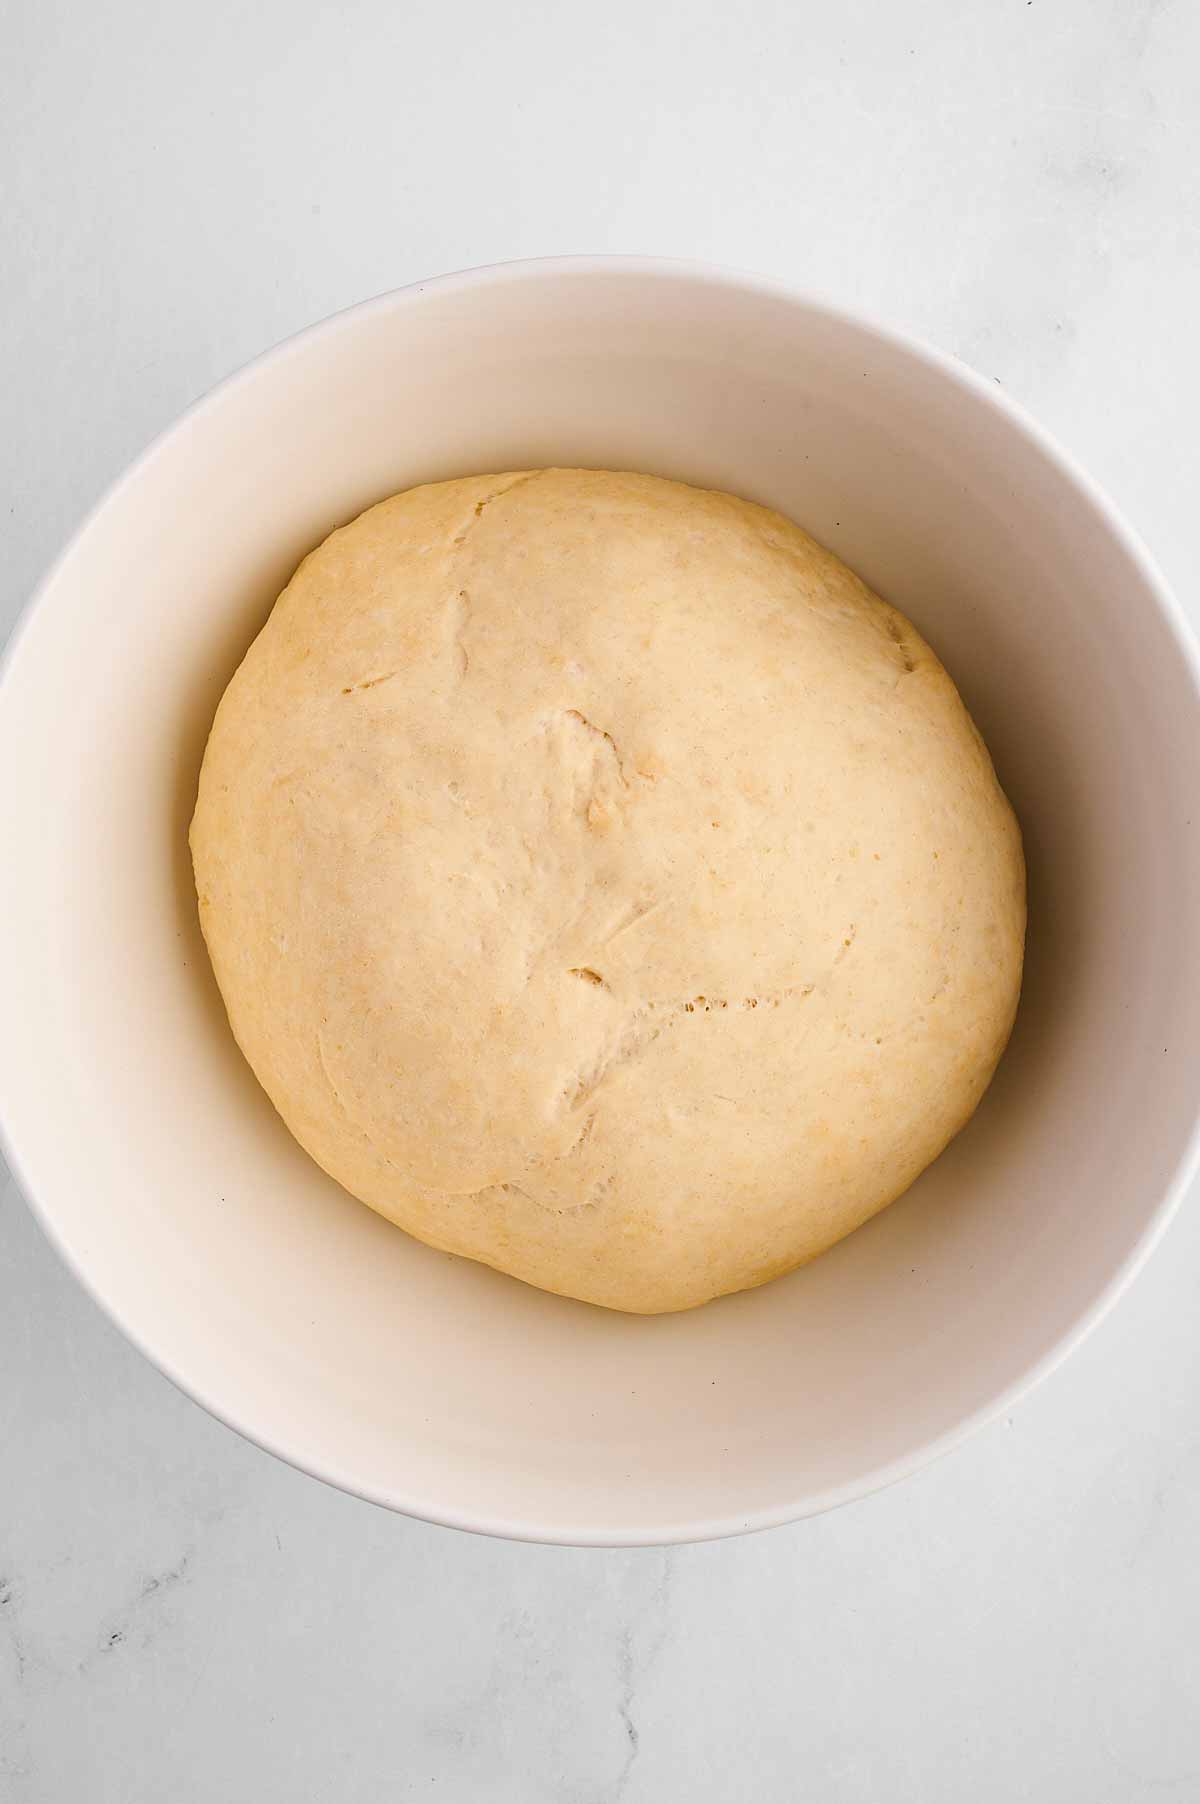
Cover the bowl with a clean tea towel and let it sit at room temperature until it doubles in size – this usually takes 40 minutes to 1 hour, depending on how warm your kitchen is, what yeast you used and at what altitude you live (warmer kitchen/higher altitude/fast action yeast = faster rising)
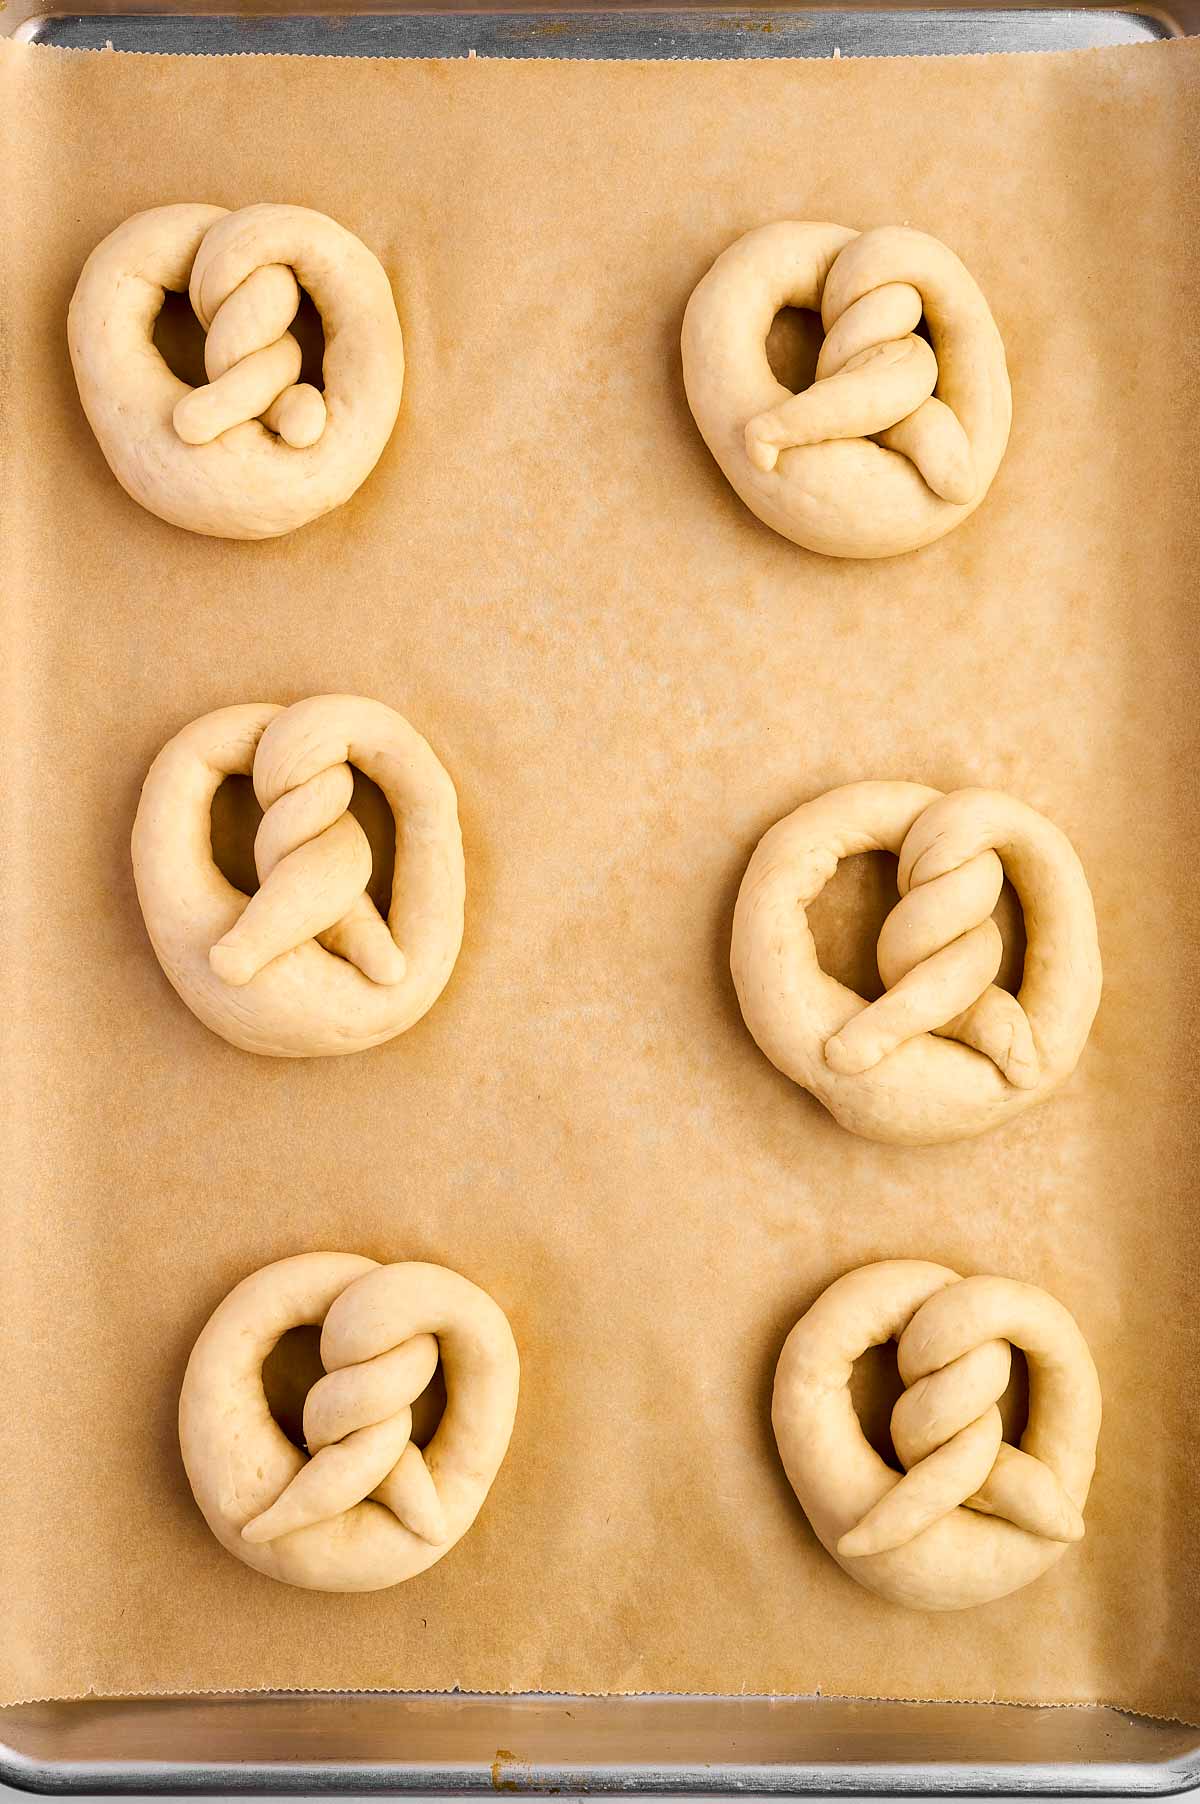
Step 3: Shape the pretzels
Once the dough has risen, punch it down. Divide the dough into 12 equal pieces (using a kitchen scale helps if you want them perfectly even).
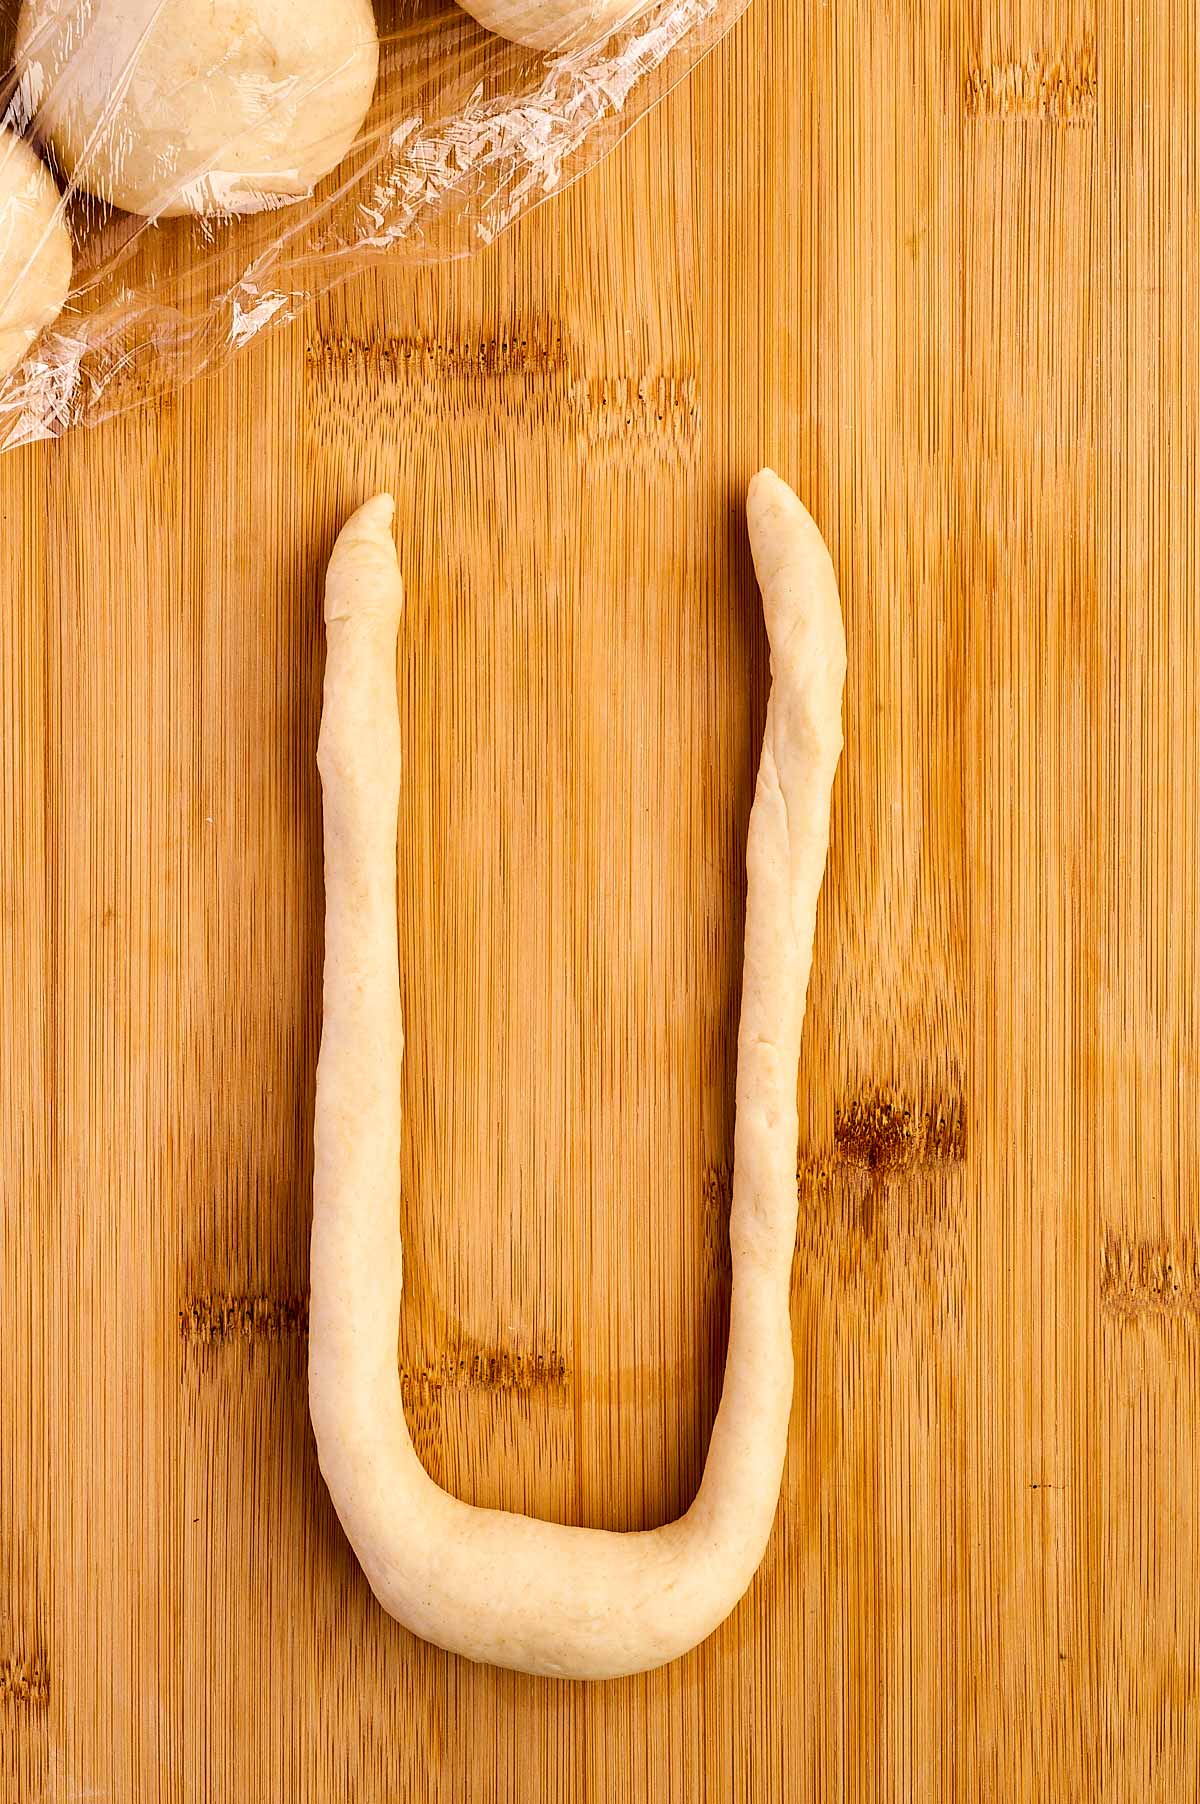
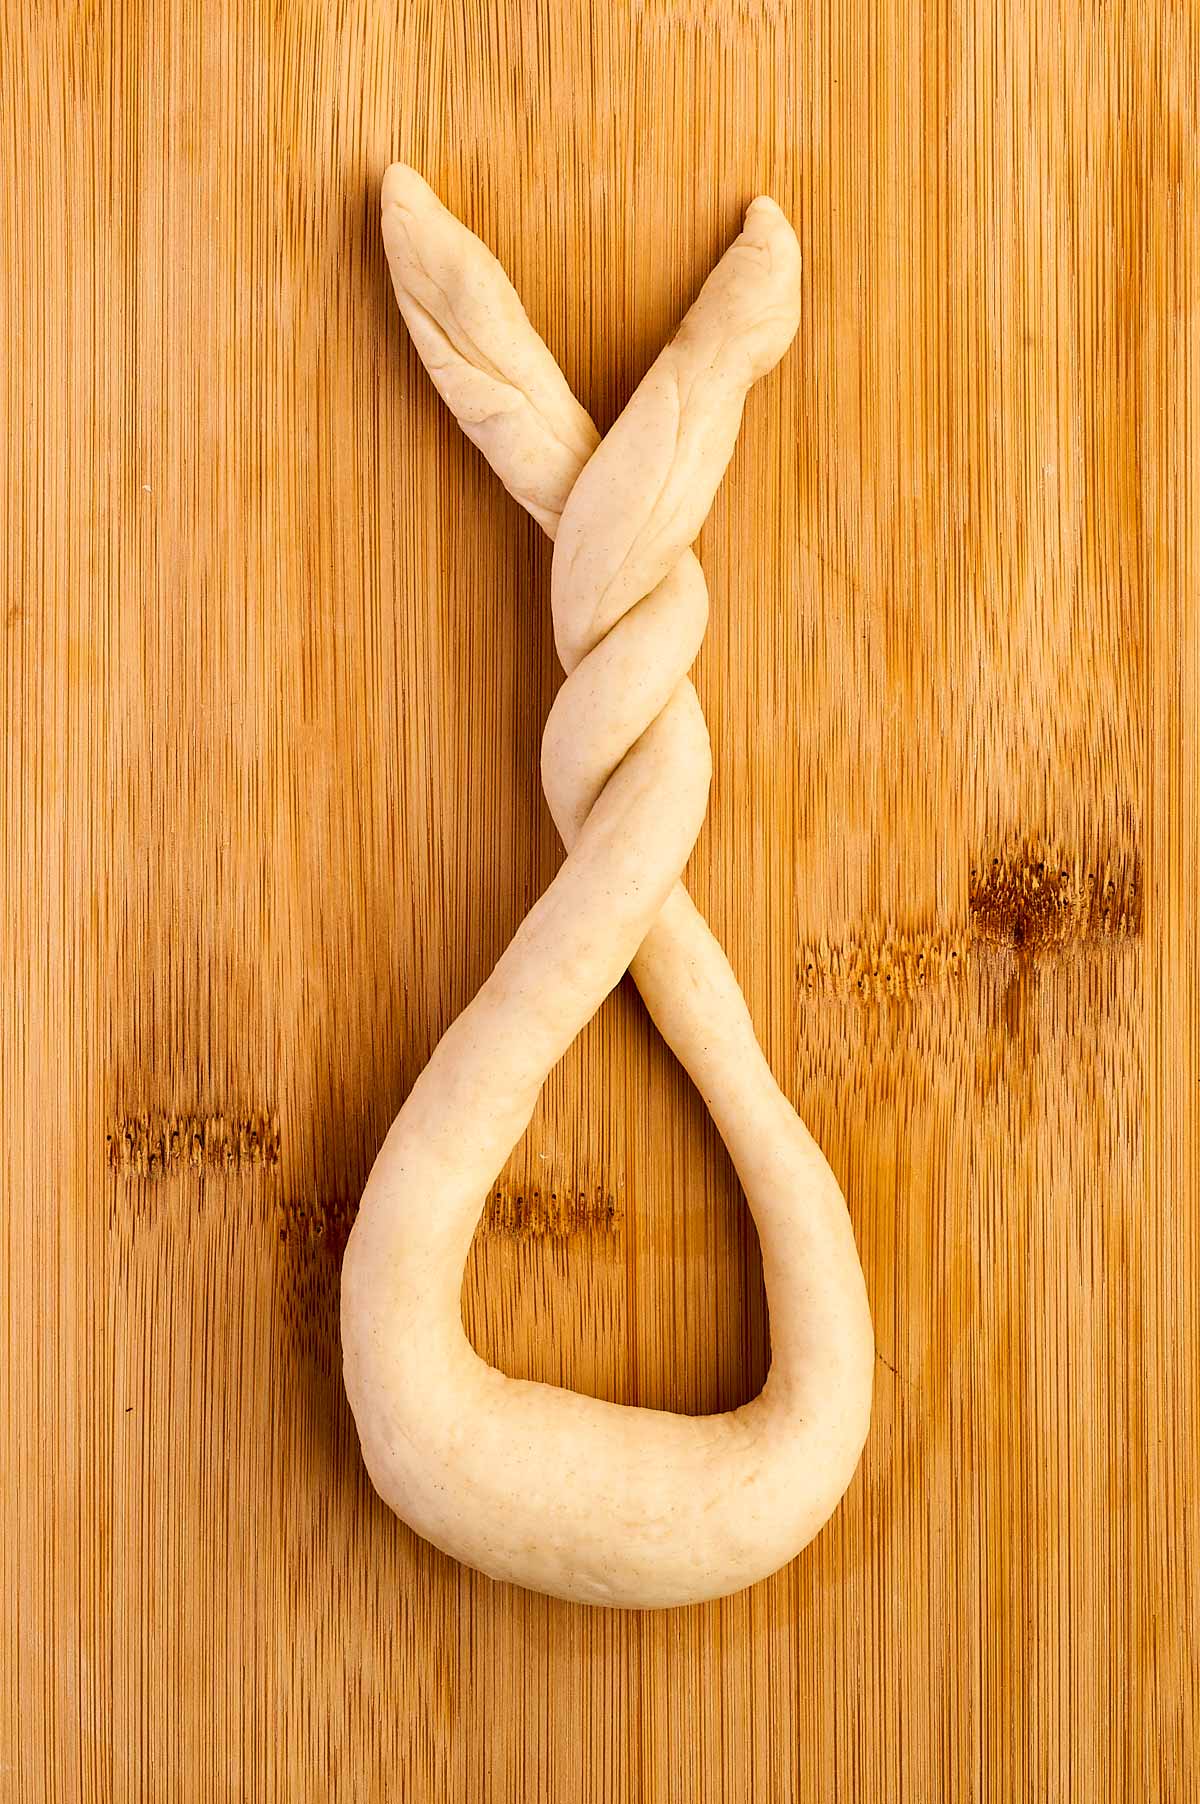
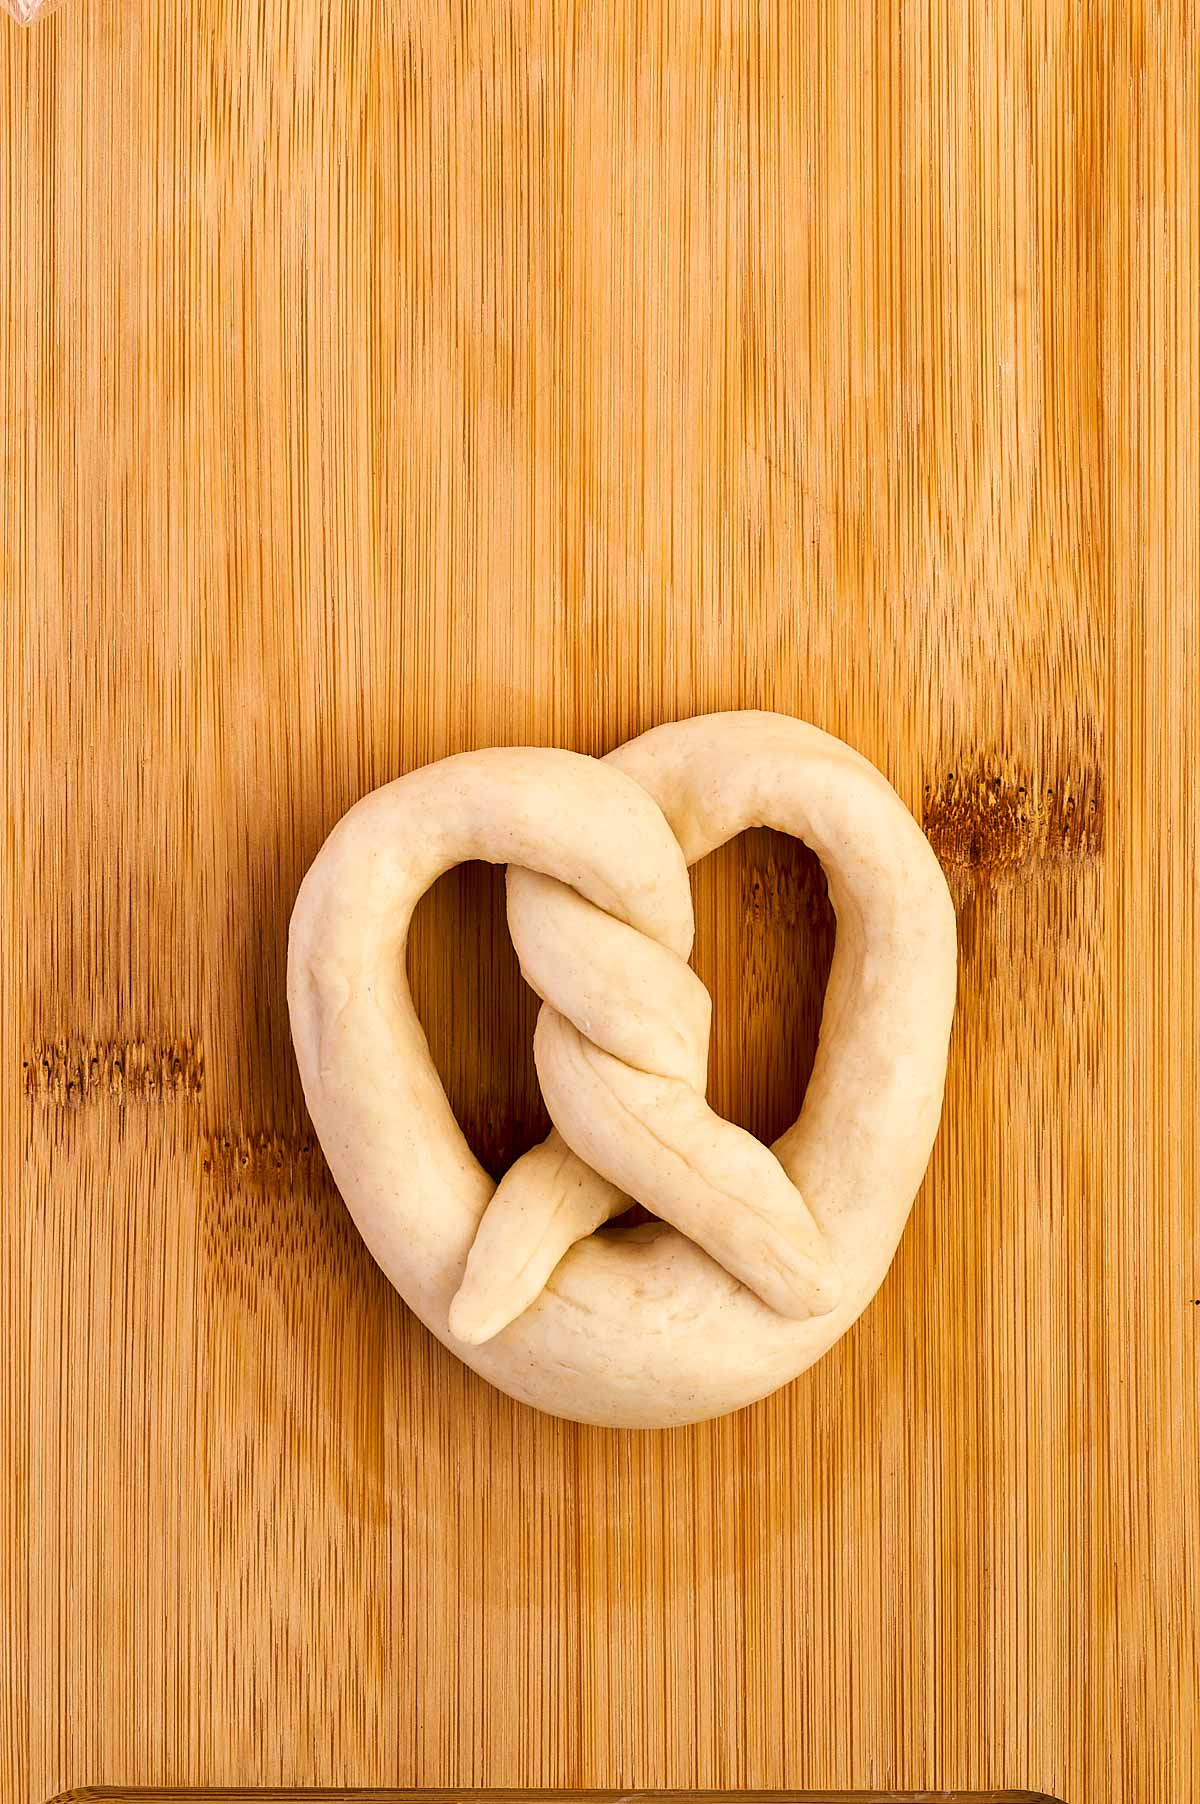
Roll each piece into a 20-inch long strand that’s slightly thicker in the middle. Twist the ends together three times, then fold the ends down to shape your pretzel. If you’ve got little helpers in the kitchen, this is the fun part where they can get involved!
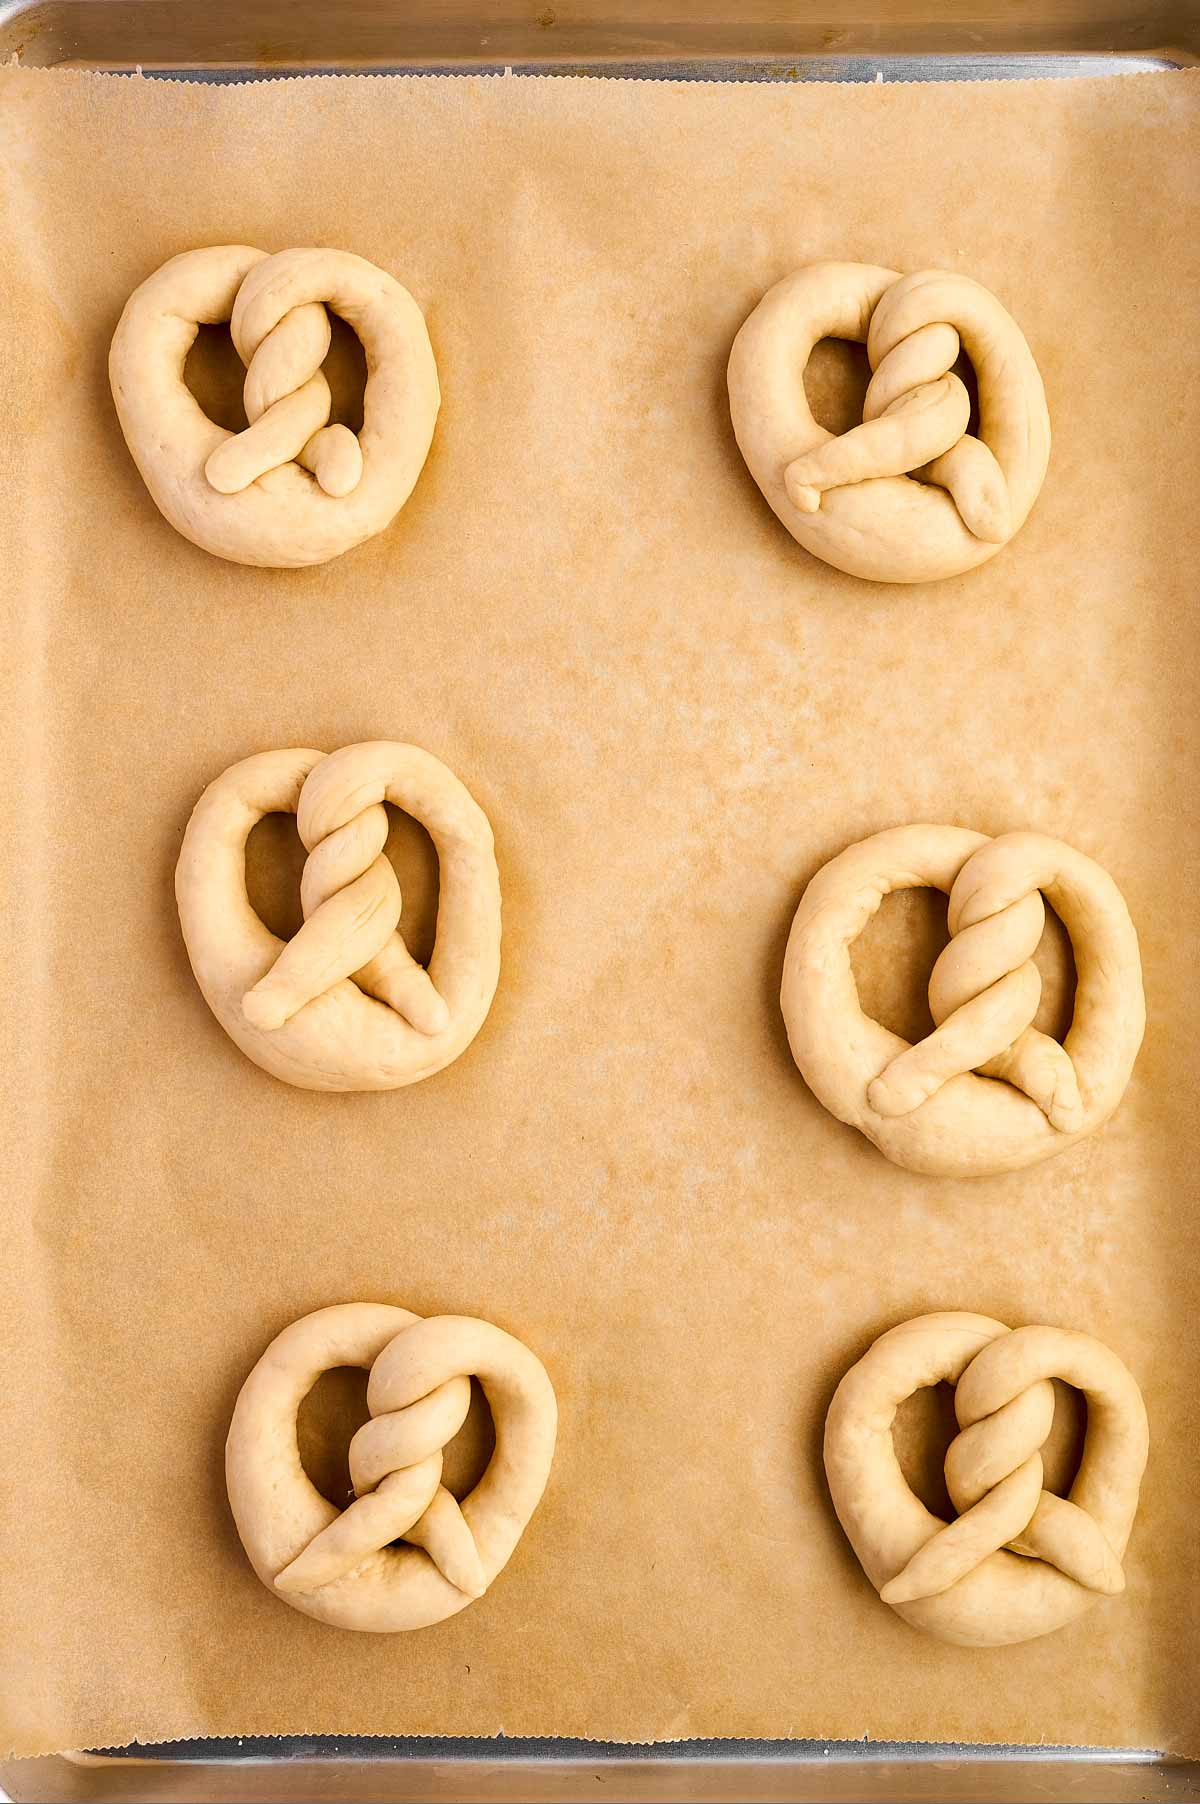
Place the shaped pretzels on the lined baking sheets, cover them with a tea towel, and let them proof for another 20 minutes until slightly puffed up. This second rise helps them hold their shape in the oven.
Make sure you do not overproof here, or else your pretzels will come out scraggly/deflated instead of puffy and soft!
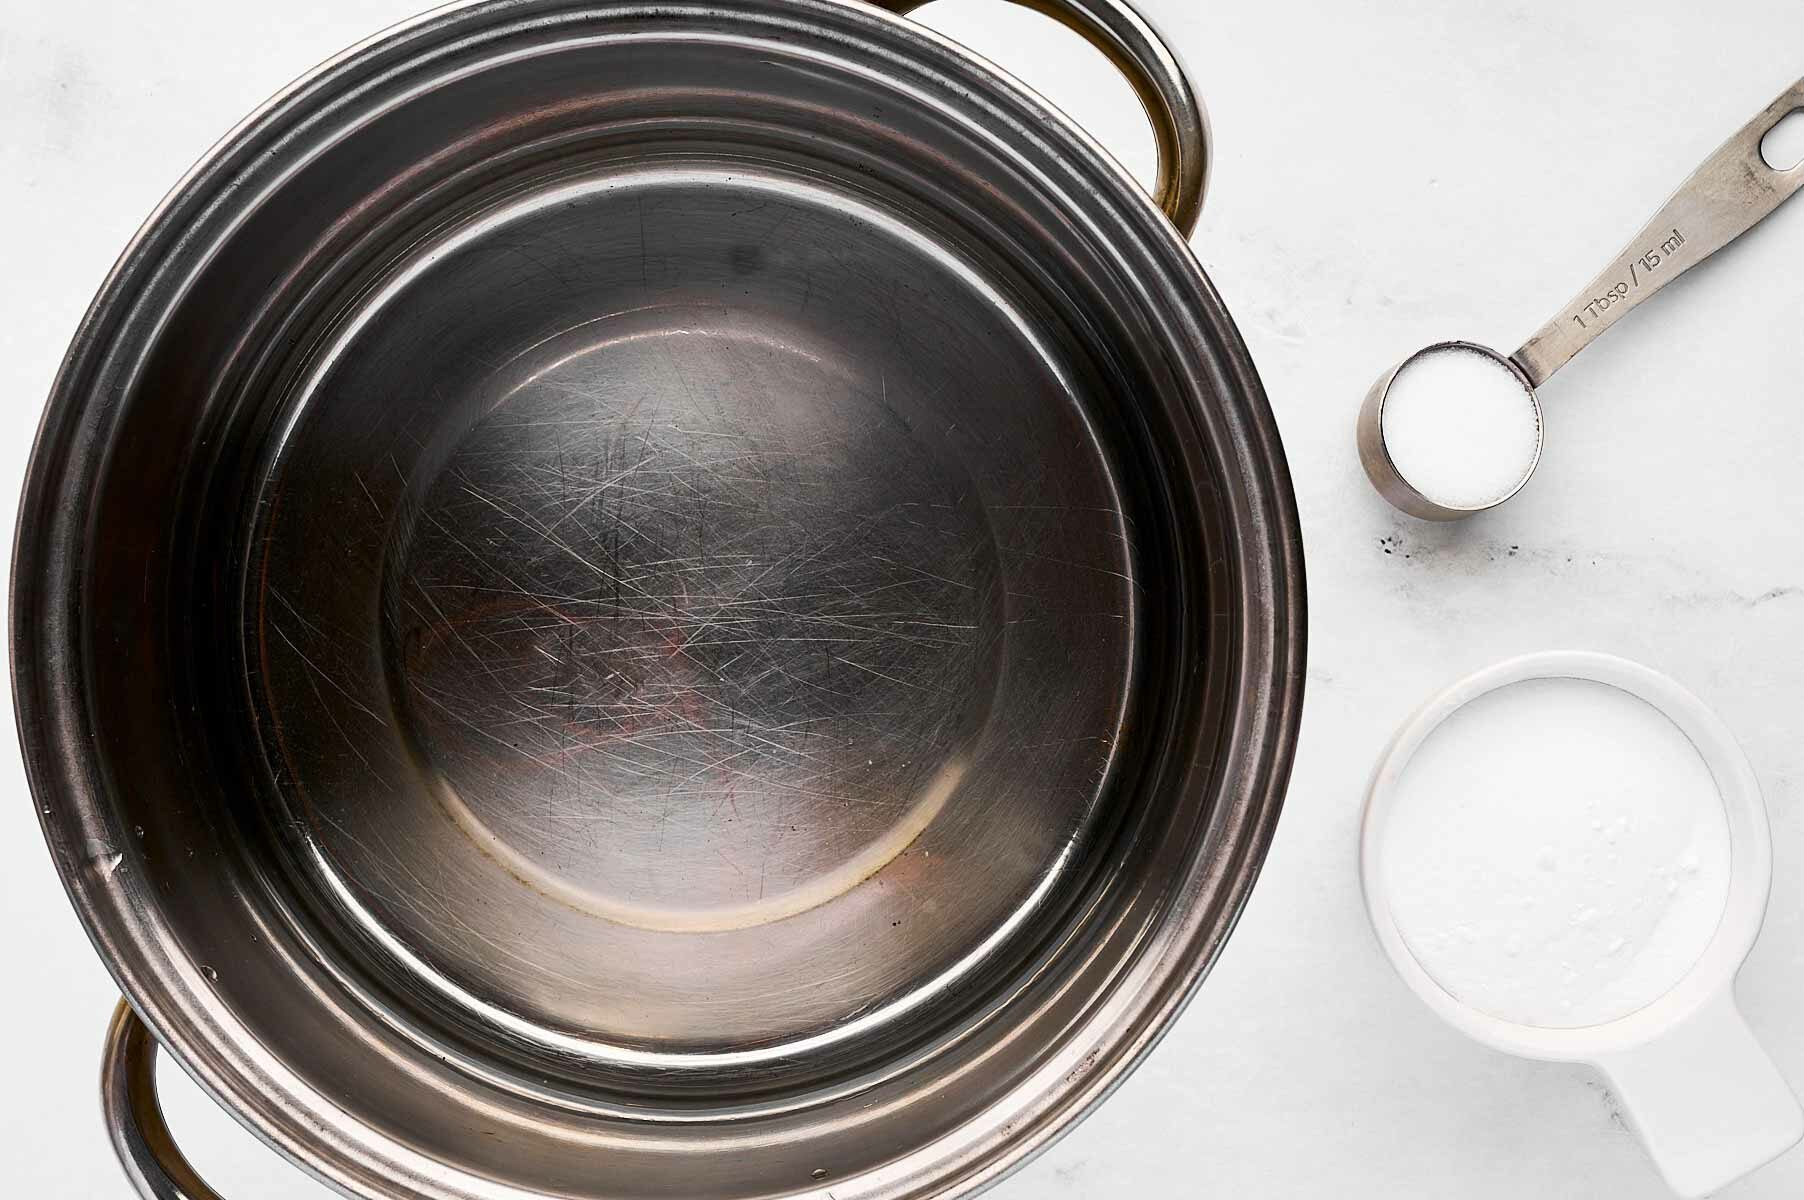
Step 4: Brine and bake
While the pretzels are proofing, preheat your oven to 360°F. In a high-sided pot, combine 1 quart water, ½ cup baking soda, and 1 tablespoon salt. Bring it to a boil, then take it off the heat.
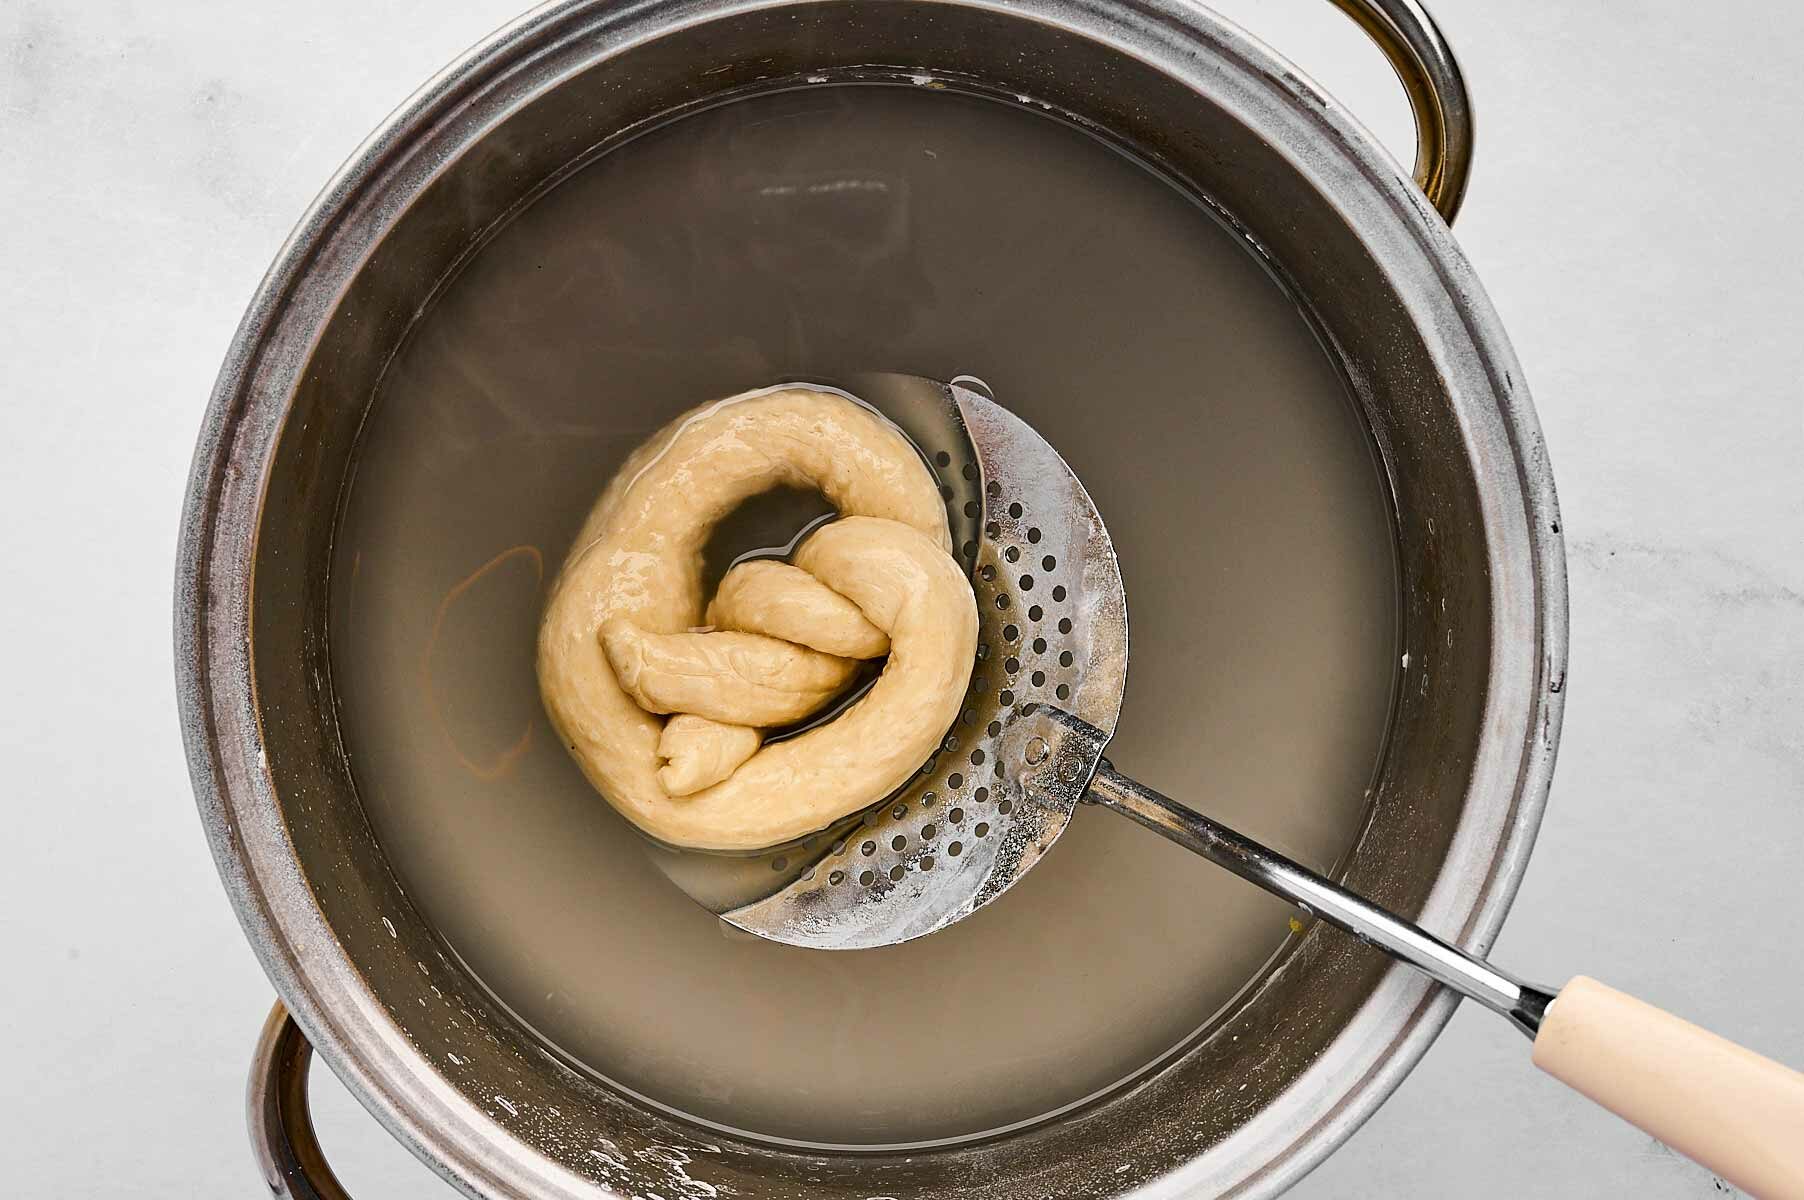
Using a slotted spoon, dip each pretzel into the brine for 15-20 seconds, making sure it’s fully submerged. Don’t leave them in too long, or they’ll turn out tough! Let them drain well on the spoon, then place them back on the baking sheets.
💡Expert tips: Try placing the pretzel face-down in the brine, then gently pushing on the back to keep it just submerged. To remove, gently flip it right side up and lift out.
I recommend reheating the brine after about every 3 pretzels, to keep it fresh and hot for the entire batch.
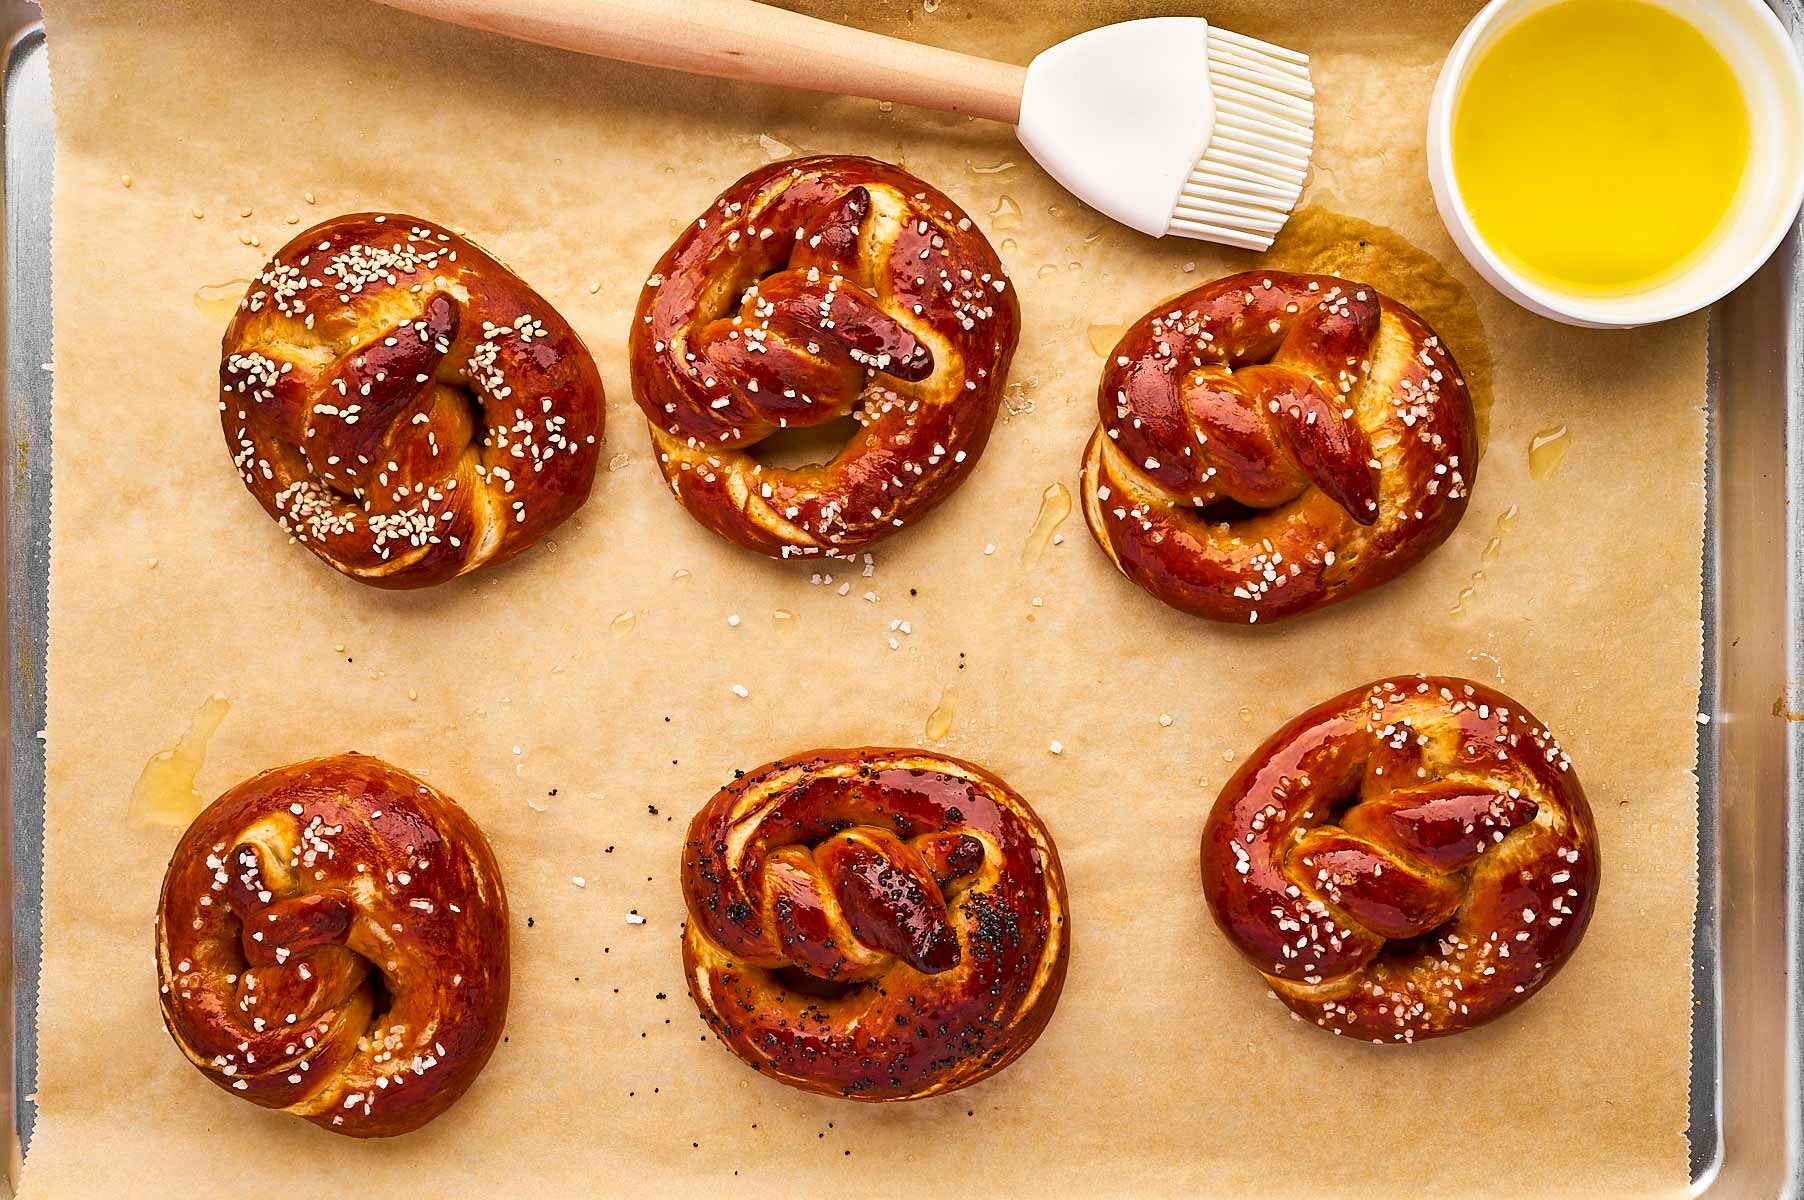
Sprinkle the brined pretzels with coarse sea salt, sesame seeds, poppy seeds, or even shredded cheese — whatever your family loves! Bake for 20 minutes, or until they’re deeply golden brown.
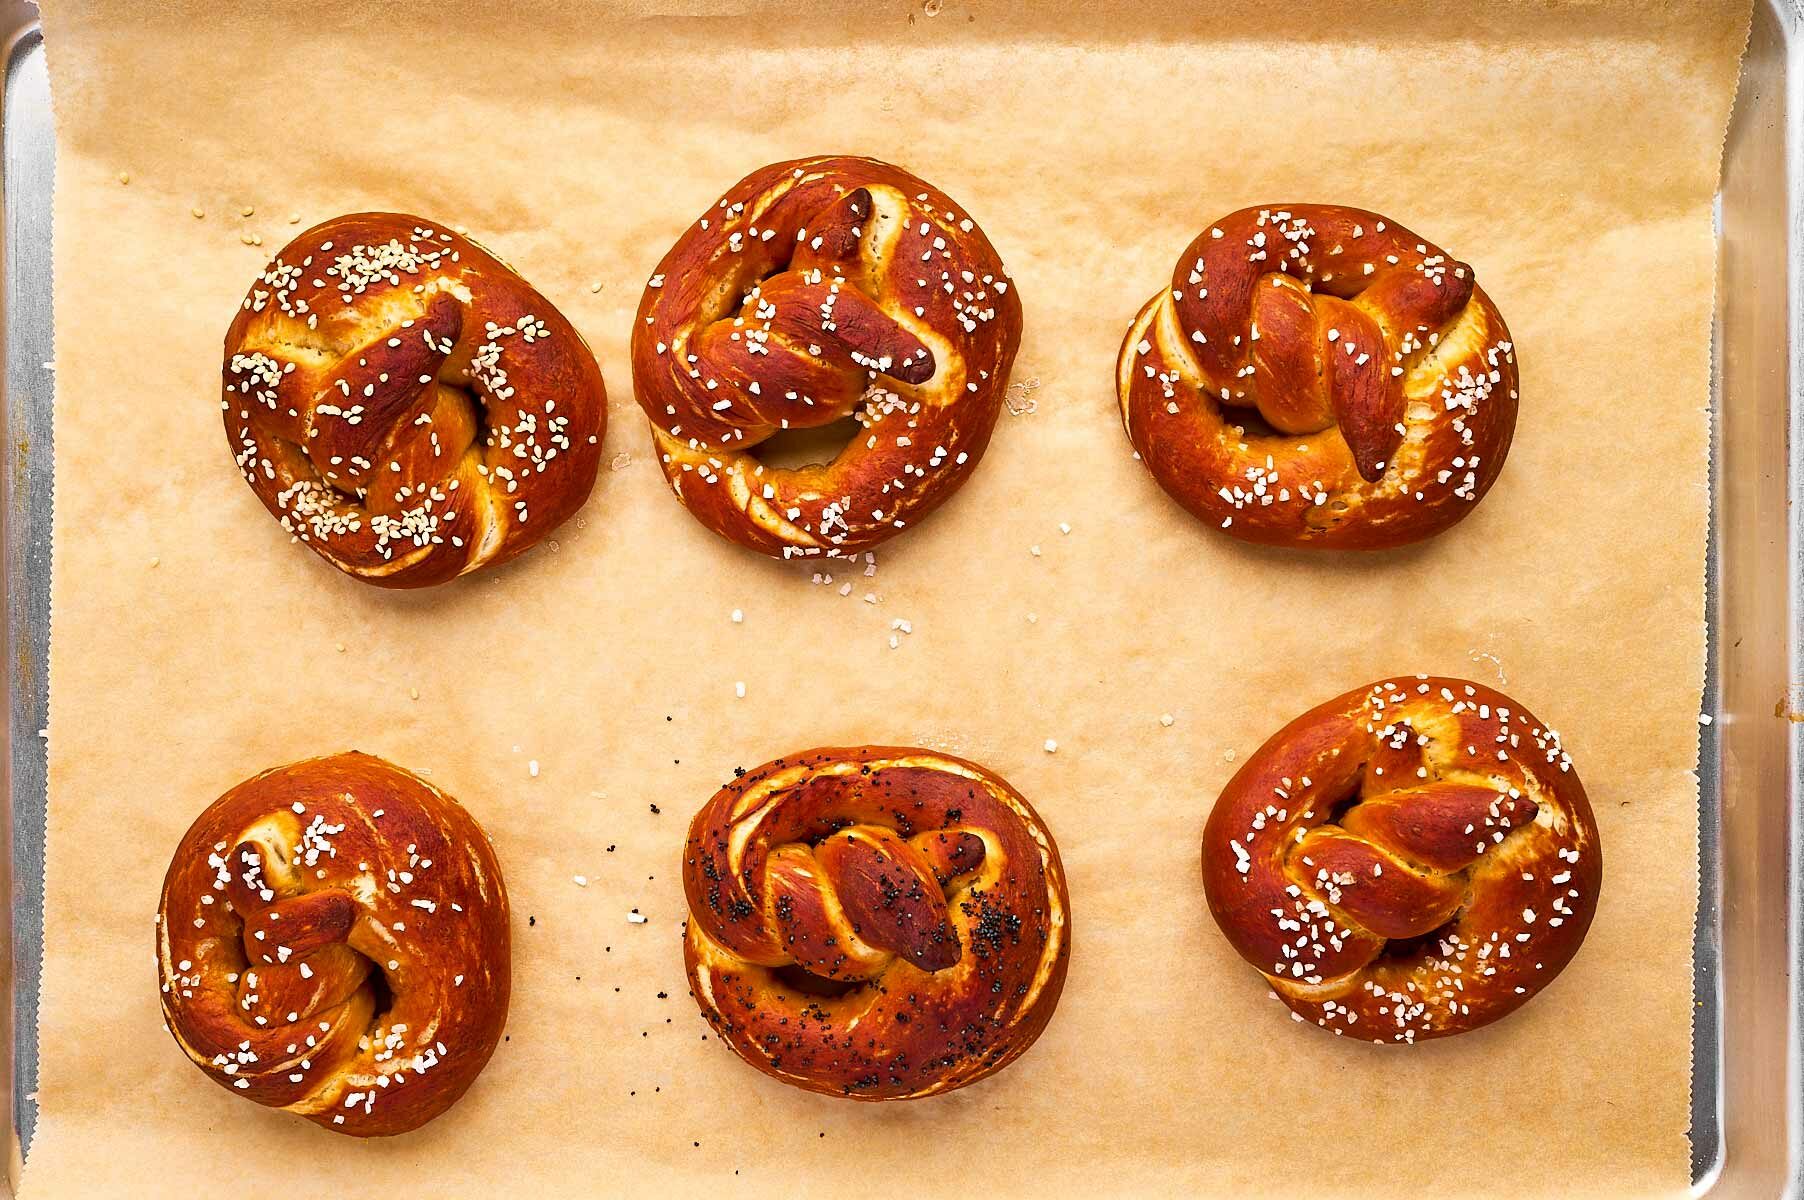
Step 5: Finish and enjoy!
For that glossy, bakery-style shine, brush the pretzels immediately after they come out of the oven with melted butter. This step is optional, but it makes them look extra special.
Transfer the pretzels to a wire rack to cool completely… or, let’s be real, enjoy one warm right out of the oven. They’re impossible to resist, and definitely taste best eaten warm!
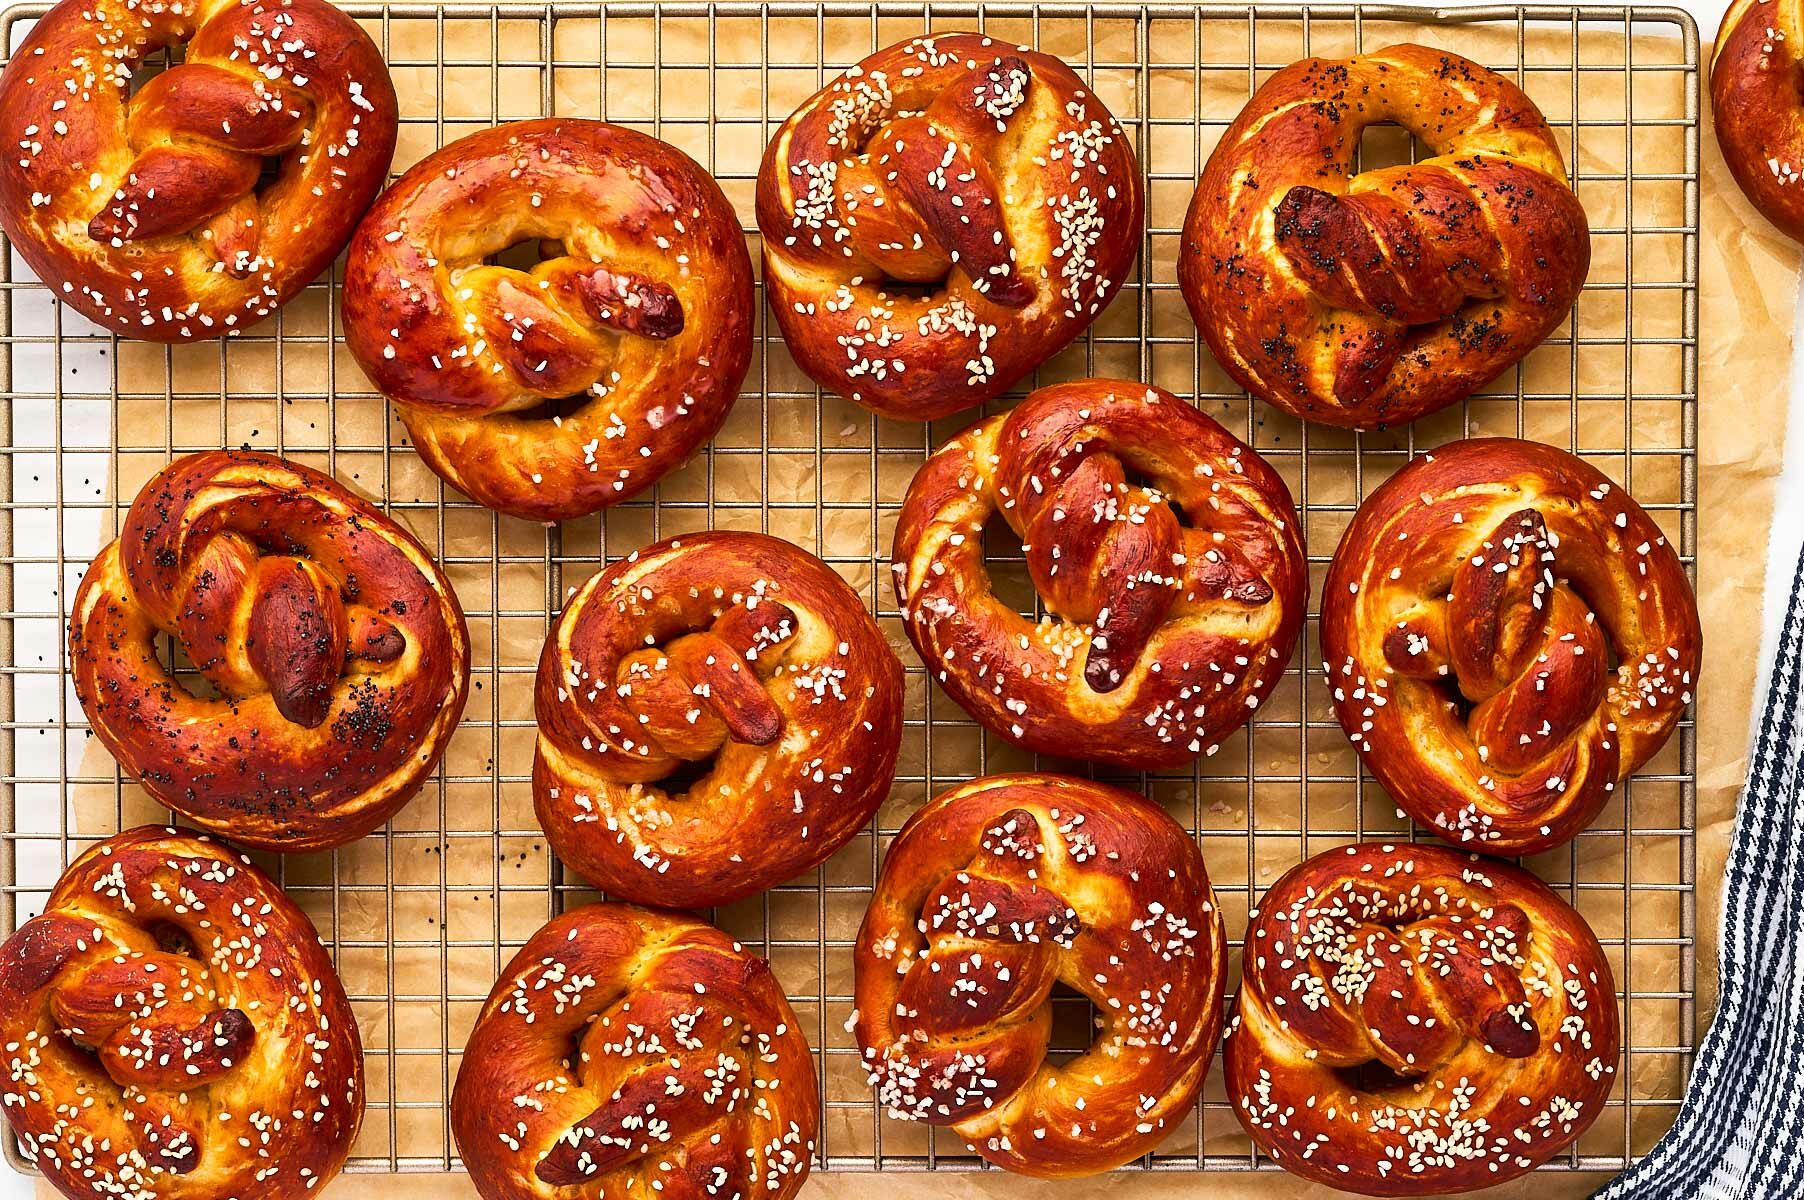
There you have it – *the* best soft pretzels you’ll ever make at home. Perfect for game day, after-school snacks, or just because you’re craving that warm, buttery goodness. Enjoy!
Top tips for recipe success
- Make sure your ingredients are at room temperature. Cold milk or butter can slow down the yeast and make your dough rise unevenly. Room temperature ingredients help everything come together smoothly and give you that perfect, soft texture.
- Don’t rush the kneading process. Let the dough knead for a full 5 minutes in your stand mixer, or up to 10 minutes by hand. This is what gives your pretzels their chewy texture—totally worth the time!
- Be patient with the proofing. I know it’s tempting to speed things up, but letting the dough rise until it doubles in size is key. If your kitchen is chilly, place the dough in a warm spot (I sometimes use my oven with the light on!). make sure you do not heat it above 100°F, or it will destroy the yeast!
- Don’t skip the second proof. After shaping the pretzels, letting them proof again for 20 minutes helps them hold their shape in the oven. Skipping this can cause them to puff up weirdly or lose that classic pretzel look. But you also do not want to overproof here – around 20 minutes is enough. Overproofing causes the yeast to lose its strength, so your pretzels will deflate in the oven and turn out tough instead of soft and fluffy.
- Be quick but careful with the brine dip. Dip each pretzel for 15-20 seconds – any longer, and they’ll turn out tough. Make sure they’re fully submerged, then let them drain for a few seconds before baking. It helps to flip the pretzels in face-down, gently push them under, then very gently flip them right side up to scoop them out.
- Keep reheating the brine: In order to keep the brine nice and fresh for the entire batch, I recommend quickly reheating it after every 3 pretzels. I know this seems like a chore, but it helps. If that sounds like entirely too much work, at least reheat it after 6 pretzels for the best results.
- Brush them right out of the oven for extra shine. A quick brush with melted butter gives your pretzels that beautiful, glossy bakery finish. It’s optional, but it makes them look extra special!
- Let them cool (at least a little!) before digging in. I get it – fresh pretzels are hard to resist. But letting them cool for a few minutes helps the texture set and makes them easier to handle without burning your fingers!
Helpful recipe hints
Recipe variations
- Cinnamon Sugar Pretzels – Skip the brine. After baking, brush the pretzels with melted butter and toss them in a mix of cinnamon and sugar. My kids *love* these for an after-school treat, and honestly, I sneak one (or three) myself.
- Cheesy Pretzels – Before baking, sprinkle shredded cheddar or mozzarella over the pretzels for a gooey, melty finish. These are a huge hit on game day – just don’t expect leftovers!
- Everything Bagel Pretzels – Swap out the coarse salt for everything bagel seasoning before baking. It adds a fun, savory twist, and they’re perfect for dipping in cream cheese.
- Pretzel Bites – Instead of shaping into full pretzels, cut the dough into bite-sized pieces and bake for 12–15 minutes. These are *perfect* for parties, and they disappear fast!
Storage tips
These soft pretzels are best enjoyed fresh, but they still taste great later with the right storage! Here’s how to keep them soft and chewy:
At room temperature: Wrap the cooled pretzels in a clean tea towel and store at room temperature for up to 2 days. This keeps them from drying out and helps maintain their softness.
Freezer-friendly: Let the pretzels cool completely, then place them in freezer bags and freeze for up to 4 months. To reheat, pop them in the oven at 350°F for about 10 minutes – good as new!
Make-ahead tip: You can prepare the dough, shape the pretzels, and freeze them before the brine step. When you’re ready to bake, thaw, dip in the baking soda solution, and bake as directed.
Serving ideas
These soft pretzels are perfect on their own, but if you’re looking to make them part of a fun spread, here are some of our favorite ways to serve them:
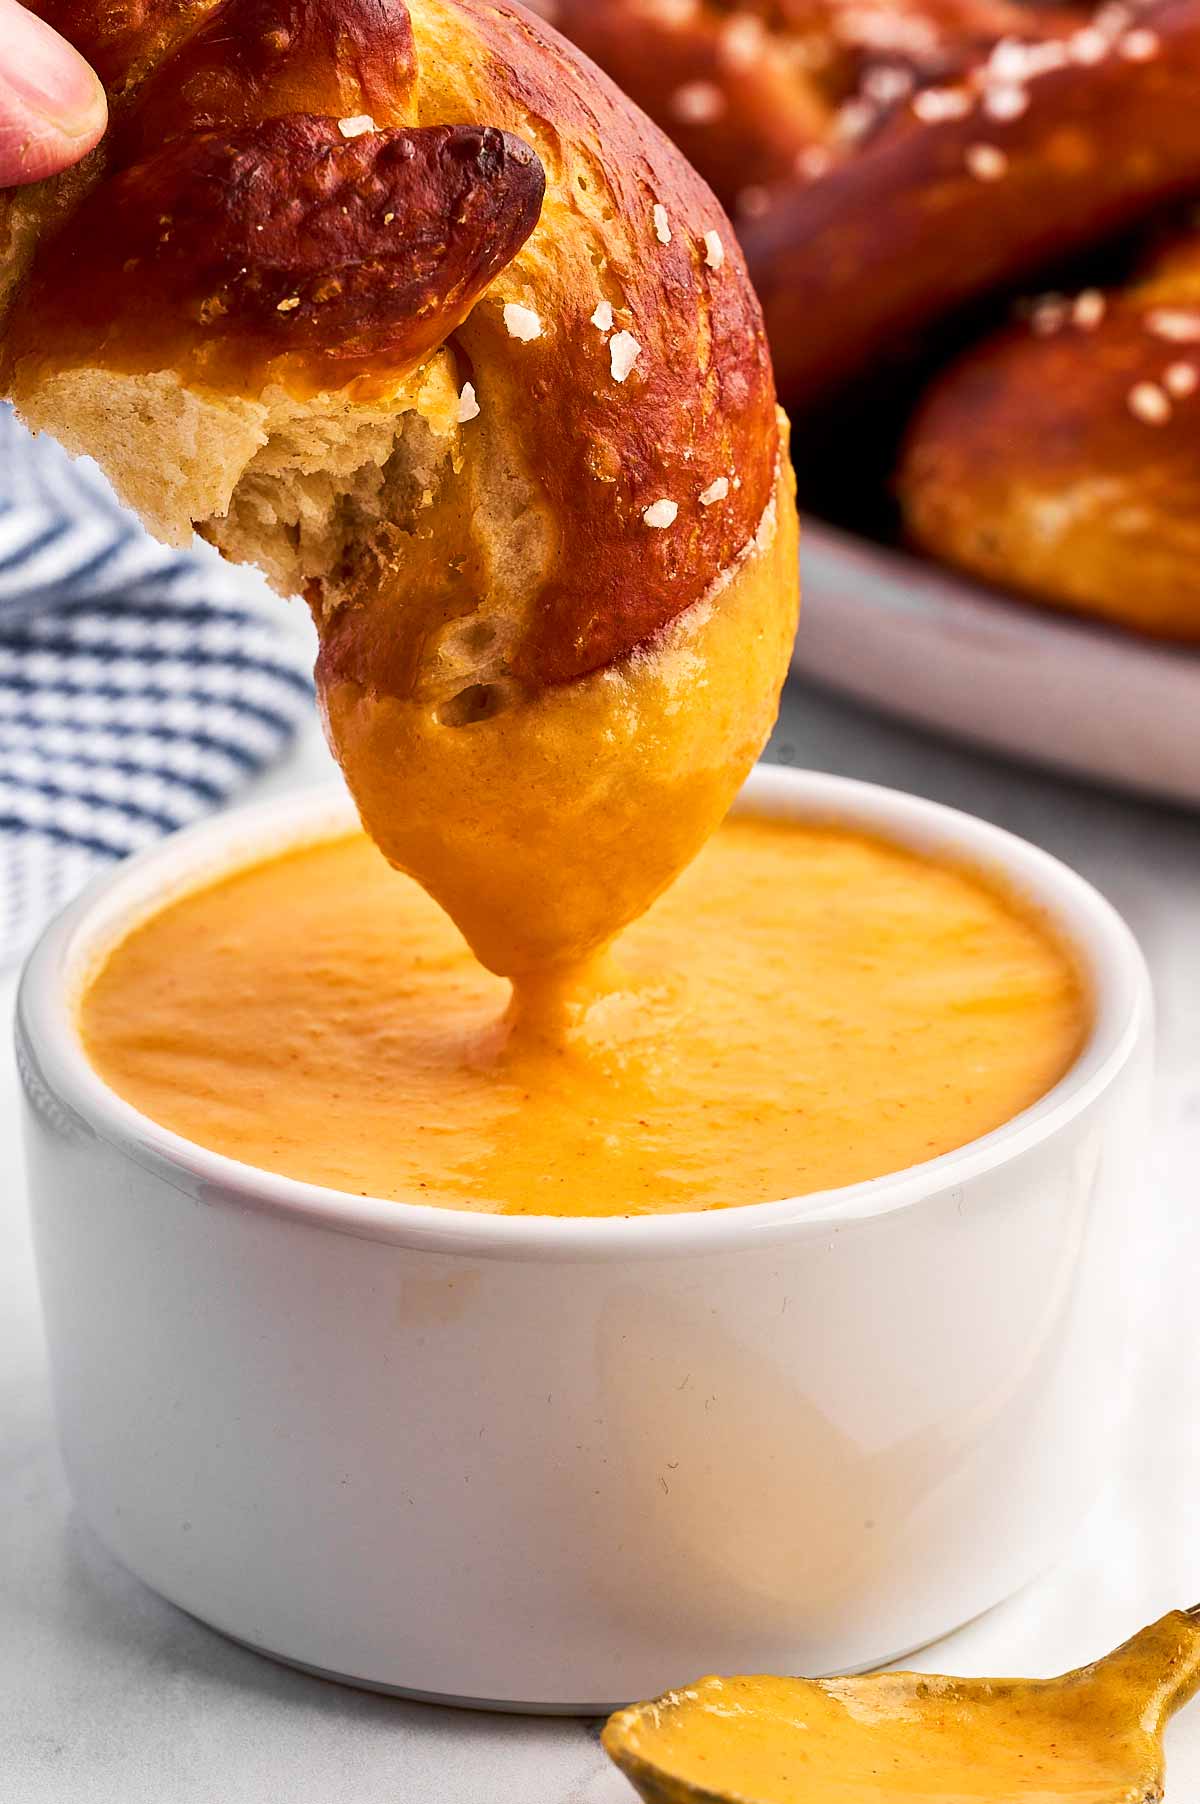
- Pretzel and Dip Platter – Serve with a variety of dips like Beer Cheese Dip, mustard, and hummus. Pair them with Sticky BBQ Slow Cooker Meatballs for the ultimate party platter!
- Soup and Pretzel Night – These pretzels are *amazing* with a hearty soup like Creamy Chicken Noodle Soup or Cheeseburger Soup. Trust me, your family will thank you.
- Game Day Snack Board – Load up a board with these pretzels, some Cranberry Pecan Cheeseball, Crockpot Lil Smokies, Air Fryer Chicken Wings or Hot Ham Sliders; and Oreo Truffles for dessert. It’s the kind of spread that keeps everyone coming back for more!
- Sweet Pretzel Dessert – For a fun twist, serve the cinnamon sugar version with a side of Crockpot Hot Chocolate. Cozy vibes all around!
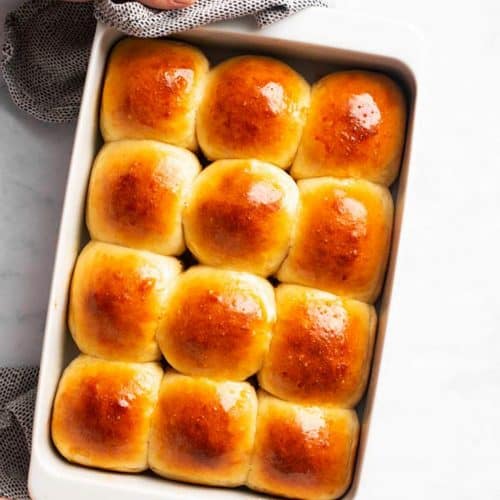
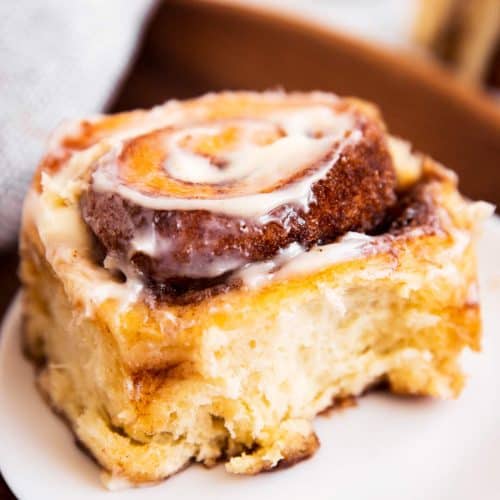
More baked goods to try
Printable recipe

Homemade Soft Pretzels
Recipe details
Ingredients
For the dough
- 4 cups flour
- 1 tablespoon instant dried yeast
- 1 tablespoon sugar
- 1 teaspoon salt
- 4 tablespoons butter softened
- 1 ¼ cups milk preferably at room temperature
Brine
- 1 quart water
- ½ cup baking soda
- 1 tablespoon salt
To finish
- coarse sea salt or sesame seeds, poppy seeds, cheese… for topping
- 2 tablespoons melted butter fro brushing, optional
Instructions
Make the dough:
- Mix dough: Place flour, yeast, sugar and salt in the bowl of your stand mixer fitted with the dough hook and combine well. Add butter, then start the mixer on low and slowly pour in the milk as the mixer works. Let the dough knead on low speed for 5 minutes, or until it forms a smooth dough.
- First proof: Shape into a tight ball, place back in the bowl and cover with a clean tea towel. Let sit at room temperature until doubled in size (about 40mins – 1 hour).
Shape the pretzels:
- Divide dough: Once dough is ready, punch it down and divide it into 12 equal pieces.
- Shape: Roll each piece into a roughly 20inch long strand that's slightly thicker in the middle. Twirl the ends together 3x, then fold down to shape a pretzel (see post or video for visualization).
- Second proof: Shape all pretzels and place on 2 lined baking sheets. Cover with tea towels and proof for another 20 minutes, or until slightly puffed up.
"Brine" and bake:
- Prep: Preheat oven to 350°F.
- Make "brine": Combine 1 quart of water, baking soda and salt in a high-sided pot. Bring to a boil, then take off the heat.
- Dip pretzels: Using a slotted spoon, dip each pretzel into the solution for 15-20 seconds, making sure it's fully submerged. Drain well on the spoon, then place back on the lined baking sheets. (See notes for tips)
- Bake: Sprinkle the "brined" pretzels with sea salt, sesame, poppy seeds… Whatever you enjoy, then bake for 20 minutes in the preheated oven until deeply golden brown (do not remove from oven too soon, they get a deep color thanks to the brine!).
Finish:
- Brush for shininess (optional to make them shiny): IMMEDIATELY after taking the pretzels out of the oven, brush them with melted butter.
- Cool: Transfer the pretzels to a wire rack to cool completely.
Notes
- Flour: All-purpose works great, but bread flour gives a chewier texture.
- Butter: Soften before using to ensure it blends evenly into the dough.
- Yeast: Instant yeast rises faster, but active dry works with a longer proof time.
- Milk: Use room temperature milk to help the dough rise properly.
- Baking soda: Essential for that classic pretzel flavor and chewy crust—don’t skip it!
- Knead thoroughly: Knead for at least 5 minutes until the dough is smooth for the perfect texture.
- Proof patiently: Let the dough rise until doubled in size—this is key for soft, fluffy pretzels. If your kitchen is chilly, place the dough in a warm spot like your oven with the light on, but don’t go over 100°F or you’ll kill the yeast.
- Don’t skip the second proof: After shaping, proof pretzels for 20 minutes to help them hold their shape. Overproofing can cause them to deflate in the oven and turn out tough instead of fluffy.
- Brine carefully: Dip each pretzel in the baking soda solution for 15–20 seconds – any longer and they’ll get tough. Submerge them fully face-down, flip gently, and let them drain for a few seconds before adding to the lined baking sheet to keep their shape intact.
- Brush for shine: Brush with water or milk right out of the oven for that glossy finish.
- Room temperature: Wrap in a clean tea towel and store for up to 2 days.
- Freeze: Cool completely, then freeze in bags for up to 4 months. Reheat at 350°F for 10 minutes.
- Make-ahead: Shape pretzels, freeze before brining, then thaw, brine, and bake when ready.
Nutrition
More recipe information
Recipe first published in 2014 and updated in 2019. Updated again on 01/26/2021 to make the layout more user friendly. Updated on 02/01/2025 with new photos and new/improved text.


Tracey says
Made these to have with potato ham soup. They turned out perfectly! I will definitely make these again.
Nora says
That sounds like a delicious combination, Tracey! Glad they turned out so well for you.
Alan & Sandy says
We thought we would try making these pretzels and we couldn’t believe how scrumptious they were. They are better than any we ever had anywhere. We used oat milk and coconut oil as substitutes.We made them twice in a week and gave some to the neighbors.
LOVE LOVE them!!!!!
Nora says
I’m so glad!
Karen says
these are easy to make and are the best tasting soft pretzles I’ve ever had. The family loves them.
Nora says
I’m so glad, Karen!
Heidi Hofacker says
I have made a few attempts, and this recipe is the Bomb!!! Gave a few to neighbors which also said they were the best pretzels they’d ever had! Thanks for my new go to pretzel recipe ♥️
Nora says
I’m so, so happy to hear this, Heidi!
Peter says
My first attempt came out great, the pretzels were delicious! The mix was really dry and wouldn’t come together in the mixer so I added another 1/4 cup of water and then dumped it all on the counter and kneaded it until it was smooth. I’m going to try it again.
Nora says
Peter, I think a lot of the time we measure our flour incorrectly (not wanting to put out any blame, I am 100% guilty of this, too!) and end up with too much in the recipe. If you measure with measuring cups, you need to spoon the flour into the cup (the cup mustn’t be packed, the flour must be fluffy and airy in there), then level it off with the back of a knife. Scooping the flour with the cup results in too much flour. I just tested this yesterday, and I ended up with a full extra ounce of flour per cup! That’s a lot of extra flour, which will absolutely result in a dough being too dry. Let me know how this works out if you try again, otherwise I’ll re-test the recipe!
Ruthanne says
What a great recipe! I have been trying to find a good soft pretzel recipe for months and hadn’t found anything. I stumbled across this from your spaetzle recipe and it worked perfectly! Thanks so much for sharing this 🙂
Nora Rusev says
I’m so glad to hear, Ruthanne! Thank you for coming back to leave a review, I appreciate it.
Azu says
Love pretzels! you have amazing photos
Nora says
Aww thanks! I am still trying to get used to my camera, nice comments make my heart pop 🙂