

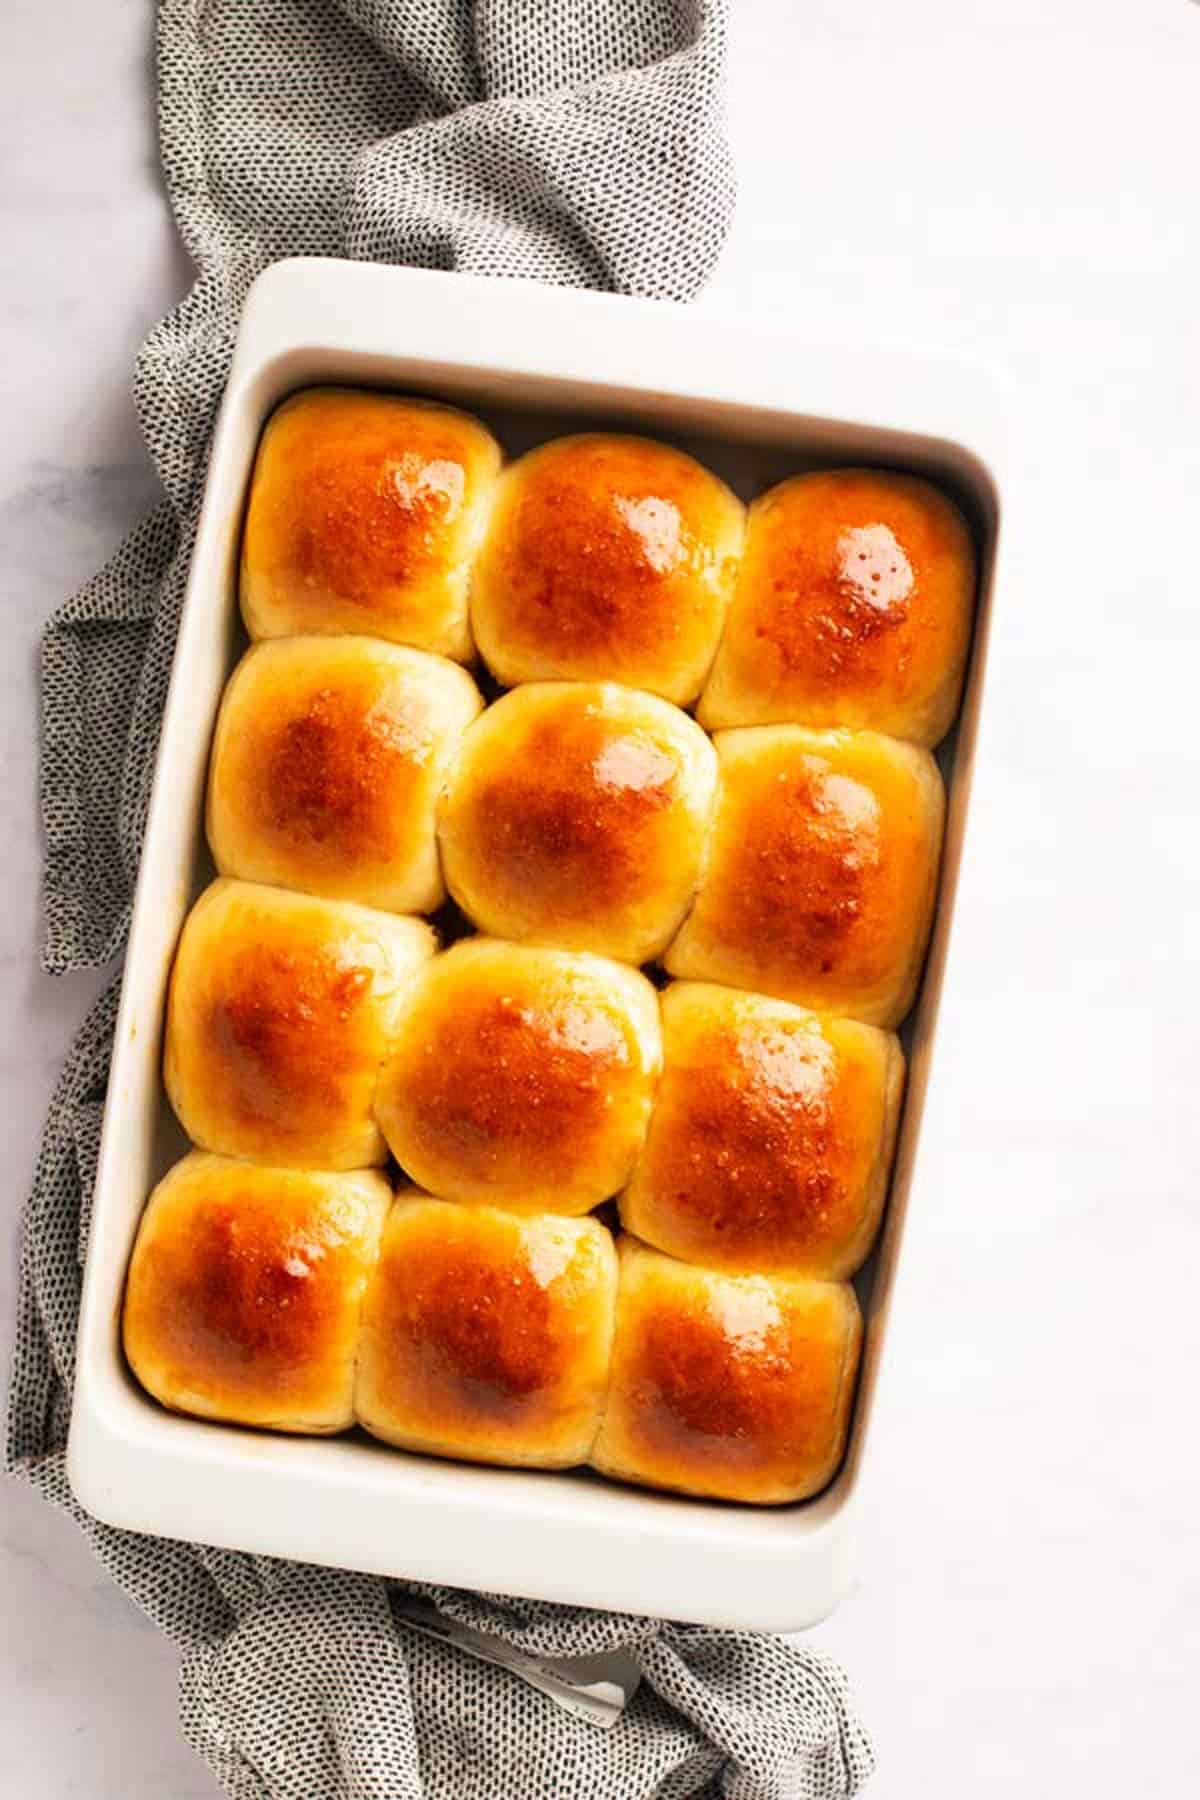
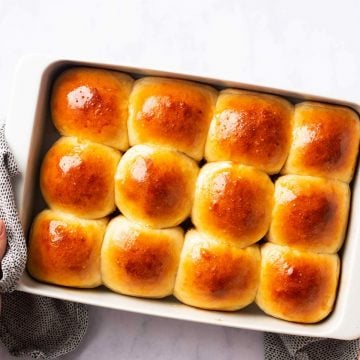
This is my way of making fluffy, light and buttery dinner rolls. My recipe is EASY and quick to prep, and the rolls turn out absolutely beautiful.
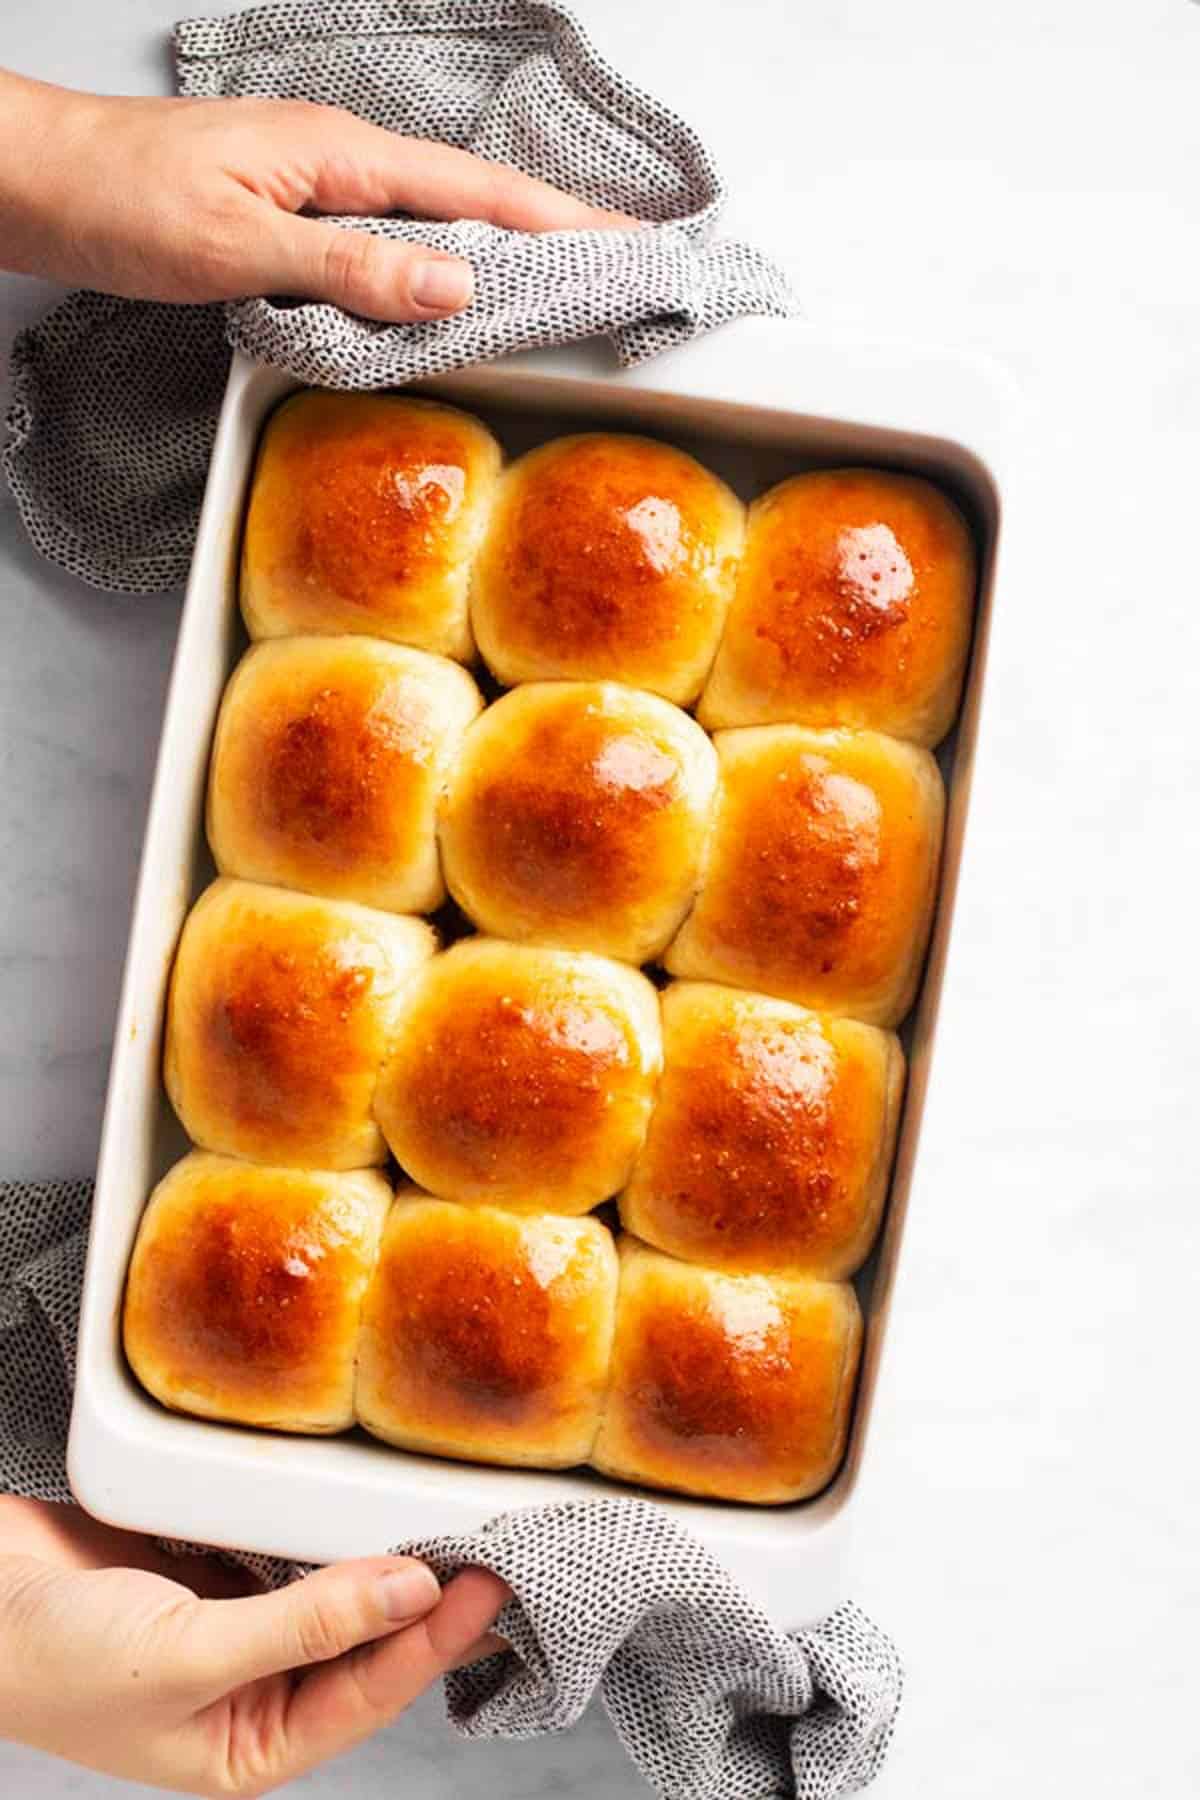
This is how I make my homemade dinner rolls – with an easy dough that’s quick to put together, and with the perfect result!
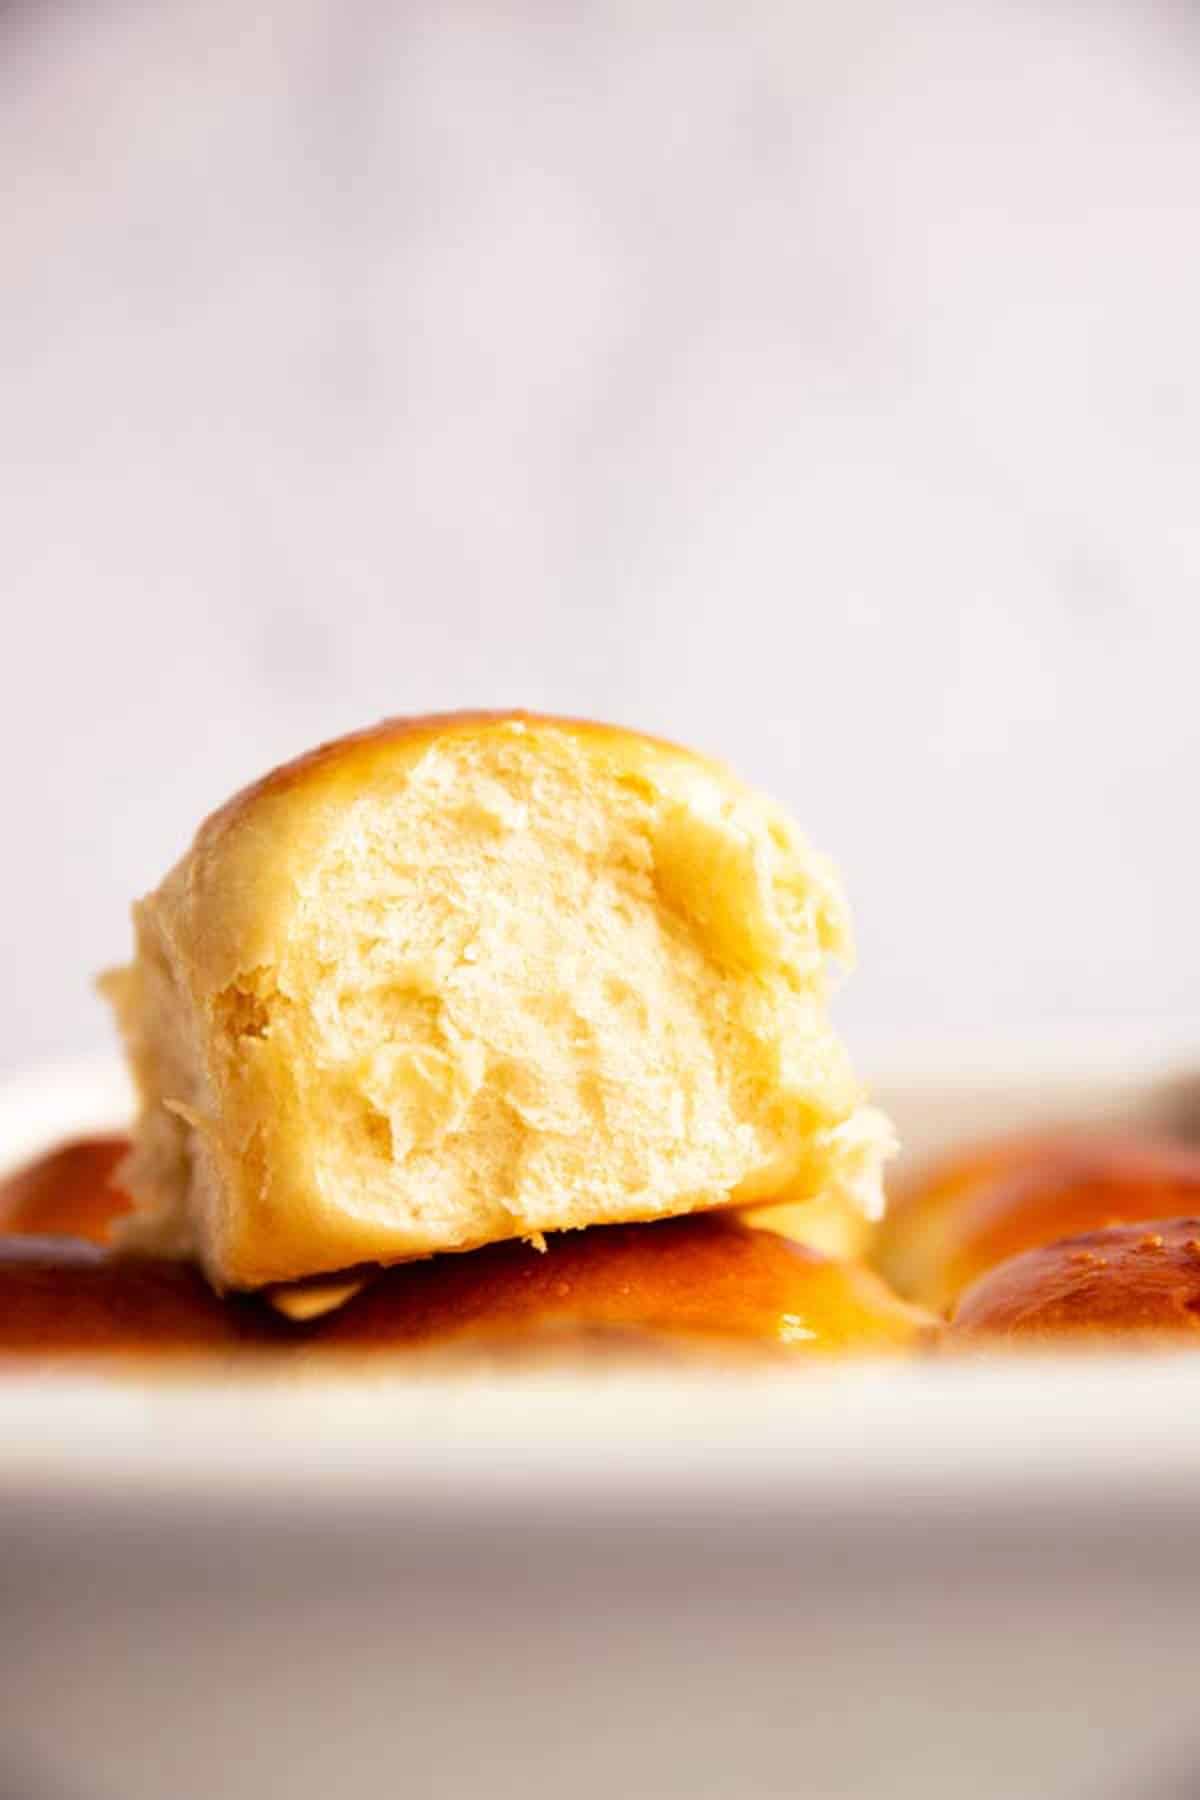
The dough is very soft, just like when making Cinnamon Rolls – this makes the rolls turn out wonderfully soft and fluffy, and you can either brush them with regular butter or with garlic butter after baking for a more savory variety.
These are best eaten warm slathered in butter (or Honey Butter!), but they keep for a day in case you have leftovers. We make them for every holiday – Easter, Thanksgiving, Christmas, you name it! They are perfect to make sliders with, too.
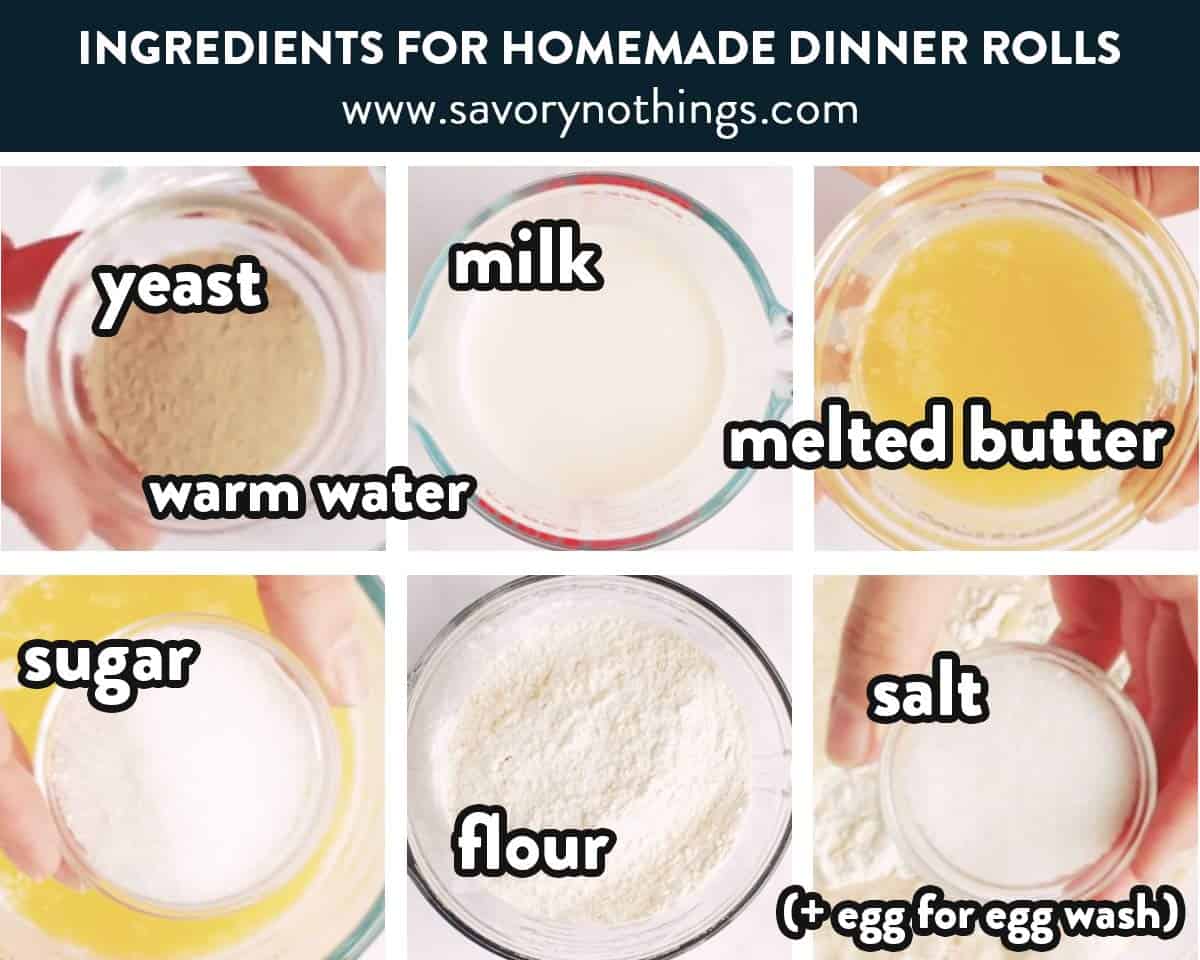
Ingredients you’ll need
Here is a visual overview of the ingredients in the recipe. Scroll down to the printable recipe card at the bottom of this post for quantities!
Ingredient notes
- Yeast: If using organic yeast, the dough may need more time to rise. Instant yeast can be used in place of the active yeast, the dough will rise faster.
- Milk: I prefer whole milk, but any milk can be used.
- Sugar: The sugar helps the yeast to grow and helps with the soft texture of the rolls, it doesn’t make the rolls overly sweet. You can reduce it to 1 tablespoon if you’re concerned about too much sweetness.
- Flour: I have made these with 2 cups whole wheat flour and 2 cups white flour before, they are a little denser and need a bit longer to rise. But they’re still very soft and fluffy! I don’t know if they work with gluten free flour, but if you try, please let me know!
- Egg: If you can’t have eggs or don’t have any on hand, you can instead brush the rolls with half-and-half or with milk. They will not get as shiny or browned, but they’ll still be perfectly pretty and delicious.
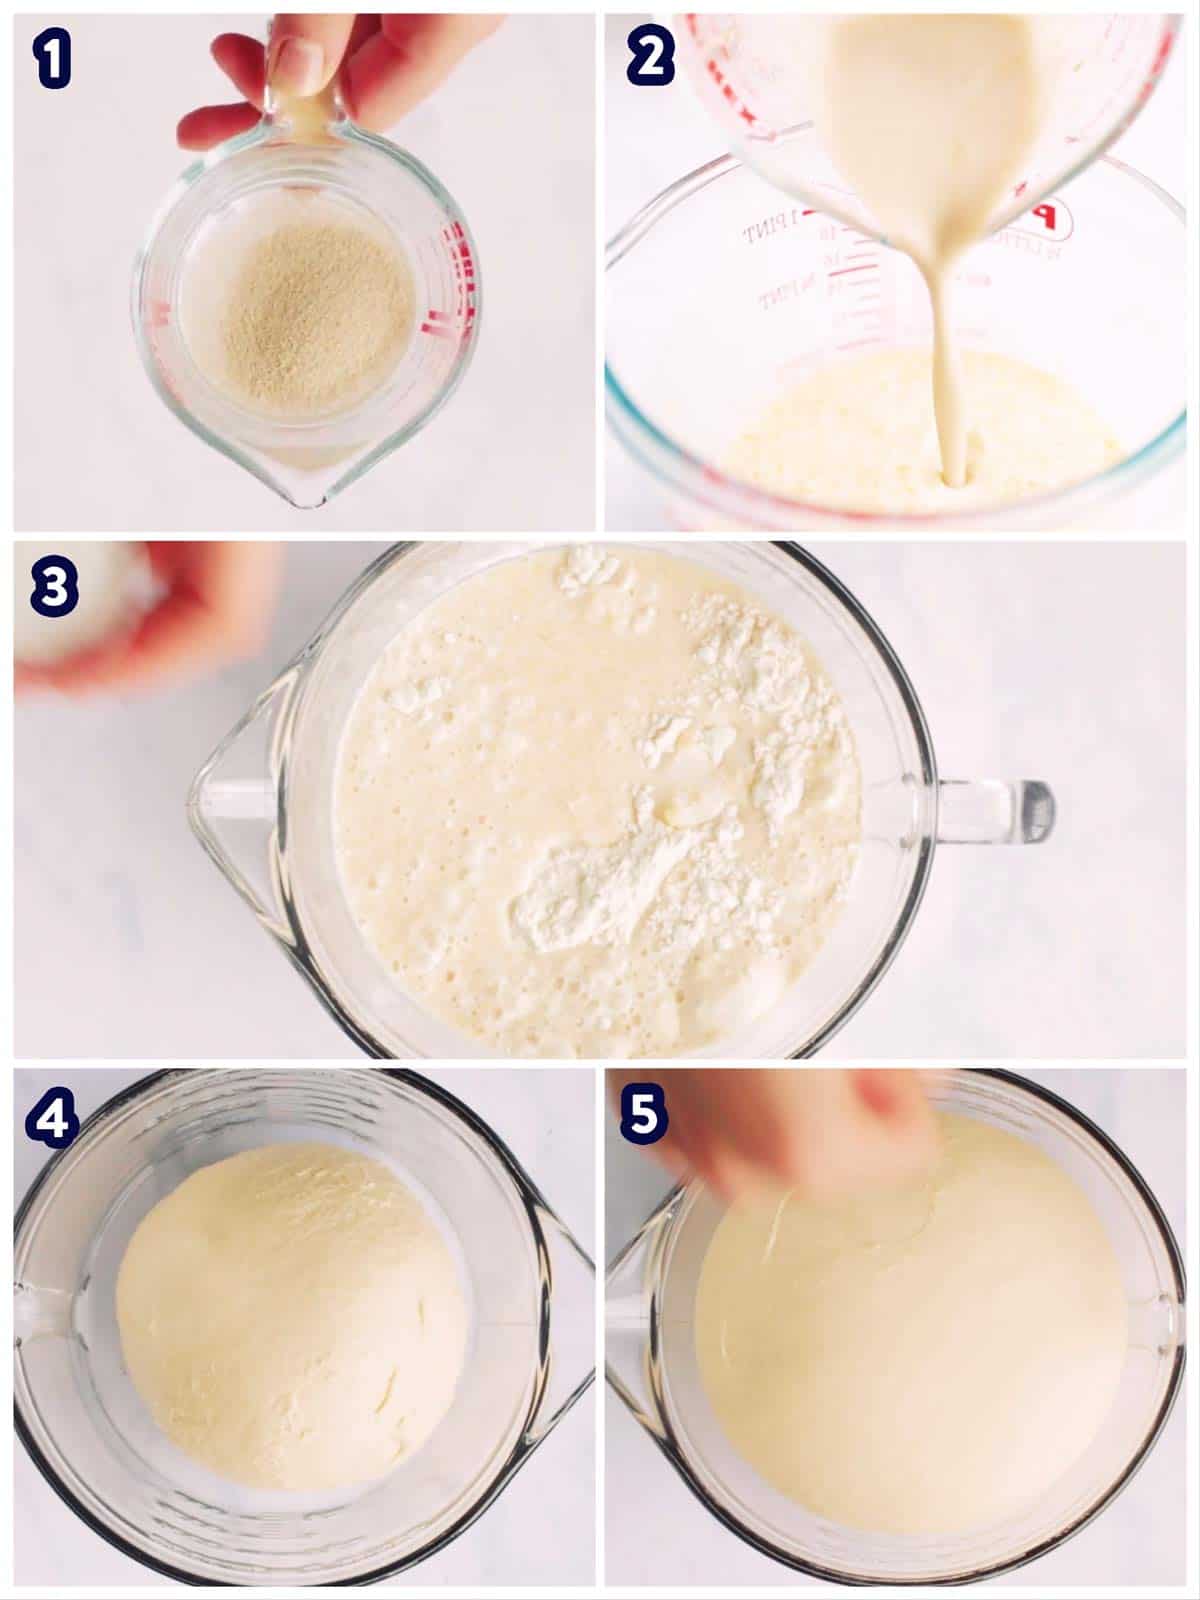
How to make homemade dinner rolls – step by step
First, you’ll need to “bloom” the yeast. Just stir it into warm water and leave it until bubbles appear. Do NOT use hot water, it should be just lukewarm, or the yeast will die (1).
While the yeast sits, combine the milk, melted butter and sugar. Once the yeast is bubbly, add it to the milk mixture and combine well (2).
Add this yeast mixture to 4 cups of flour, add salt (3) and then knead the dough until it’s soft and very pliable (4). Let the dough sit under a clean tea towel in a warm spot until it has doubled in size (5).
Once the dough is ready, punch it down (6) divide it into 12 equal pieces (7) and shape each into a roll. Place in a 9×13 inch dish (8) and let rise until puffy, then brush with egg wash (9) and bake. I like to brush these with melted butter right as they come out of the oven for some extra decadence (10).
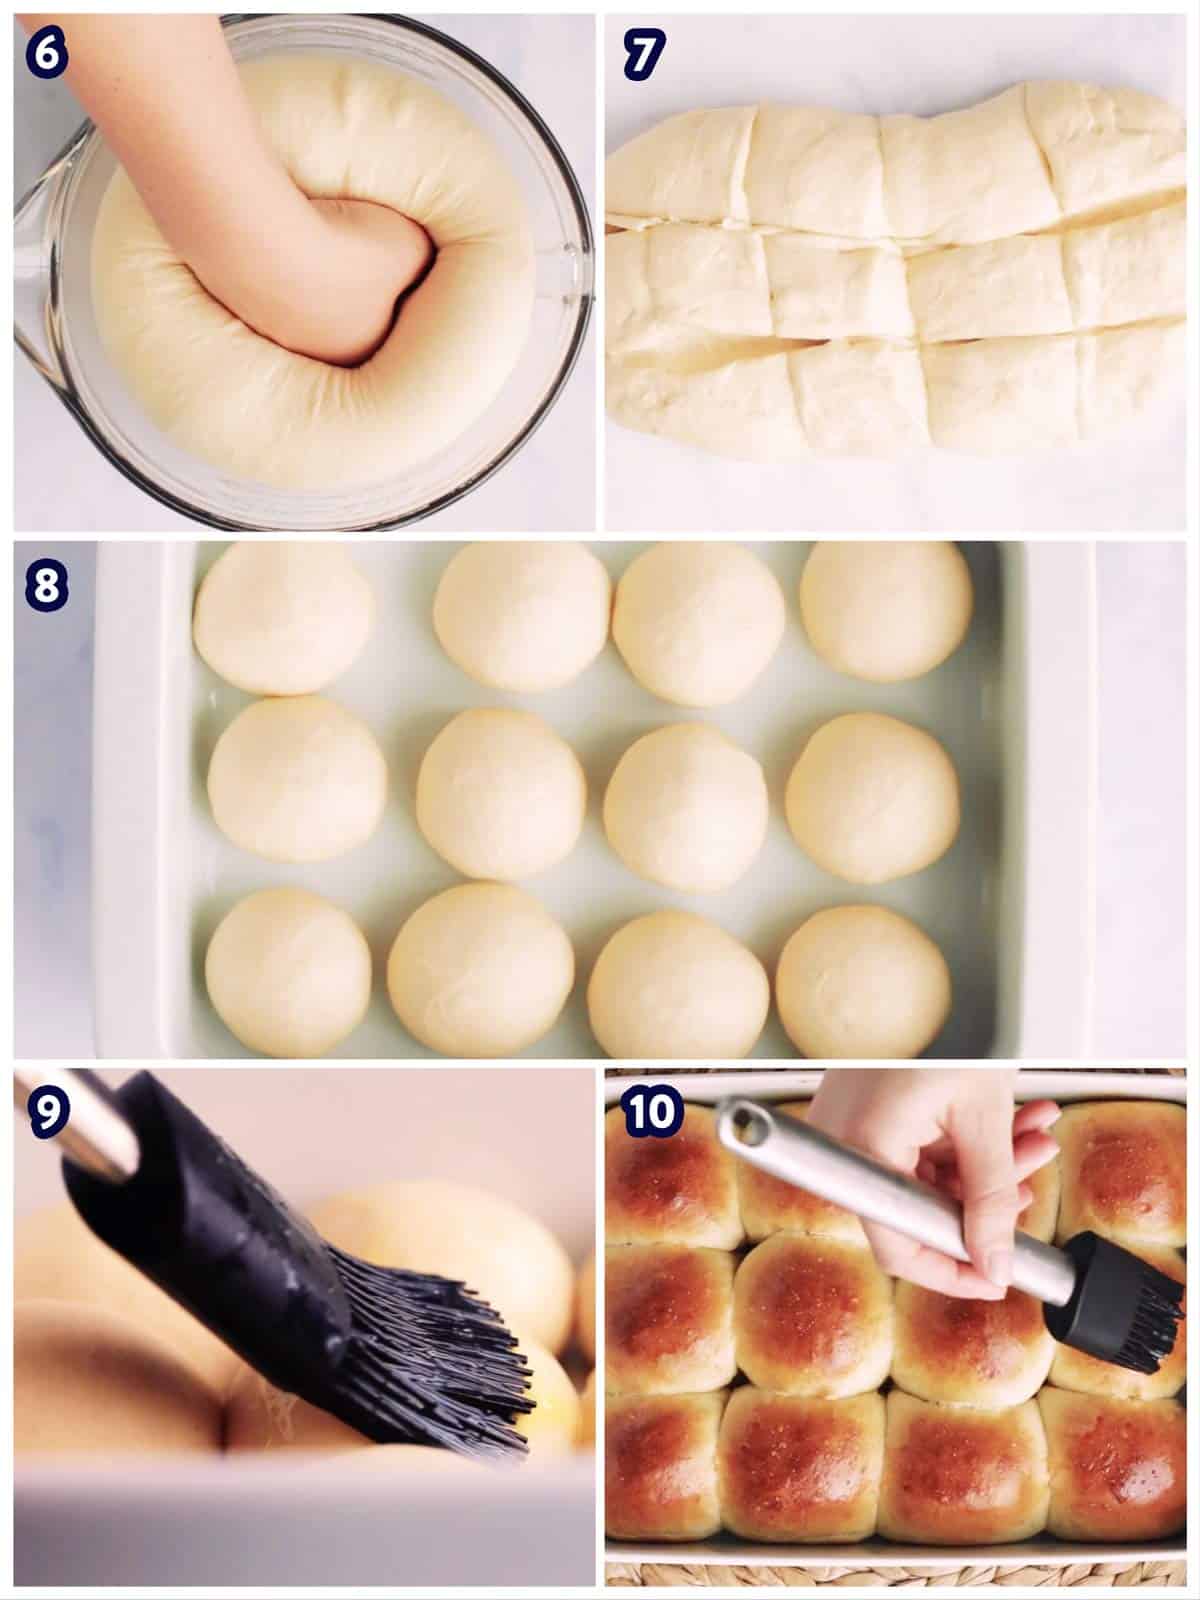
Just don’t burn your fingers when you try to pull a still-too-hot roll from the dish (been there, done that – too many times to count!).
Recipe tips
- Water temperature: Make sure the water you use doesn’t exceed 115°F. Otherwise it will kill off the yeast and your dough will not rise. Also, there’s no need to heat up the milk.
- Flour amount: Make sure to measure your flour correctly (spoon it into a measuring cup until heaping full, then level with a knife). If you add too much flour, your rolls will not turn out soft/fluffy but crumbly like a biscuit.
- Kneading: Knead the dough long enough. It’s hard to overwork yeast dough, so don’t worry about that. With yeast doughs, under-kneading is generally worse than kneading for a little bit too long. It should feel smooth and elastic, and you should be able to pull it a little without it tearing.
- Shaping the rolls: I pinch the dough at the bottom and then roll it in the hollow of my hand on the countertop. Watch the video to see how I shape my rolls to make them look nicely rounded.
- Baking: Make sure to not undertake the rolls, or they’ll sink back and turn out dense. The internal temperature of bread should be around 200°F, so if you have a kitchen thermometer you can check that way.
Freezer instructions
To make these rolls ahead and freeze, I like to freeze the dough, not the baked rolls (they taste much better that way).
- knead the dough as directed in the recipe, then let it rest for just 15 minutes.
- shape into rolls and freeze spaced apart on a lined baking sheet for a couple of hours. Once solid, transfer them to a freezer bag and label with the name and use-by date (use within 3 months) before placing in the freezer.
- to bake, place the rolls in a greased 9×11 pan and let them thaw and rise for 4-6 hours (depends a lot on your altitude and room temperature). Then egg wash and bake as directed!
More homemade bread recipes

PS If you try this recipe, please leave a review in the comment section and add a star rating in the recipe card – I appreciate your feedback! Follow along on Pinterest, Facebook or Instagram.
Printable recipe
Easy Homemade Dinner Rolls
Recipe details
Equipment
- Stand Mixer
- 9×11 Inch Baking Dish
Ingredients
For the rolls:
- 1 envelope active dried yeast see notes below!
- ½ cup water about room temperature warm, see notes
- 1 cup milk whole milk or 2% preferred
- 4 tablespoons butter melted
- 2 tablespoons sugar
- 4 cups all-purpose flour or more if needed; spooned and levelled! (too much flour will yield a dense, biscuit-like texture)
- ½ tablespoon salt
For brushing:
- 1 egg for egg wash
- melted butter to brush on the hot rolls
Instructions
- Activate yeast and combine liquid ingredients:Whisk the yeast into the warm water in a small bowl and set aside until bubbles start to appear on the surface. In the meantime, whisk together the milk, melted butter and sugar. Add the activated yeast mixture and whisk until combined.
- Make dough:Add the flour and salt to the bowl of your stand mixer fitted with the hook attachment. Add the milk mixture, then knead on medium-low speed for 5-6 minutes, or until you have a smooth ball of dough. Add an extra tablespoon of flour if your dough feels too sticky!
- Rise:Cover the bowl with a clean kitchen towel and let stand at room temperature for 1 hour, or until doubled in size. Punch down, then divide dough into 12 equal pieces; shape into balls. Place in greased 9×11 inch baking pan. Cover and let rise at room temperature until big and puffed up, about 20-30 minutes.
- Bake:Heat the oven to 375°F. Beat the egg and egg wash the top of the rolls (you will most likely not use the entire egg; don't add too much or you'll have scrambled eggs on top of your rolls). Bake for around 20 minutes or until done. Brush with additional melted butter right as they come out of the oven, if you like. Remove from the pan and serve warm.
Notes
Ingredient Notes:
Yeast: If using organic yeast, the dough may need more time to rise. Instant yeast can be used in place of the active yeast, the dough will rise faster. If you’re concerned about your yeast not activating, stir the 2 tablespoons of sugar into the water and yeast mixture to move things along. Sugar: The sugar helps the yeast to grow and helps with the soft texture of the rolls, it doesn’t make the rolls overly sweet. You can reduce it to 1 tablespoon if you’re concerned about too much sweetness. Flour: I have made these with 2 cups whole wheat flour and 2 cups white flour before, they are a little denser and need a bit longer to rise. But they’re still very soft and fluffy! Egg: If you can’t have eggs or don’t have any on hand, you can instead brush the rolls with half-and-half or with milk. They will not get as shiny or browned, but they’ll still be perfectly pretty and delicious.Baking Tips:
Water temperature: Make sure the water you use doesn’t exceed 115°F. Otherwise it will kill off the yeast and your dough will not rise. Also, there’s no need to heat up the milk. Flour amount: Make sure to measure your flour correctly (spoon it into a measuring cup until heaping full, then level with a knife). If you add too much flour, your rolls will not turn out soft/fluffy but crumbly like a biscuit. Kneading: Knead the dough long enough. It’s hard to overwork yeast dough, so don’t worry about that. With yeast doughs, under-kneading is generally worse than kneading for a little bit too long. It should feel smooth and elastic, and you should be able to pull it a little without it tearing. Shaping the rolls: I pinch the dough at the bottom and then roll it in the hollow of my hand on the countertop. Watch the video to see how I shape my rolls to make them look nicely rounded. Baking: Make sure to not undertake the rolls, or they’ll sink back and turn out dense. The internal temperature of bread should be around 200°F, so if you have a kitchen thermometer you can check that way.Freezer Instructions:
To make these rolls ahead and freeze, I like to freeze the dough, not the baked rolls (they taste much better that way).- knead the dough as directed in the recipe, then let it rest for just 15 minutes.
- shape into rolls and freeze spaced apart on a lined baking sheet for a couple of hours. Once solid, transfer them to a freezer bag and label with the name and use-by date (use within 3 months) before placing in the freezer.
- to bake, place the rolls in a greased 9×11 pan and let them thaw and rise for 4-6 hours (depends a lot on your altitude and room temperature). Then egg wash and bake as directed!


Janice says
My family loved this!
Nora says
Glad to hear it, Janice!
Lori says
Can I make these without the egg wash as a family member is allergic to eggs?
Alexia says
Yes you can! the egg is mainly aesthetic.