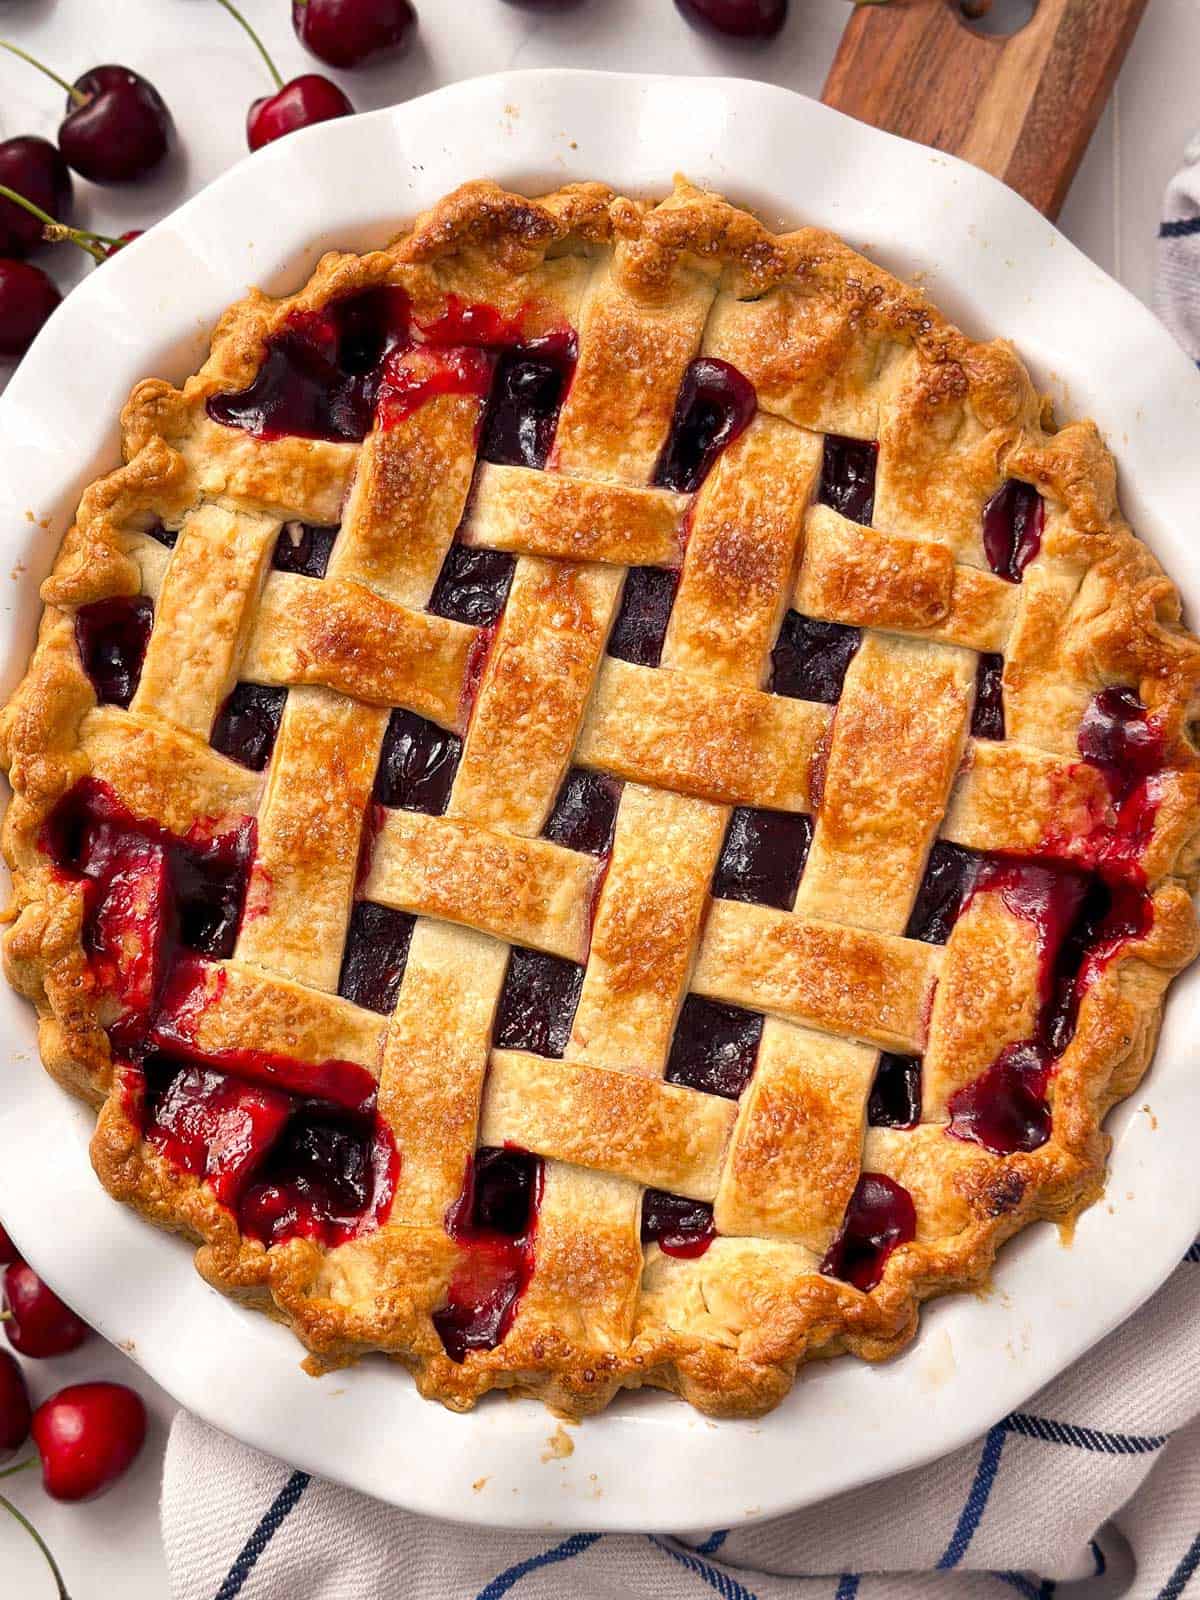
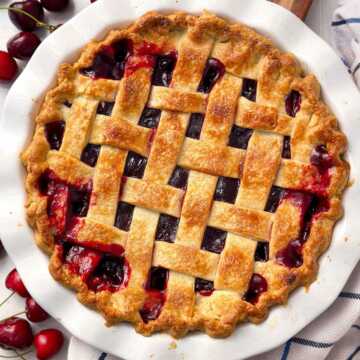
You don’t need to be a pro baker to create a mouthwatering cherry pie with this easy and delicious recipe. No matter if using fresh, canned or frozen cherries, the homemade filling is irresistibly jammy and tangy, wrapped in a perfectly flaky pie crust.
My recipe is written to guide you step-by-step, making it easy for anyone to achieve pie perfection!
Why you’ll love this recipe
- Foolproof filling: For my homemade cherry pie, I prefer to take the extra step to pre-cook and then cool the filling before adding it to the crust to bake (it doesn’t even take long!). This way, you know exactly how the filling will come out! No more runny pie filling and no more issues with having tart fruit that ended up not sweetened enough. If your cooled filling is not at the consistency or taste that you like for your pie, you can just tweak it before adding it to the crust, making sure you are baking your perfect pie.
- Extra-flaky crust: My pie crust recipe is quick to pull together, and comes out perfectly flaky! I’ve tweaked my recipe for years until I landed at the right flour-to-butter ratio to make it easy for new bakers to handle while providing the perfect flake.
- Homemade perfection: I firmly believe in making homemade things look, well, homemade. My pies always look imperfectly rustic and homemade – which is totally fine!
Fruit pies are one of my all-time favorite desserts. From apple pie to lemon pie, I have yet to meet one I don’t like! My classic cherry pie is a summer staple, and it’s much easier to make than you’d think.
Even though it’s easy, it does require a bit of patience. The chilling and cooling of both the pastry and the filling take time, but they are crucial to pie success.
Ingredients you’ll need
Here is a visual overview of the ingredients in the recipe. Scroll down to the printable recipe card at the bottom of this post for quantities!
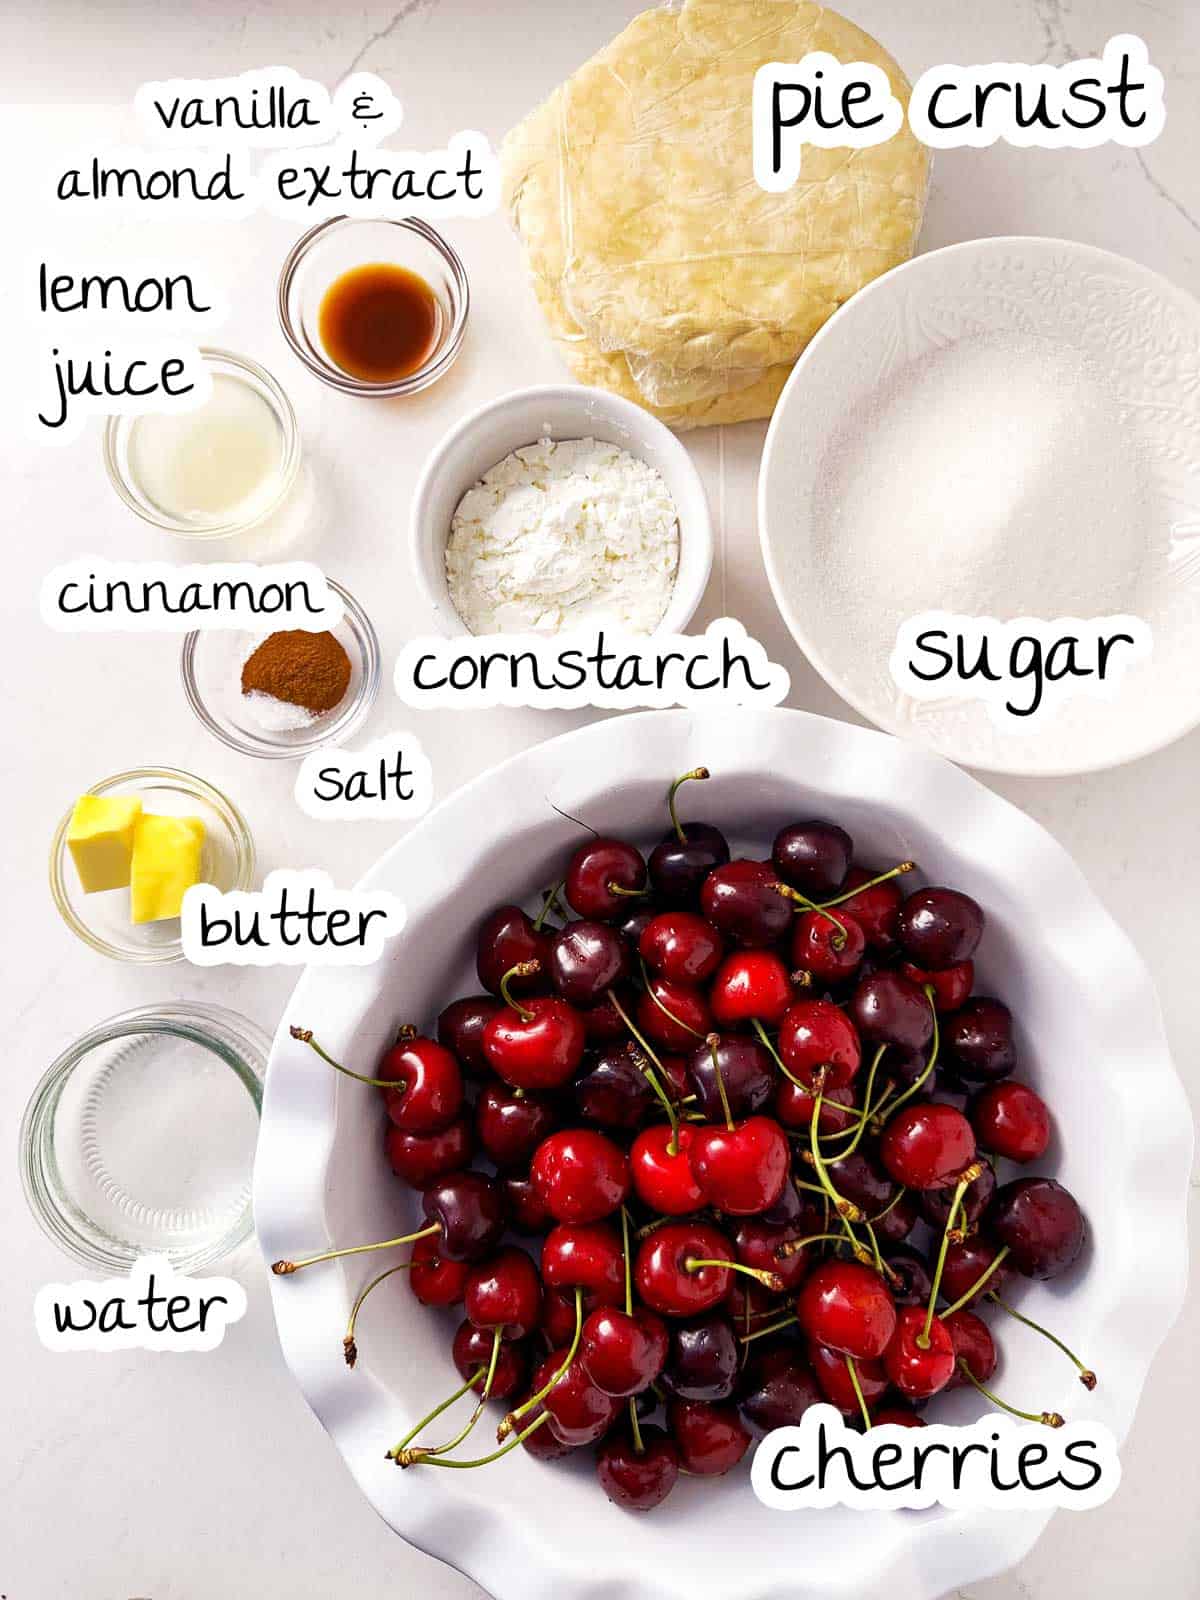
Ingredient notes
- Cherries: Sour cherries are my favorite, but sweet cherries work great as well as long as you reduce the sugar in the filling (instructions included in the recipe below). Fresh, frozen (no need to thaw!) or 3 14.5-oz cans all work in this recipe (again, the instructions for each are further down). I actually like frozen cherries best, because they are so easy to use; but will happily use fresh when I get them from Grandma’s garden!
- Extracts: I like using both vanilla and a little almond extract, but you can stick to just one if you prefer. Just don’t overdo it with the almond extract, or it will overpower the entire pie.
- Crust: My go-to is my homemade pie crust, and store-bought crusts can be tricky to use with fruit fillings because they tend to be a little thin. If you’re in a hurry and need to use a store-bought crust, just be mindful of using it well-chilled and make sure to not stretch it out when adding it to the pie dish.
- Lemon juice: A must if using sweet cherries! If you’re using sour/tart cherries, I suggest tasting the filling first before adding the lemon juice. Substitute 2 tablespoons water if the filling is tangy and tart enough for you.
- Cinnamon: I love the hint of warmth and spices this adds, but feel free to skip it if you prefer.
- Egg white: I forgot to add the egg white for the egg wash to the photo. If you don’t want to use egg, you can brush the pastry with cream instead.
How to make cherry pie from scratch
I highly recommend making the pastry for the crust (if making a homemade one) before making the filling, because it needs adequate time to chill (at least 2 hours, better overnight, especially if you live in a hot climate!).
To save time, you can prepare both the crust and filling a day or two in advance.
Homemade cherry pie filling
Note: This recipe works the same for fresh and frozen cherries. The alterations for canned cherries are written further below.
1. Cook cherries:
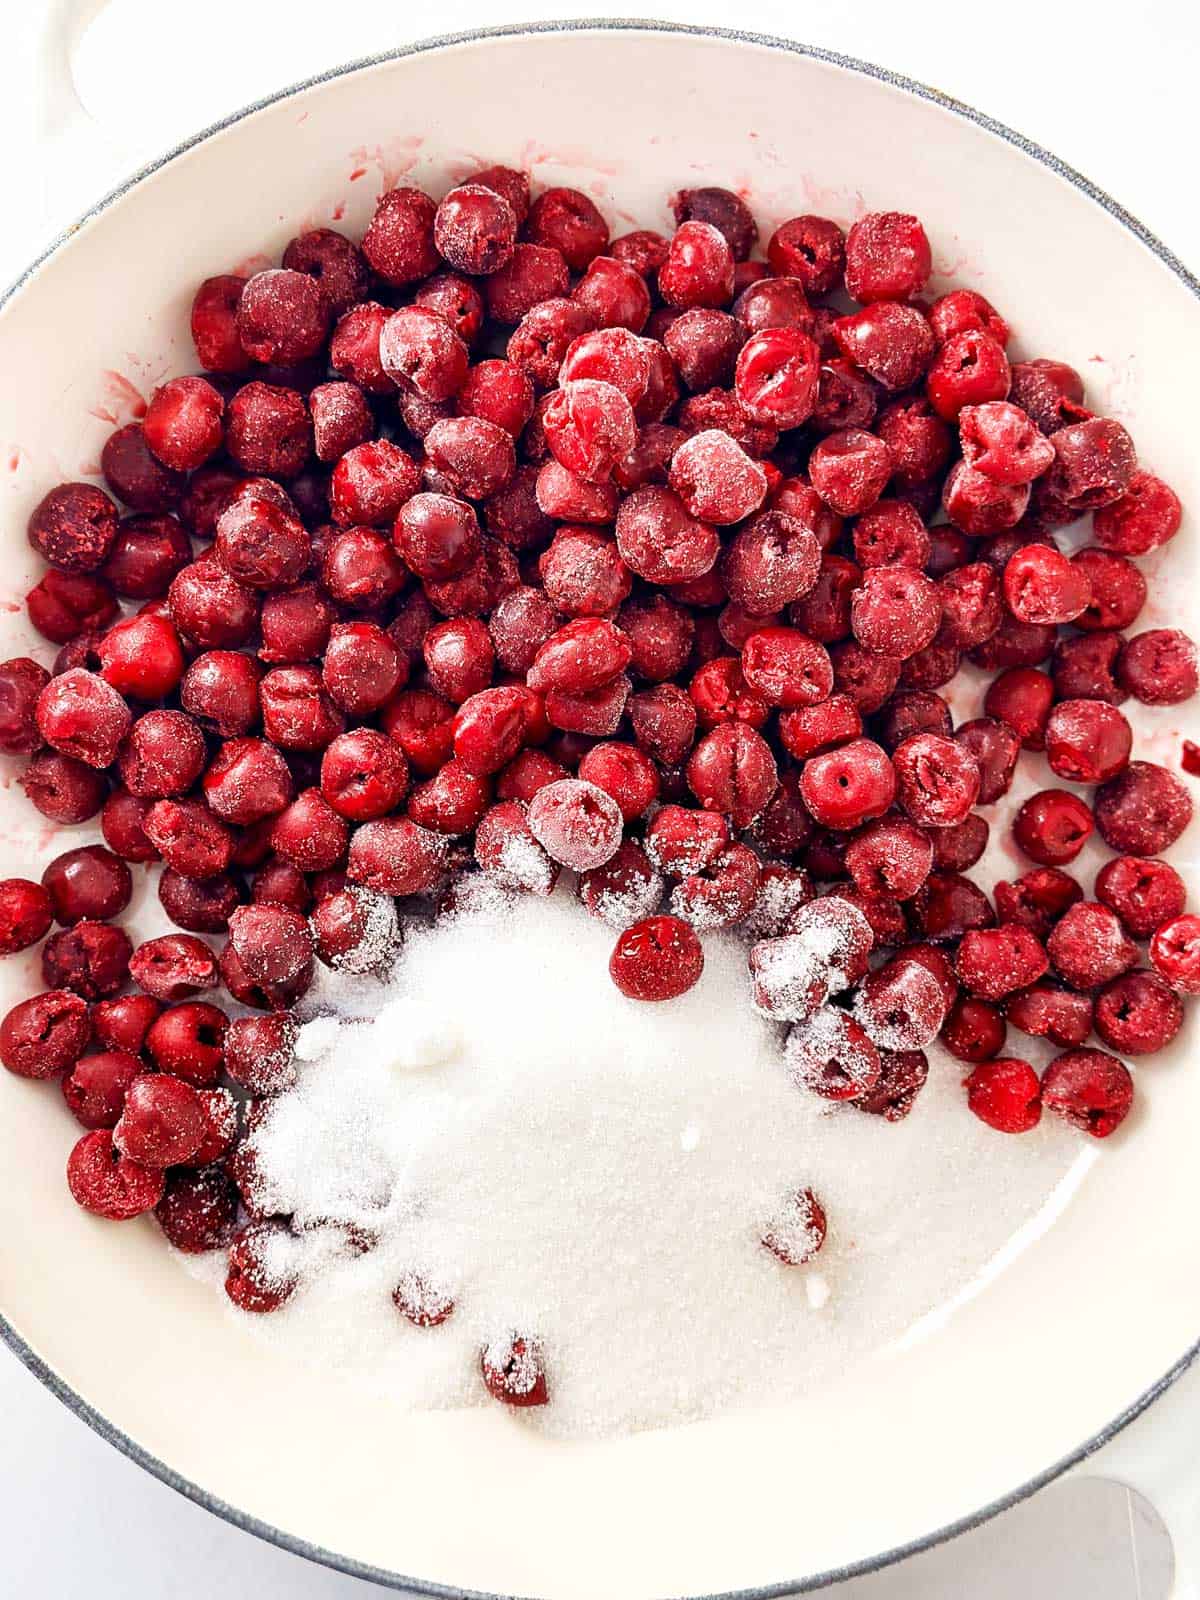
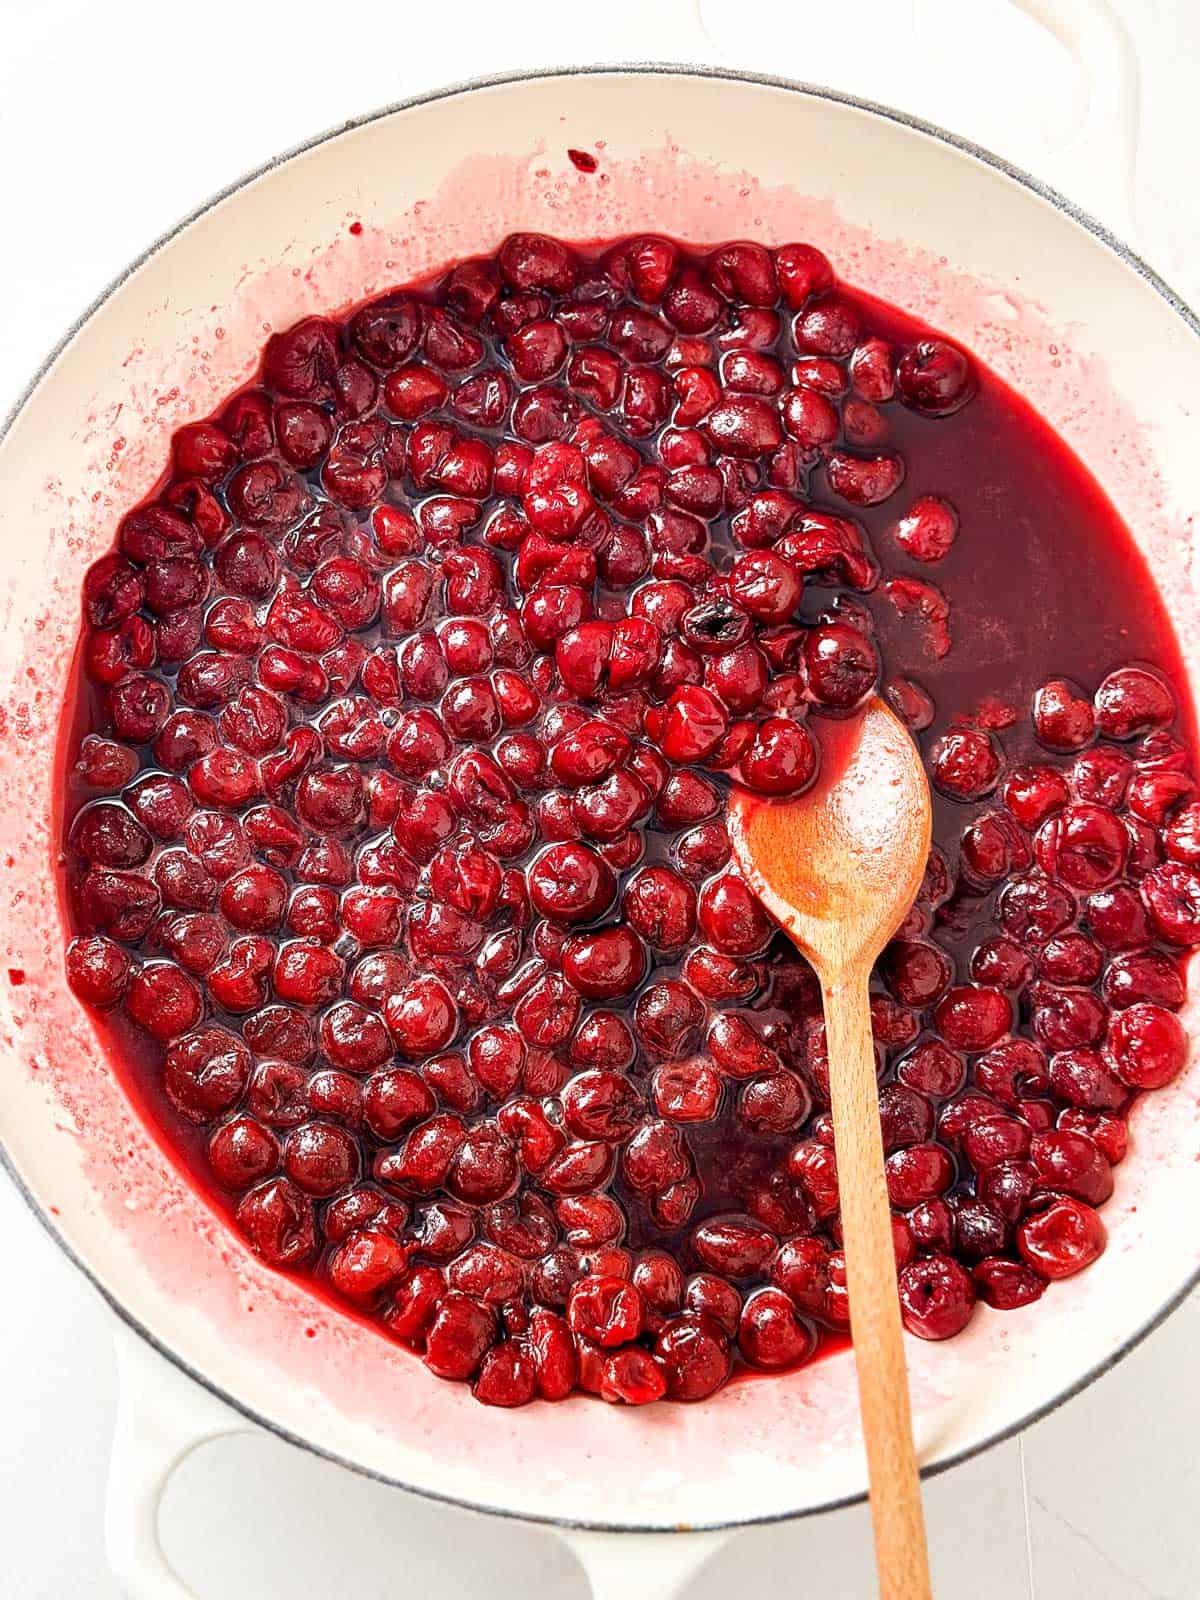
Place the cherries, sugar, extracts, spices and a small pinch of salt in a wide pan. Bring to a boil over medium-high heat, then immediately reduce the heat to a simmer and simmer the cherries for 5-8 minutes, until they release their juices (frozen cherries may take a little longer).
2. Thicken juices:
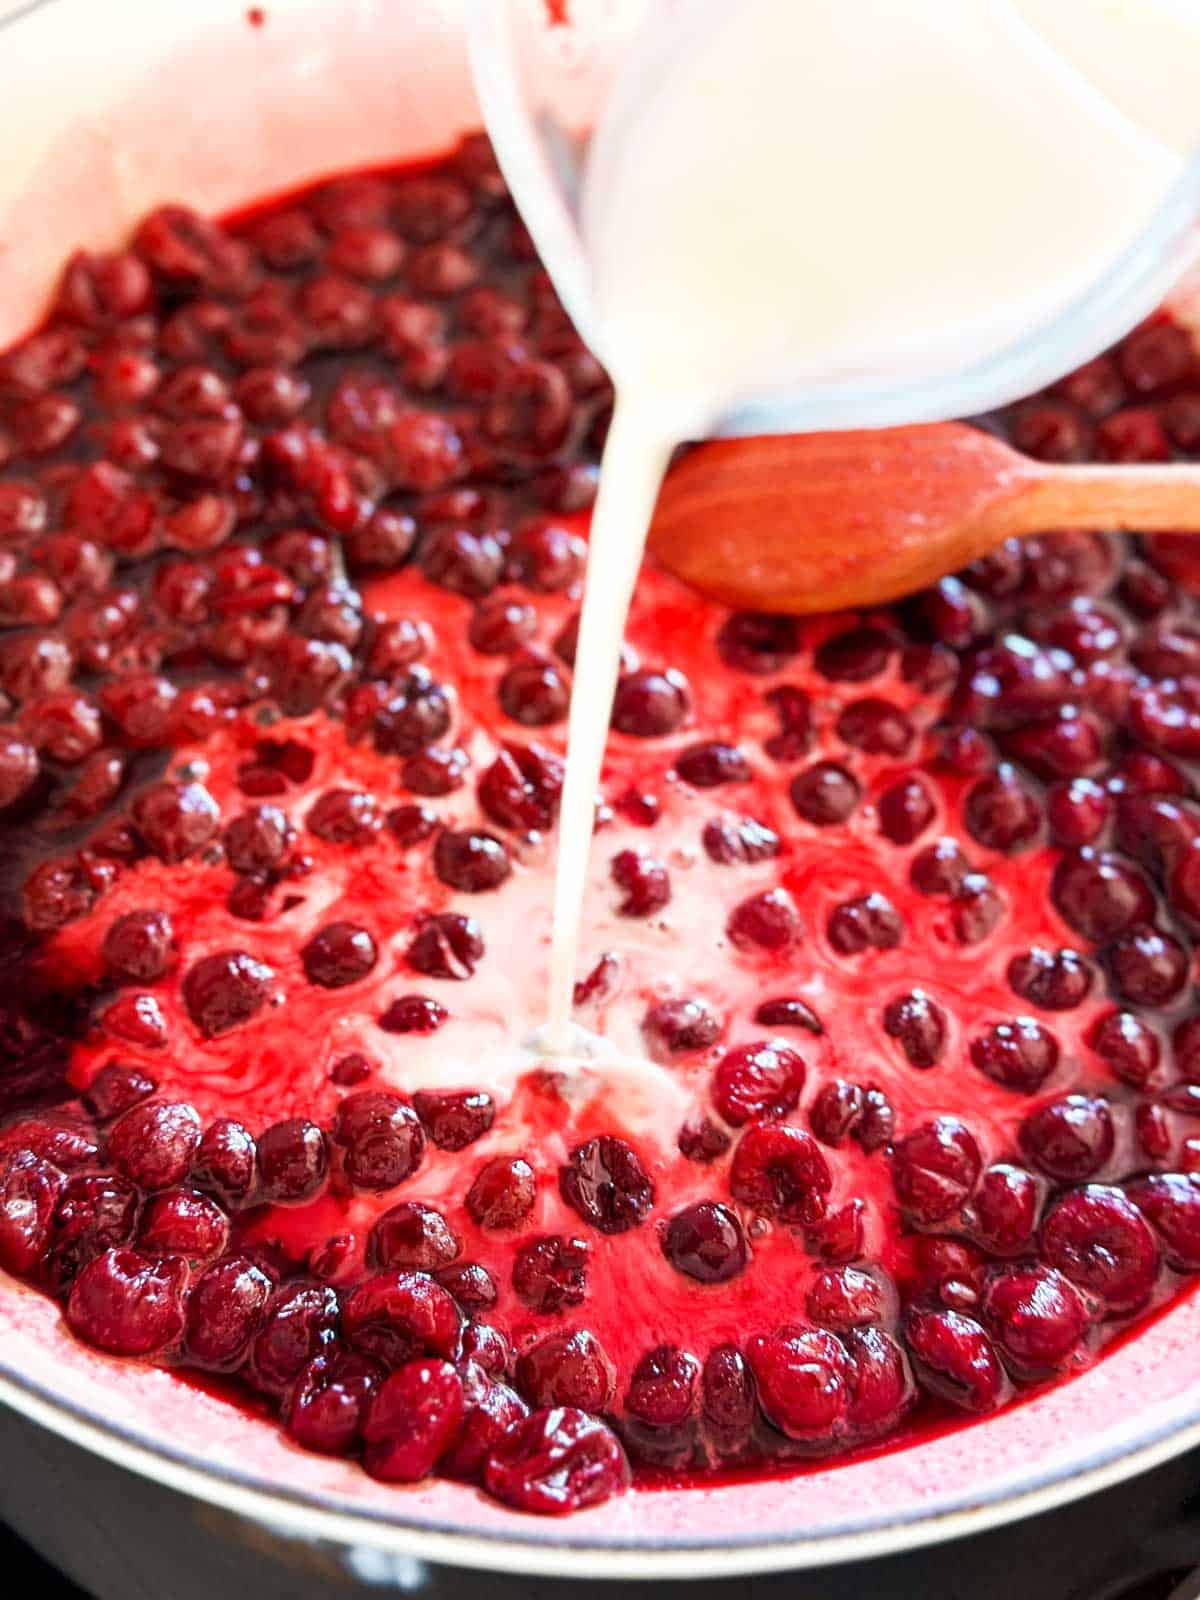
Take the filling off the heat. Whisk the cornstarch into 4 tablespoons cold water, then pour this slurry into the filling, stirring quickly and constantly until it’s fully combined.
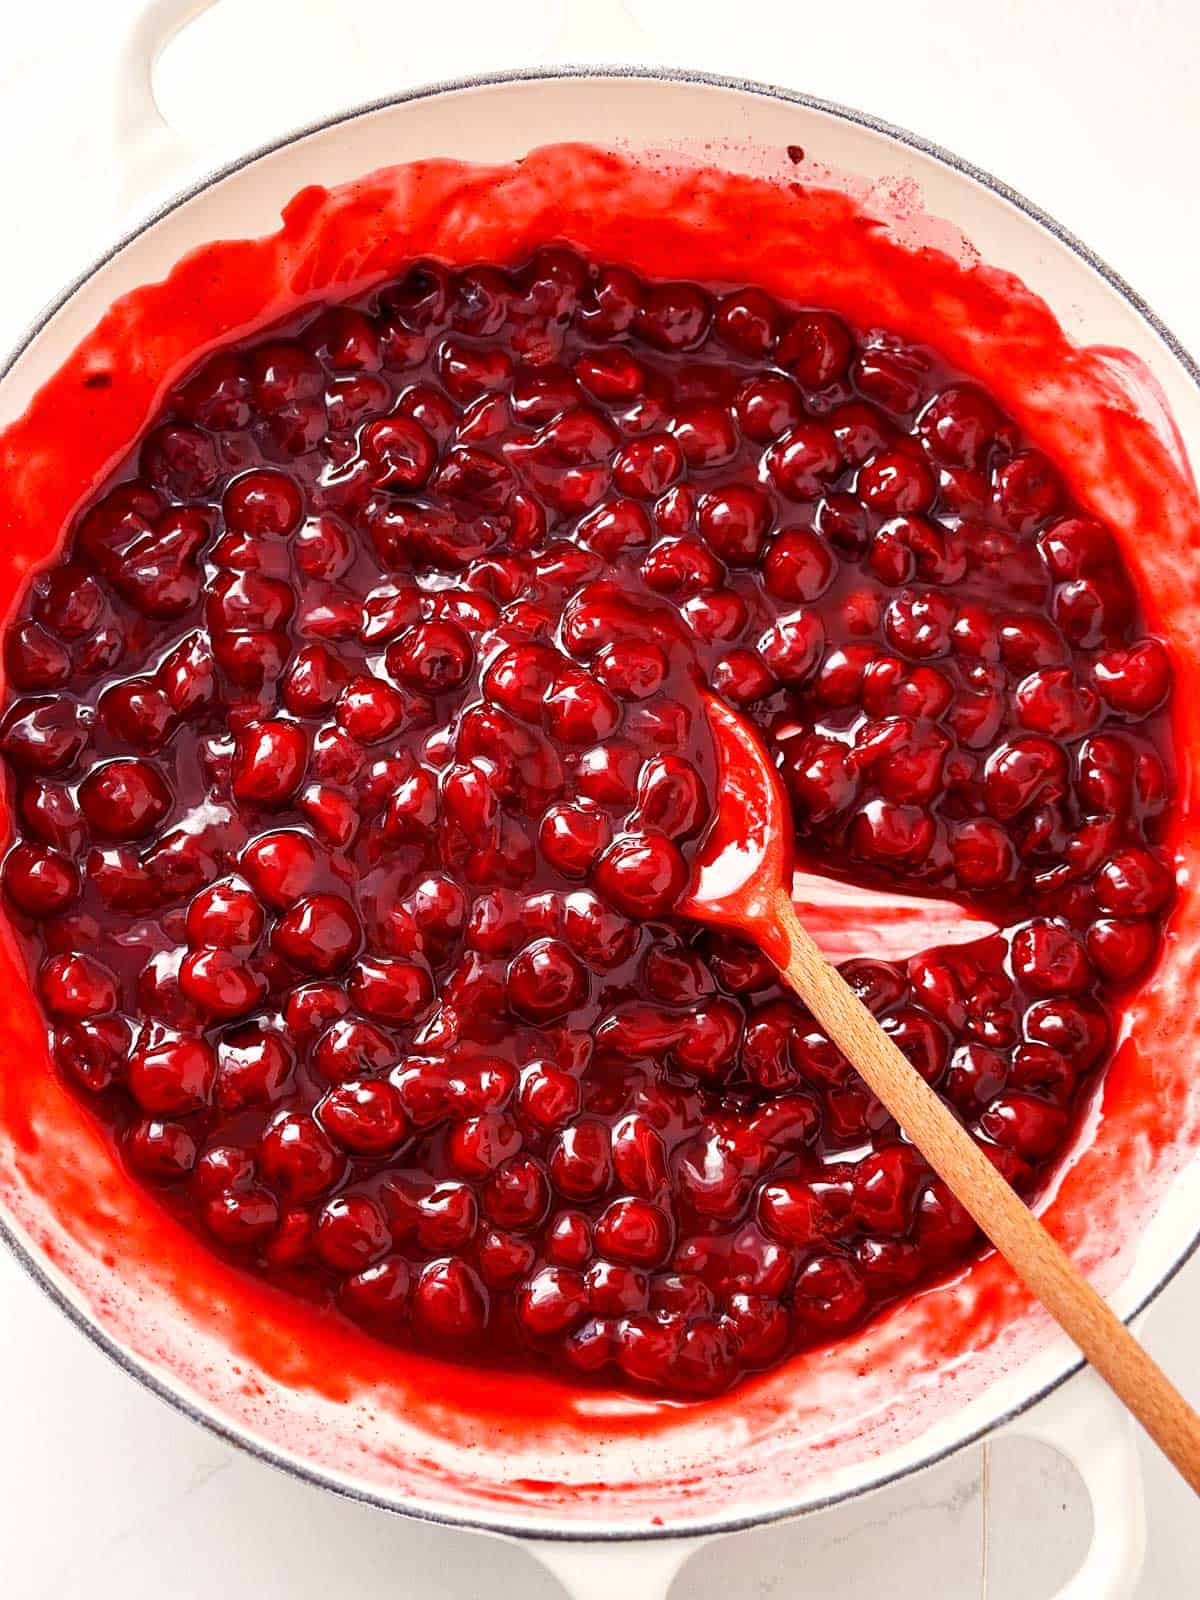
Put the filling back over medium-low heat and allow to simmer, stirring constantly, until the juices have thickened.
3. Adjust:
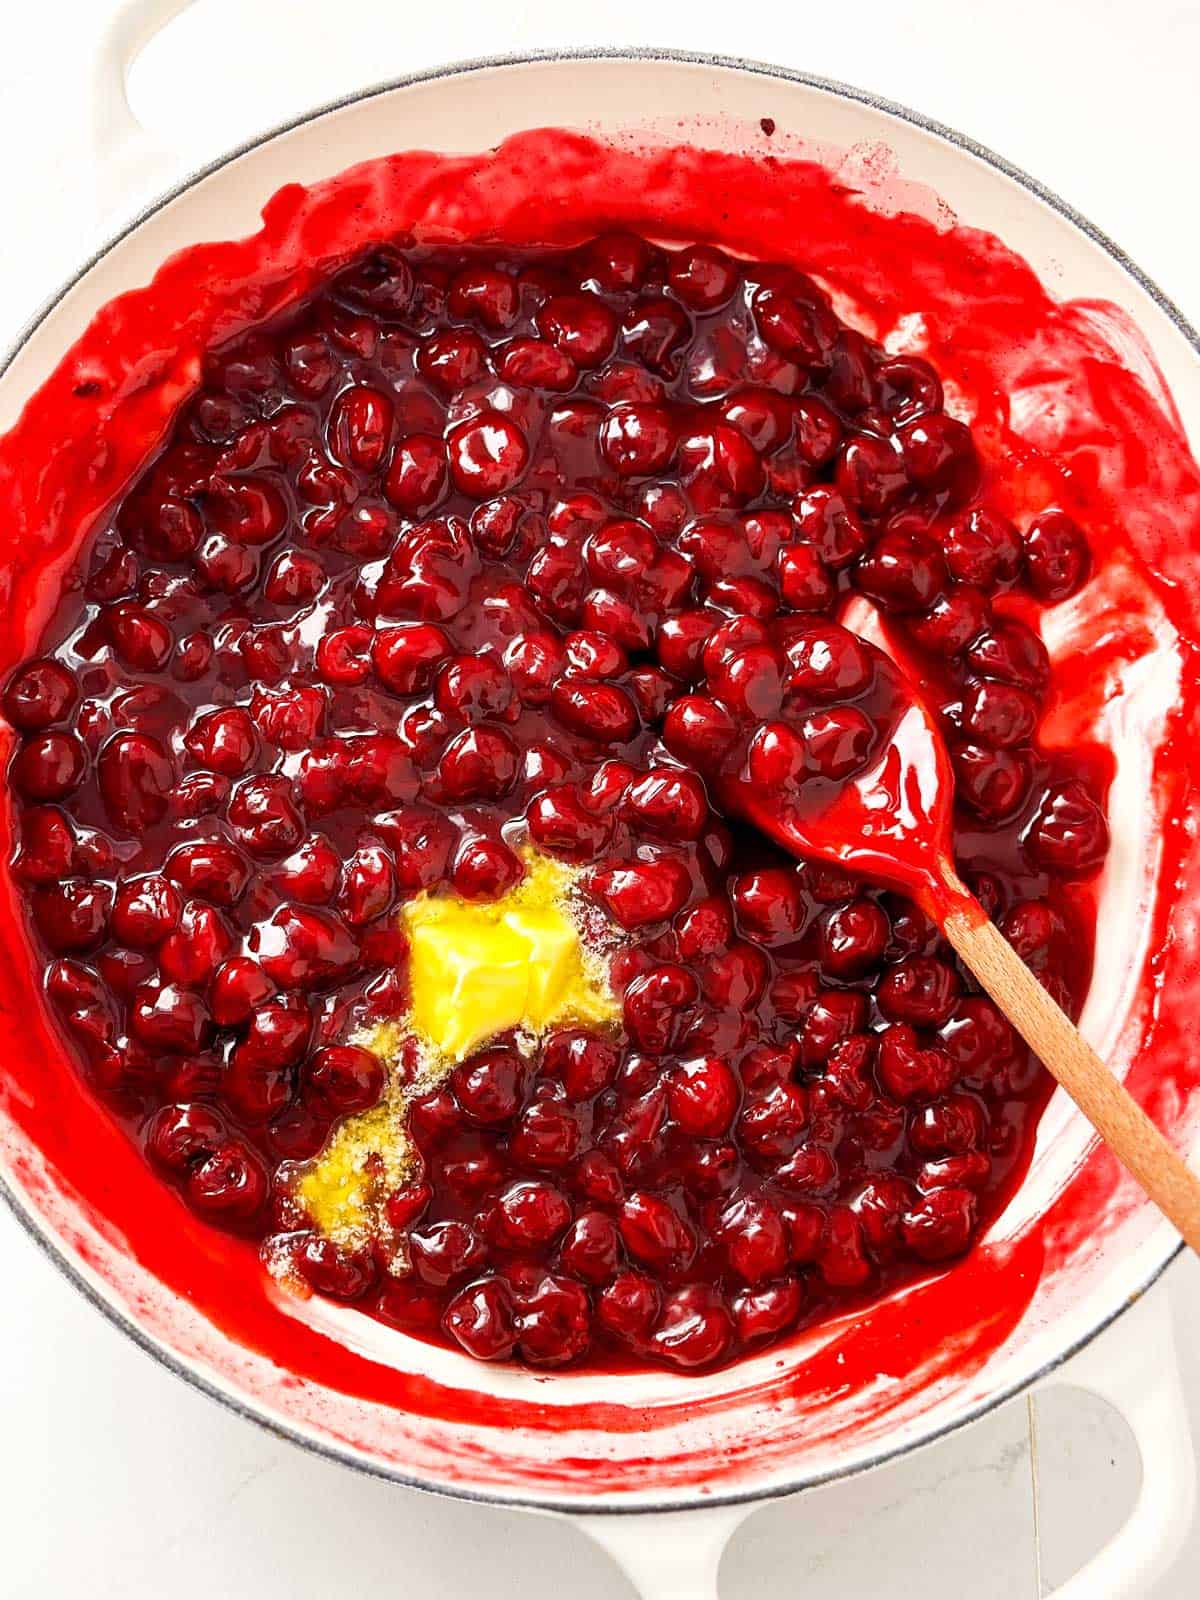
Taste the filling and add up to 2 tablespoons lemon juice to achieve your preferred tartness. Stir in the butter until melted, then taste and adjust if needed.
- If the filling is too sour, add a little more sugar.
- If it’s too runny, add a little more cornstarch slurry (never add the cornstarch directly to the hot filling! This will cause lumps. Always dissolve in cool water first!)
- If it’s too thick, add more water, tablespoon by tablespoon.
- If the filling seems too bland, add a little more vanilla extract or cinnamon.
4. Cool:
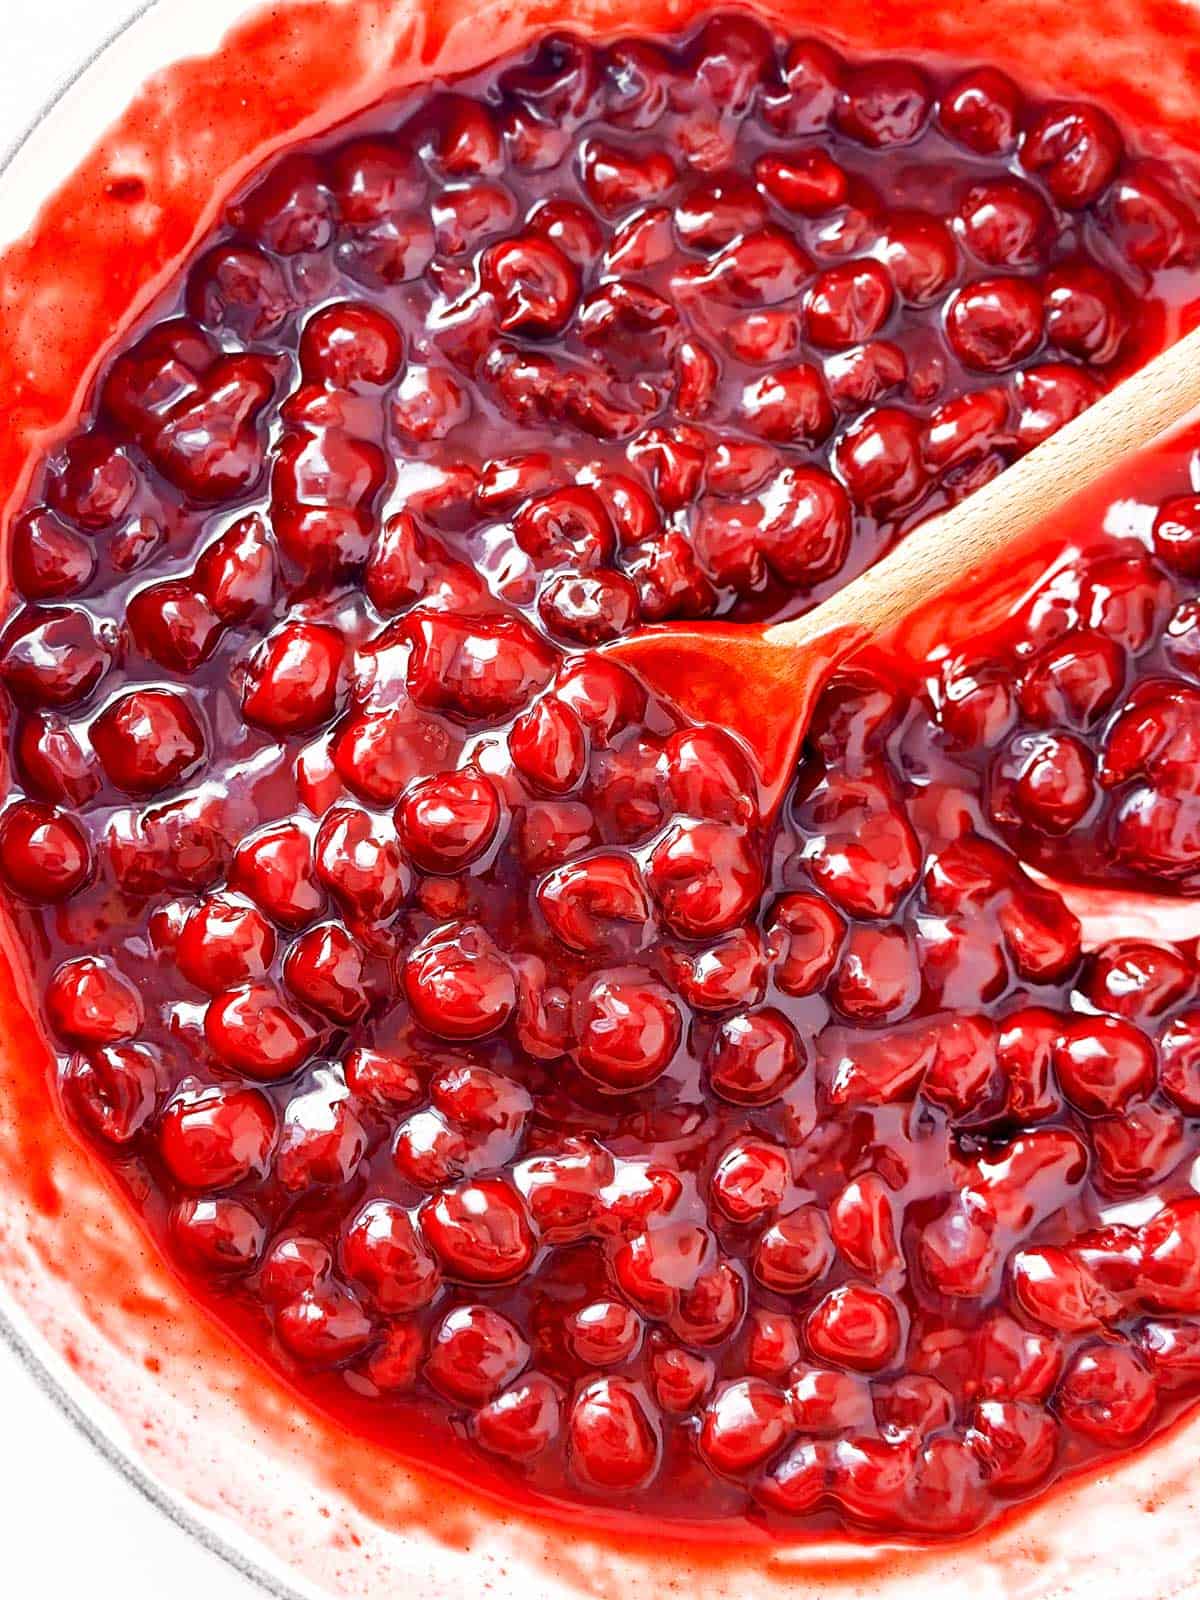
Transfer the filling to a wide, shallow bowl (if you have it) for faster cooling. If you’re not in a hurry, you can just leave it in the pan. The filling needs to cool completely to room temperature.
Adjustments for canned cherries:
- Strain the cherries, catching the juice, then place the juice in a wide pan, reserving ⅓ cup
- Add extracts, cinnamon and a small pinch of salt. Add sugar to taste (some cherries come in sweetened juice, so make sure to adjust for the cherries you have on hand). Bring to a boil.
- Dissolve ⅓ cup cornstarch in the ⅓ cup reserved juice. Take the pan off the heat and whisk in the cornstarch slurry until fully incorporated.
- Put the pan back over medium-low heat, stirring constantly, until thickened. Stir in the lemon juice (if needed) and butter. Stir in the cherries, adjust for taste and texture as described above and allow to fully cool to room temperature.
Assembling the pie
Assembling the pie is not that tricky, but there’s a lot of planned chilling and oven preheating going on to keep the crust as well-chilled as possible while working on your pie, and to make sure you get the best bake!
Note: I highly recommend generously buttering and then placing your 9-inch pie dish in the freezer for 15 minutes before rolling out the bottom crust!
1. Prepare the bottom crust:
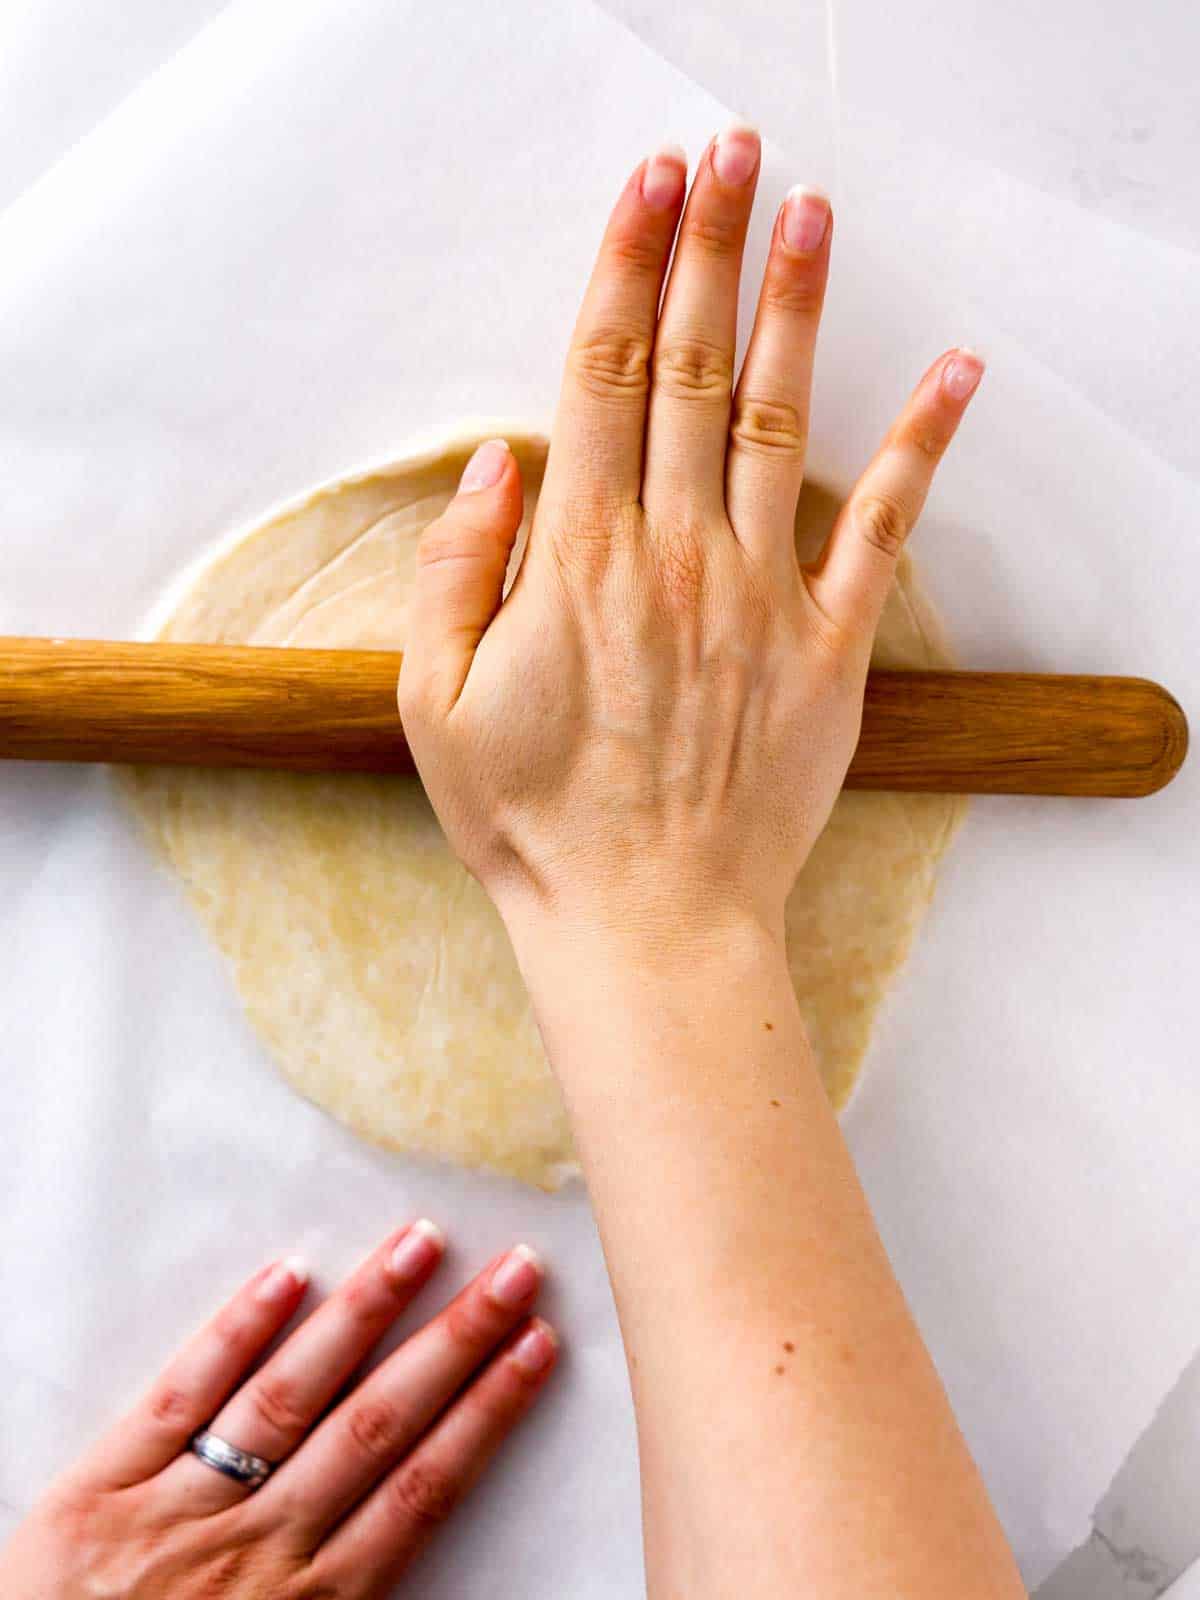
Remove one pastry disc from your fridge. Place it between two sheets of baking parchment or between two pieces of plastic wrap. Roll it into a circle 1-inch larger than your pie dish
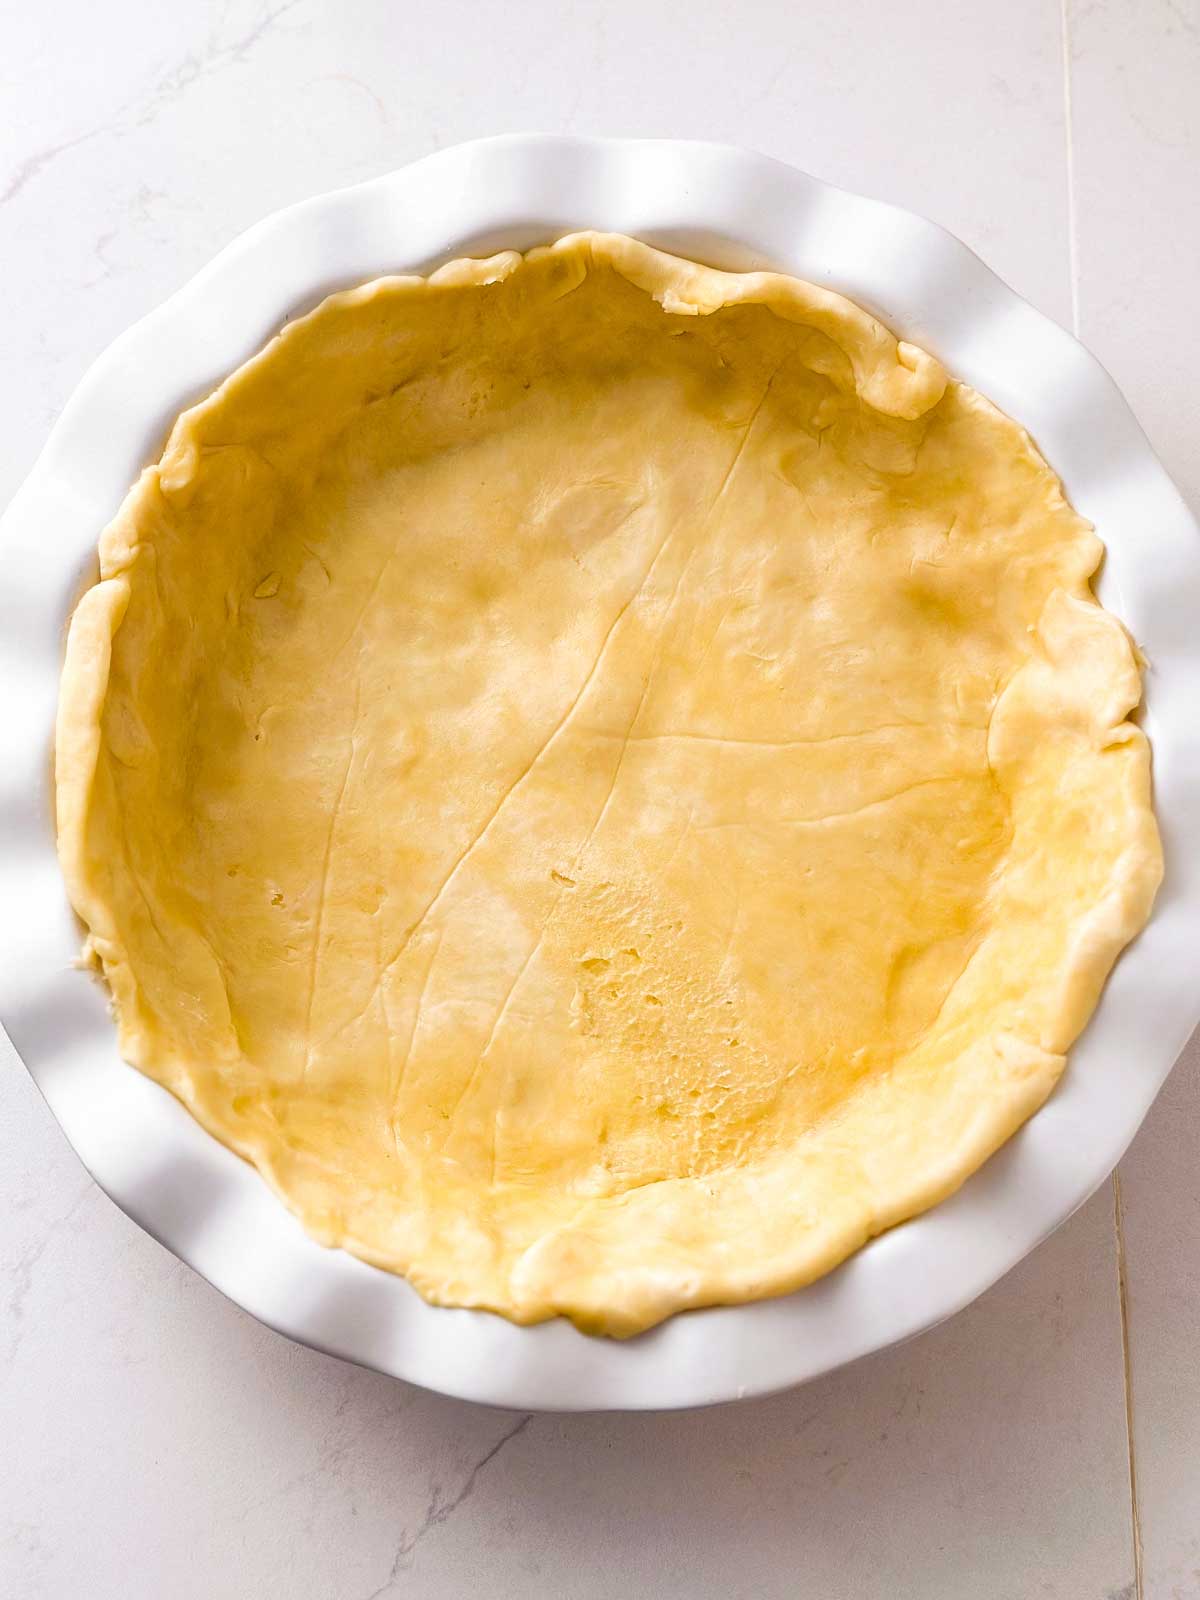
Transfer the rolled out crust into the buttered, chilled pie dish (this is easy if you halfway roll it over your rolling pin, lift it into your pie dish and then carefully unroll.
Leave any overhang, you’ll use it to fold over the lattice to create a crimped edge in the end.
Place the dish into the fridge to chill until the top crust is prepared (rolling and handling warms it up, you want the bottom crust to be extremely well chilled to keep it from getting doughy and soggy).
2. Prepare the top crust:
Before you begin: Before you start this next step, place a foil-lined baking sheet in the lower ⅓ of your oven. Turn on the oven and heat it to 425°F while you continue working on the pie. Heating up the baking sheet provides a hot surface to put your pie dish on to help the bottom crust brown and cook through.
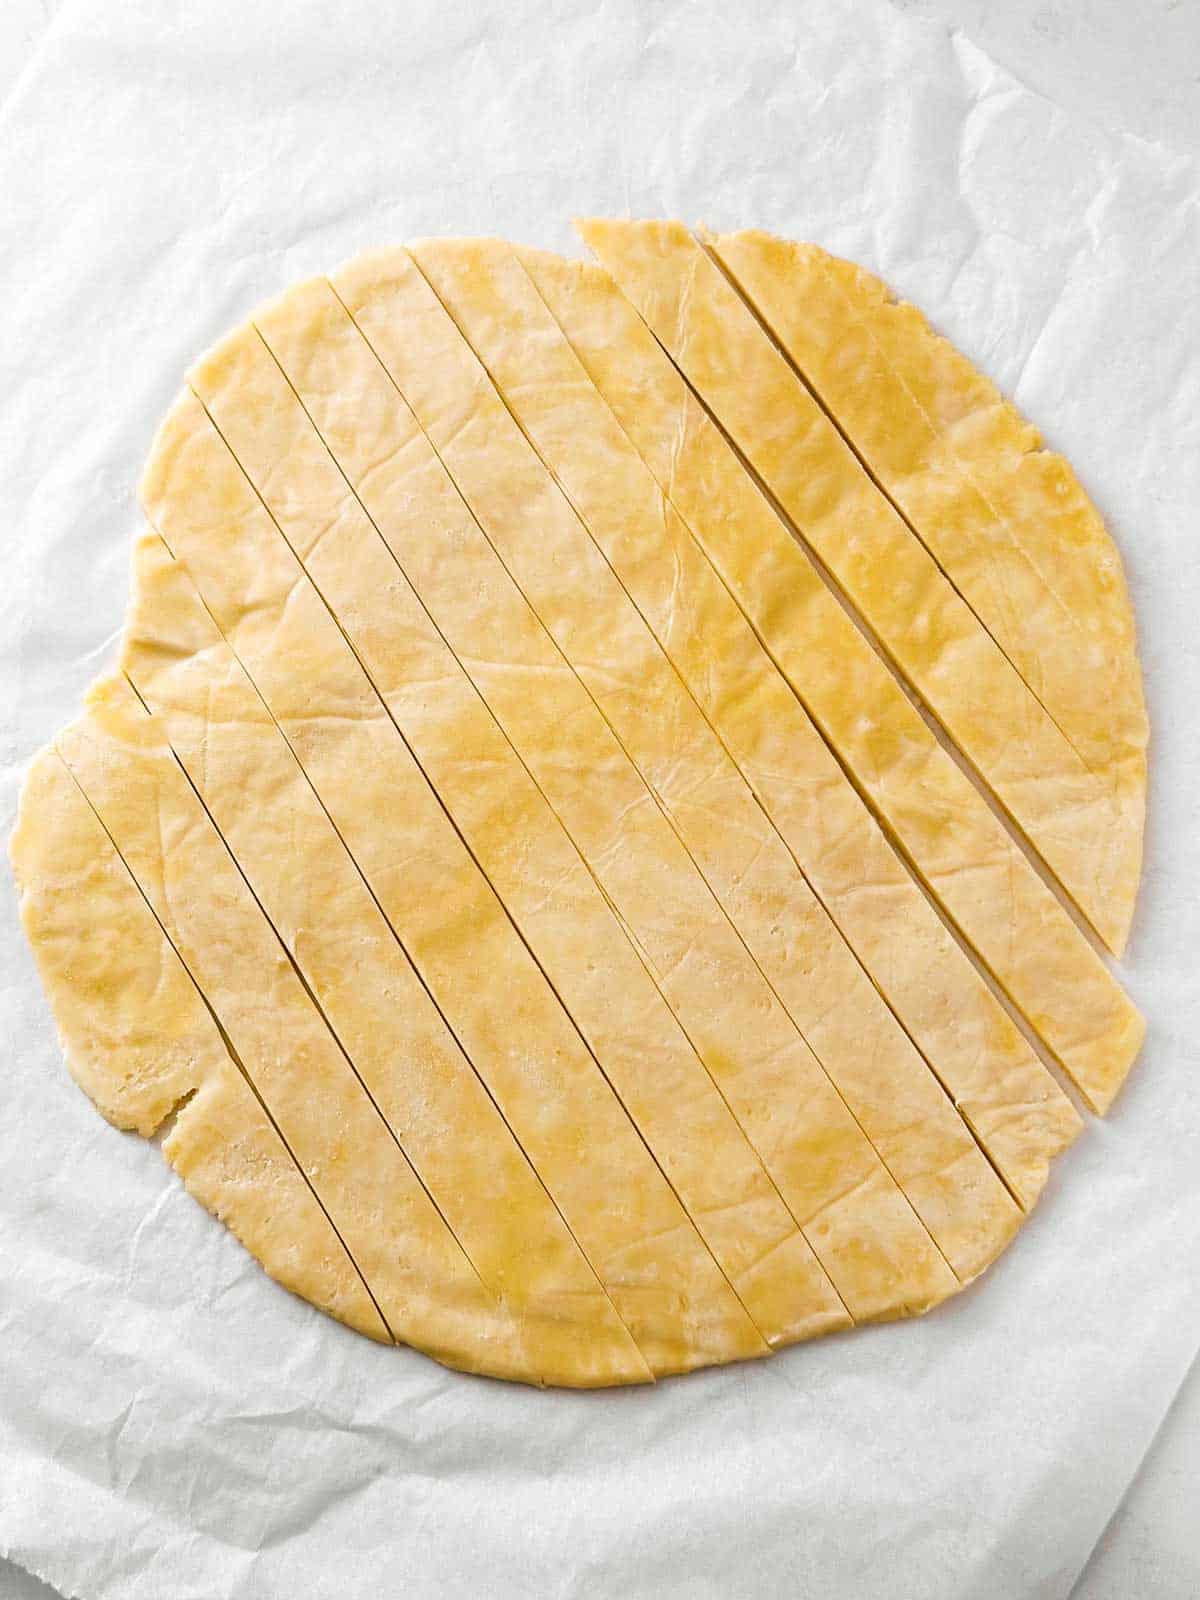
While the bottom crust is chilling, roll out the top crust into the same-size circle as before. Cut it into evenly sized strips – I like to make them about ⅓ – ½ inch thick.
Place it back into the fridge (not in the freezer; you want the top crust strips cold, but not too cold, or the lattice weave will be more difficult).
3. Assemble the pie filling and lattice weave:
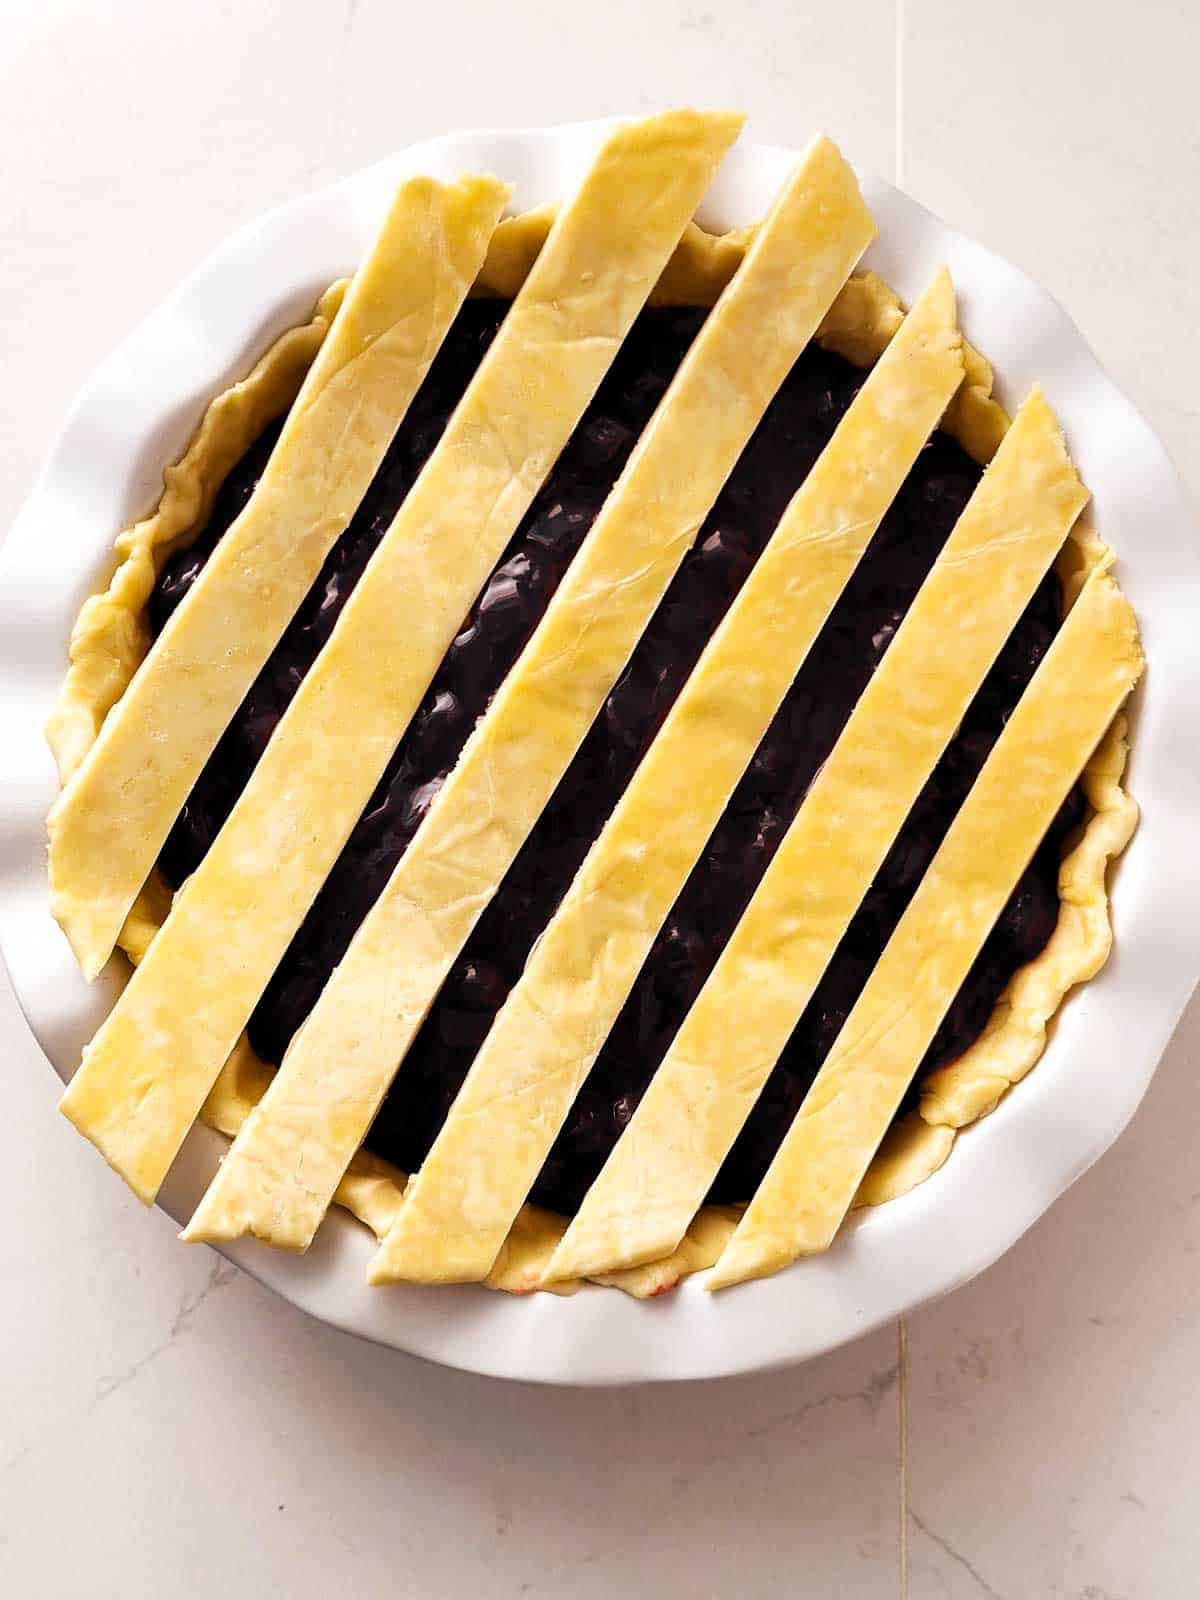
Remove the pie dish from the fridge. Immediately spread the cooled filling in the crust.
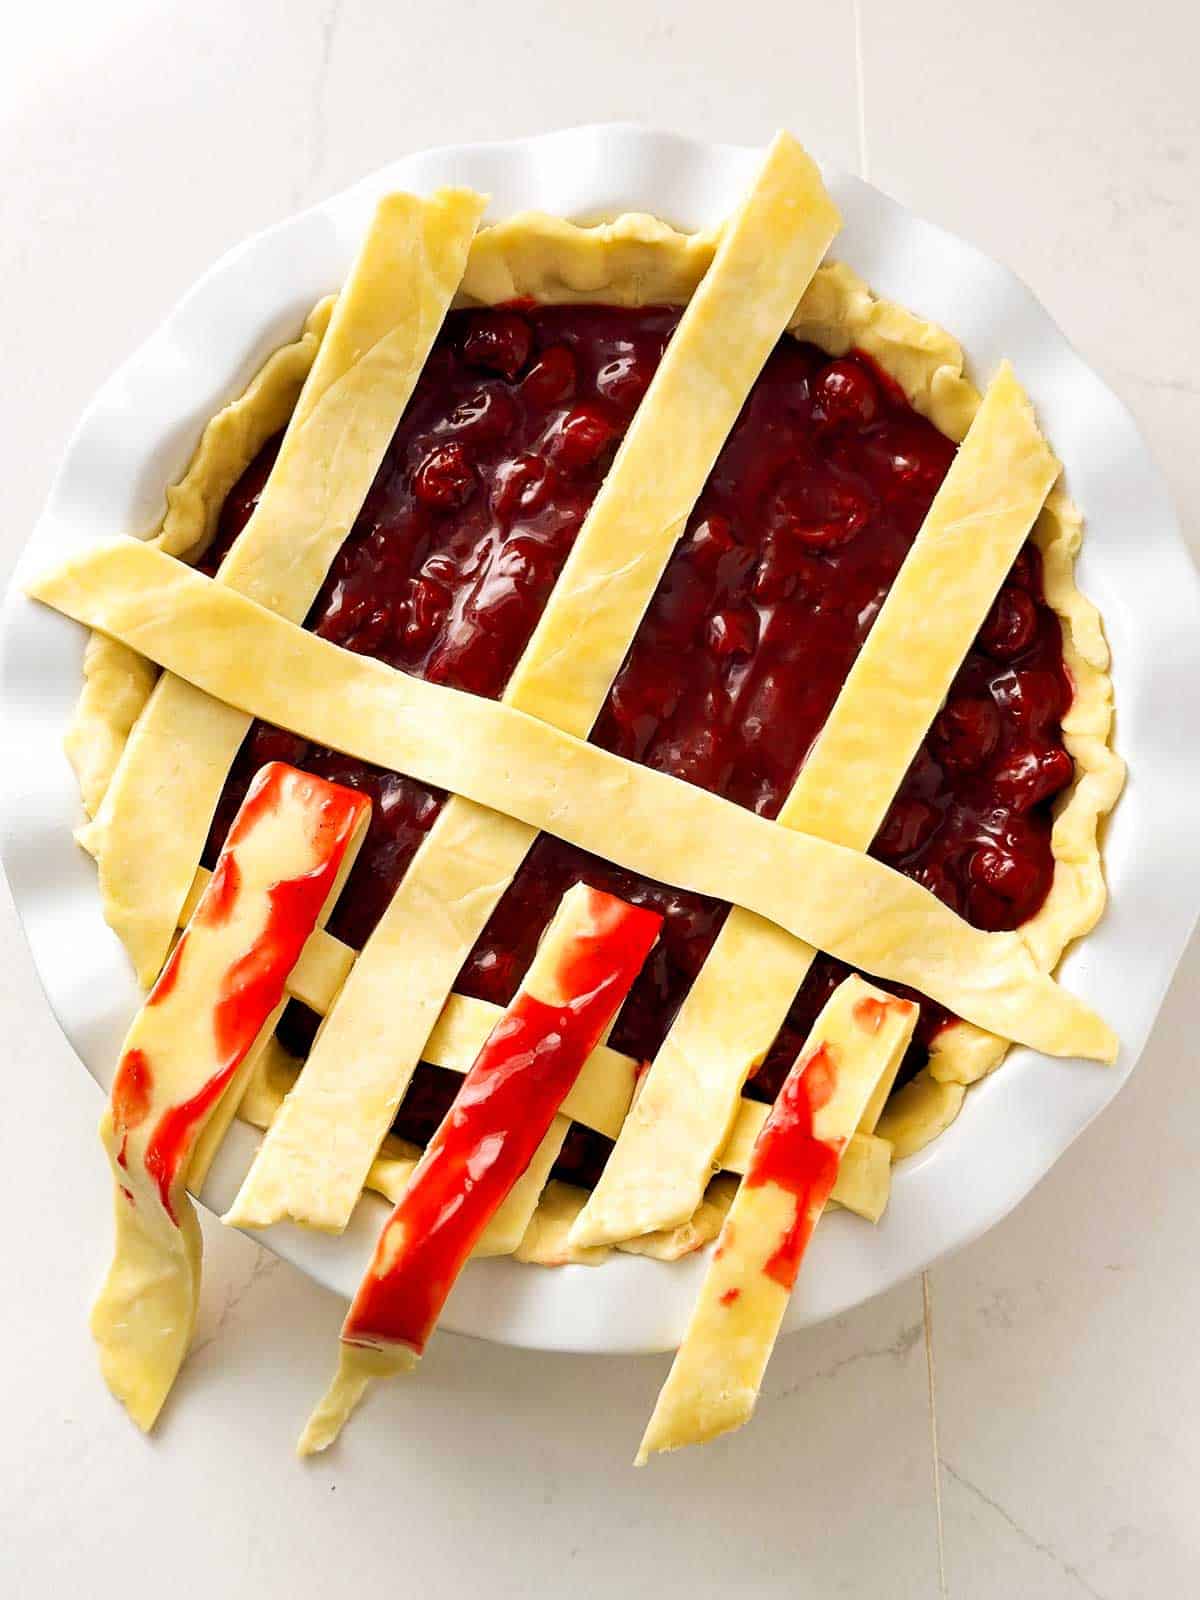
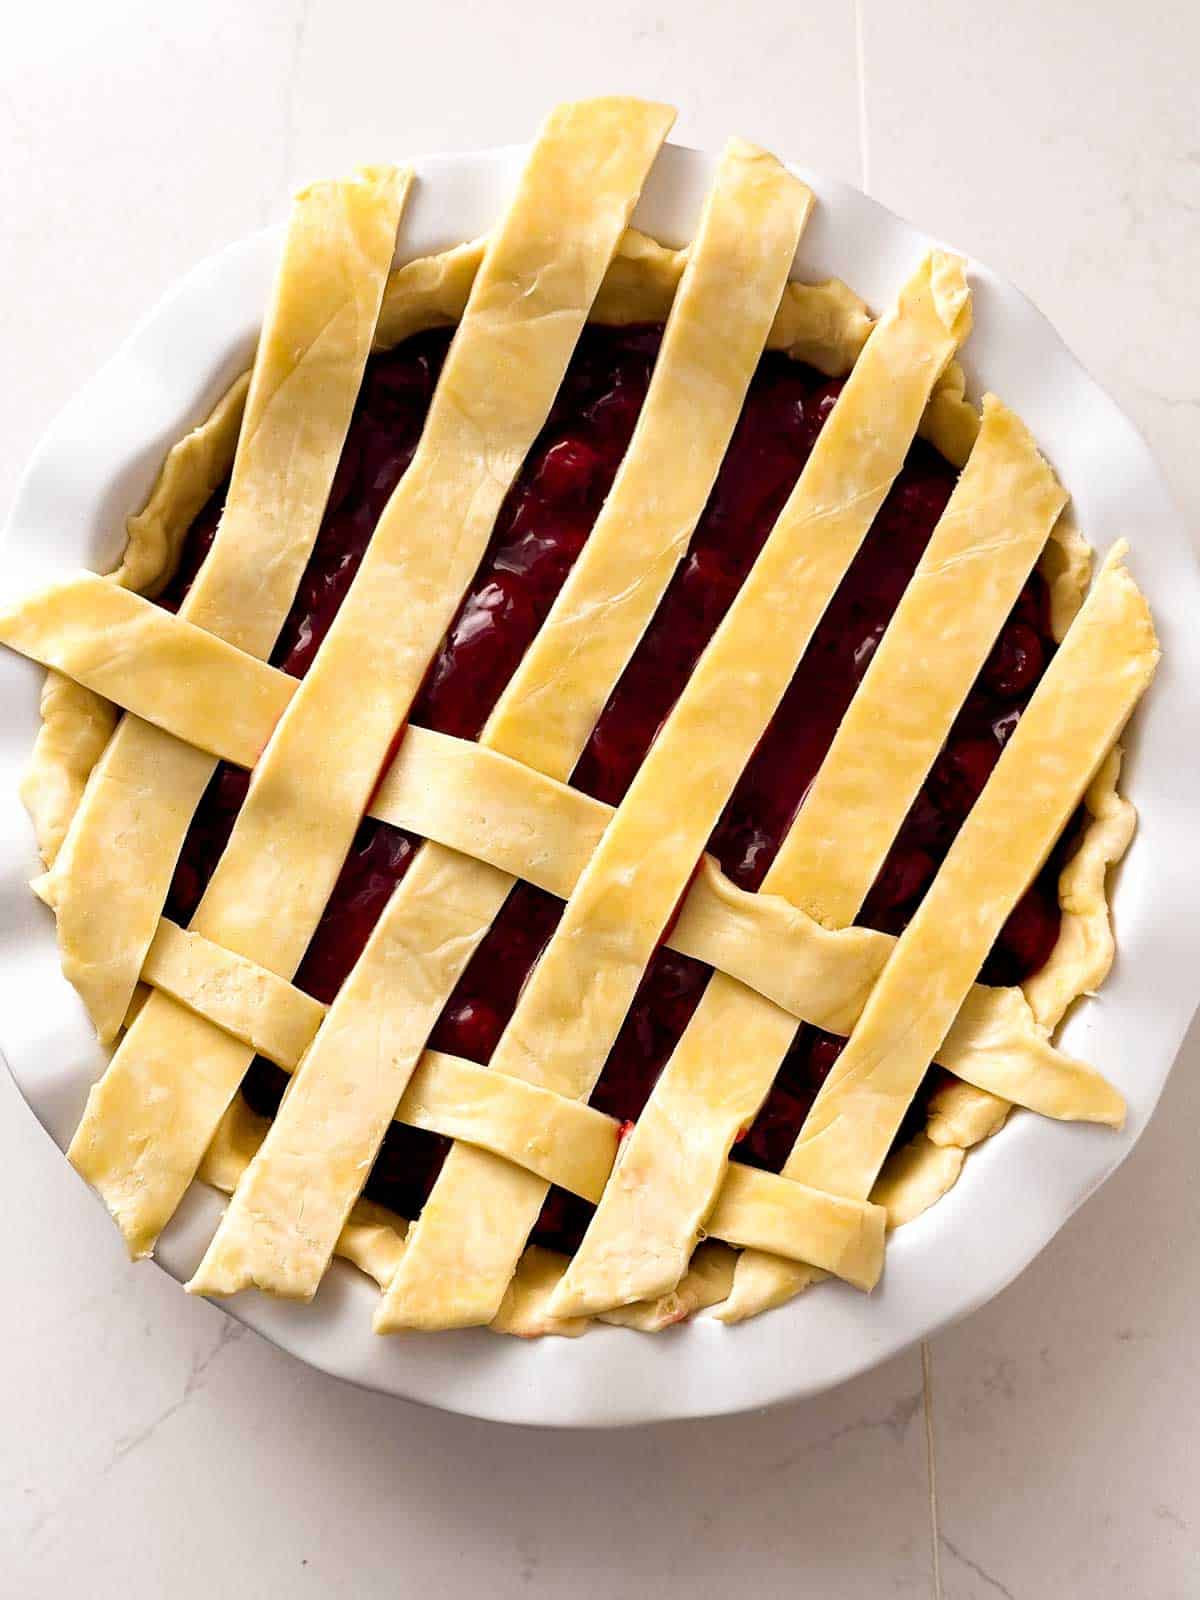
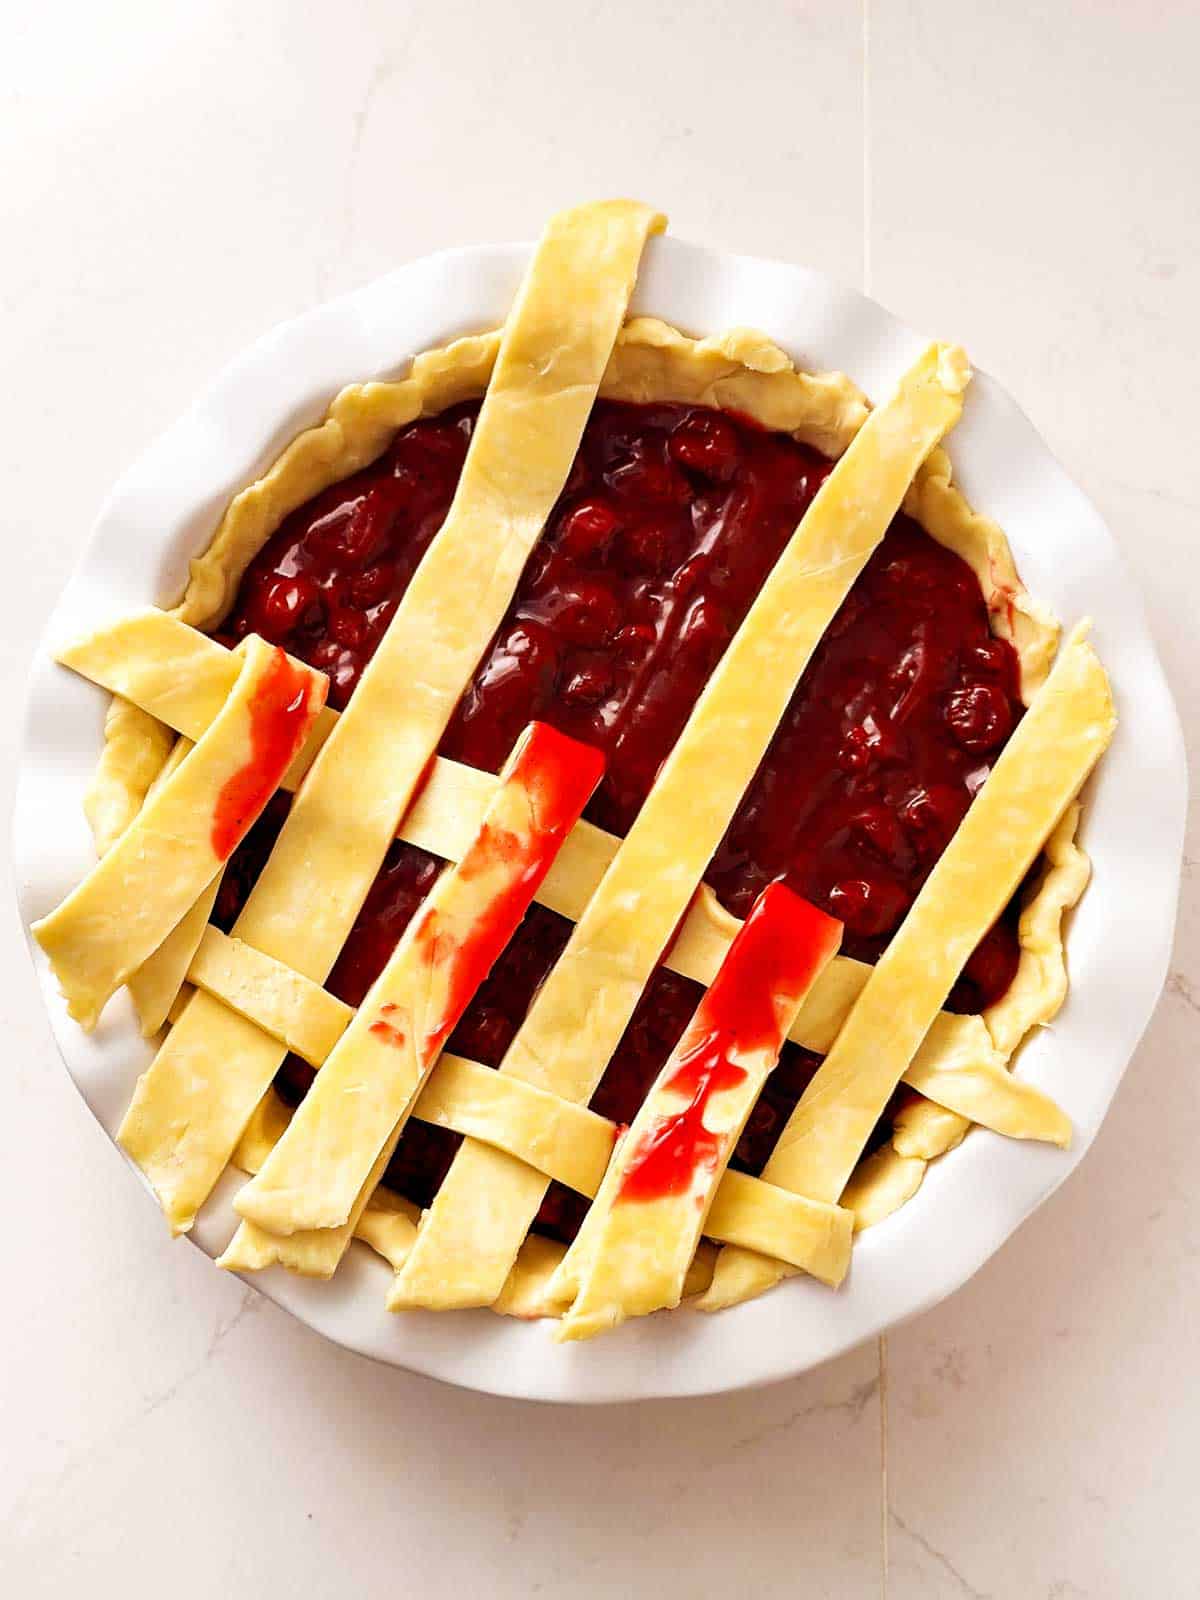
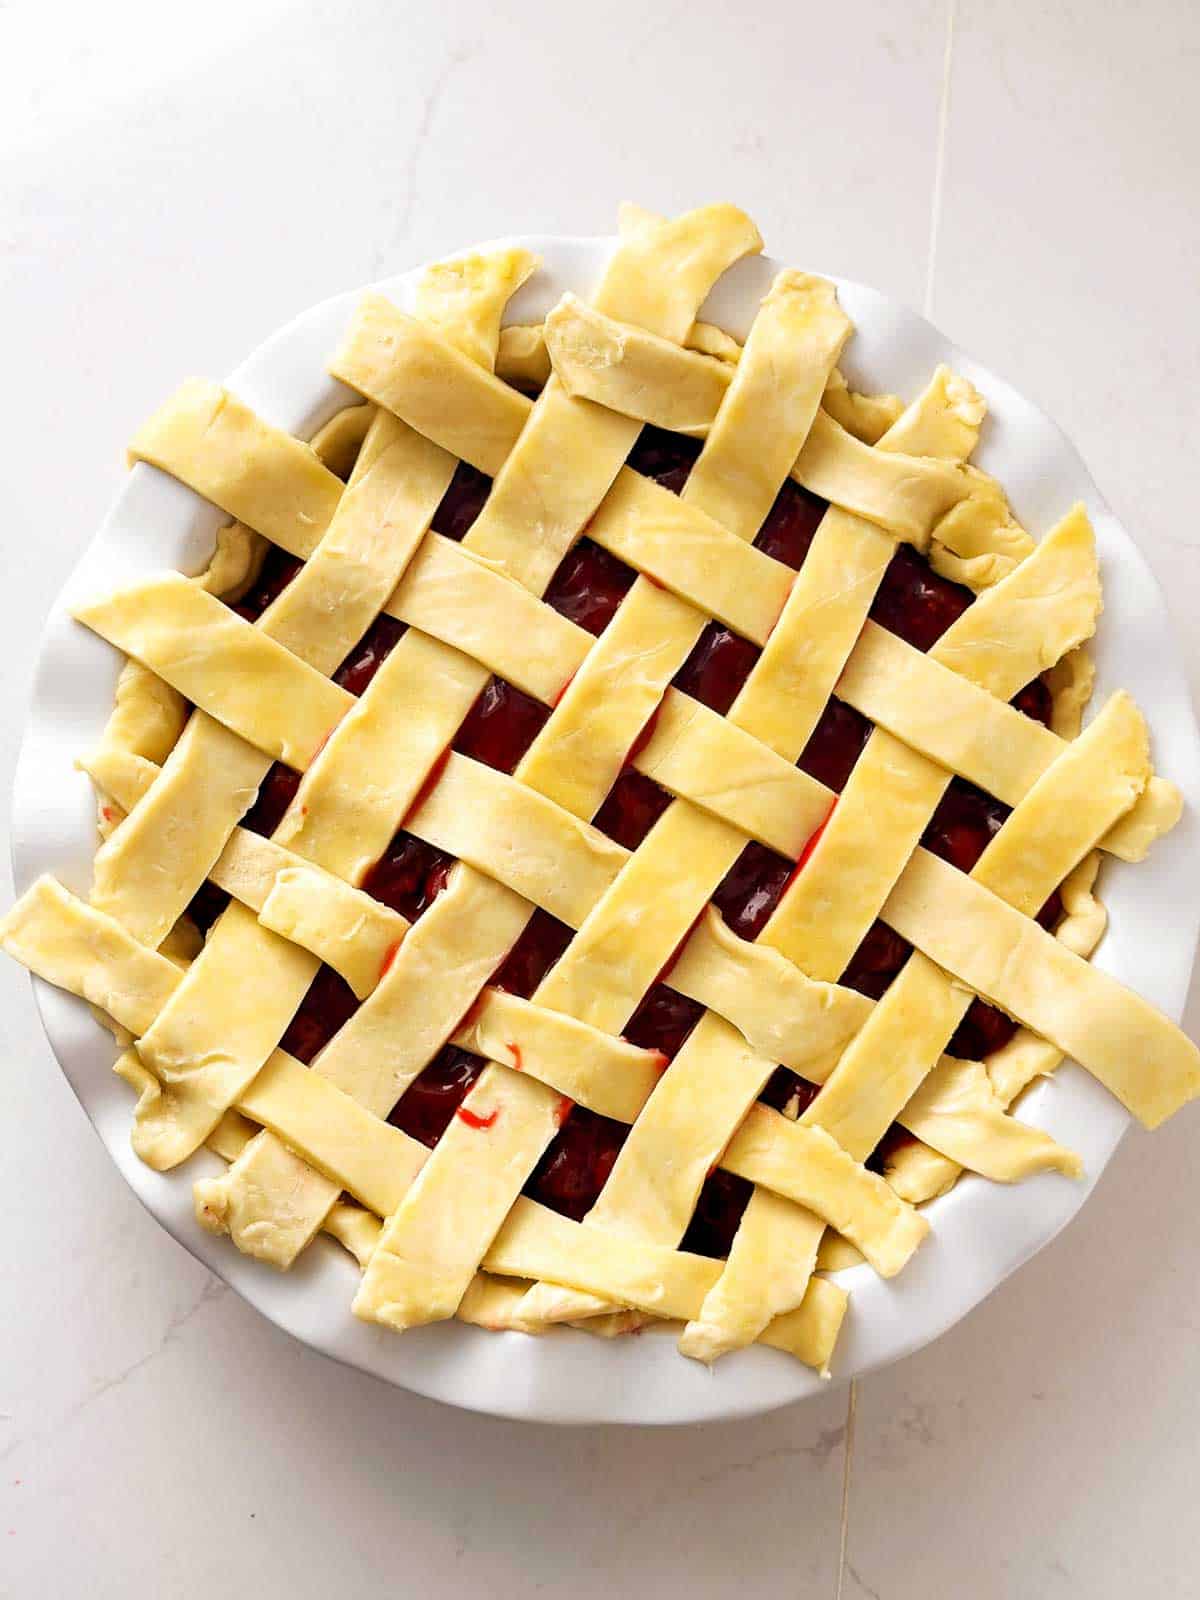
Remove the top crust from the fridge. Assemble into a lattice weave:
- Place half of the pastry strips on top of the pie in the same direction, making sure to choose strips with adequate length.
- Start placing pastry strips across, in a one-up, one-down pattern. I find this easier by flipping back the pastry strips I need to weave under, then flipping them on top of the pie again. In the next round, flip back the other strips and place your next pastry strip across.
- Continue weaving your pastry strips across until the pie is covered.
4. Crimp and finish:
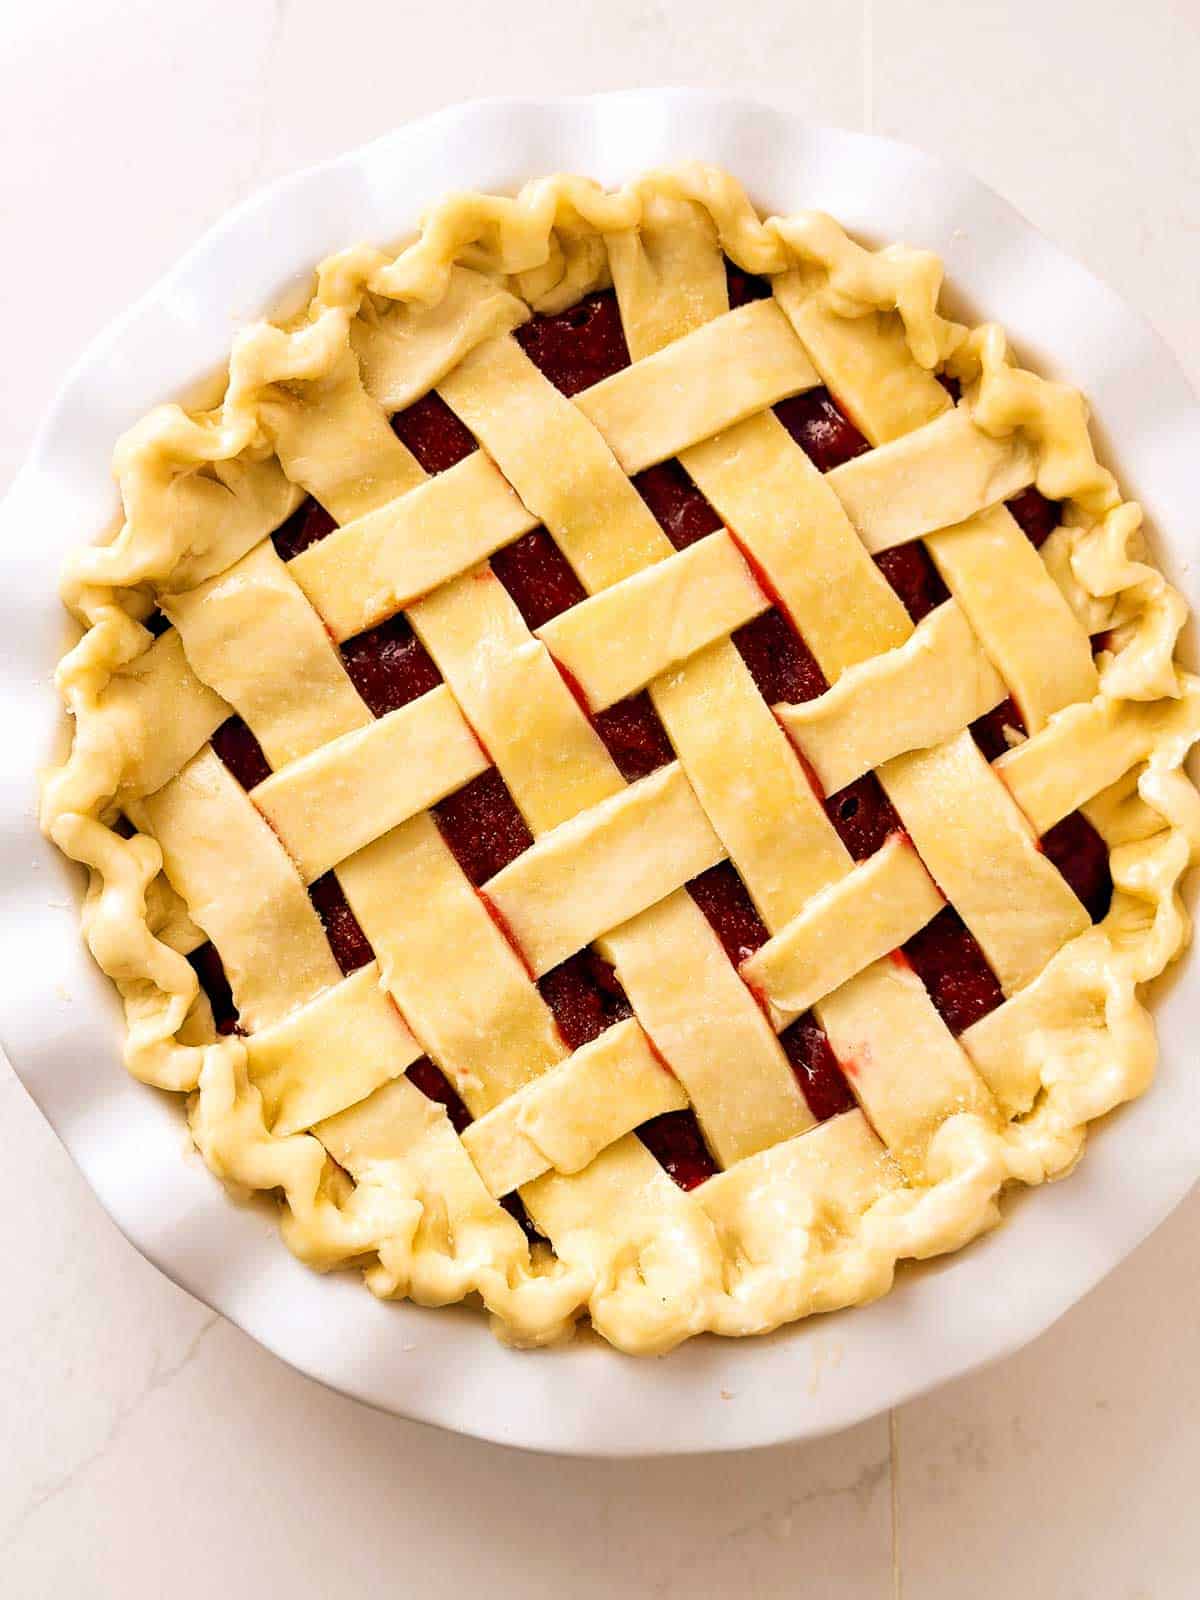
Arrange the excess pie crust around the pie by folding it to the side; or trim the excess and arrange it in a circle around the edge. (The goal here is to create a thicker crust edge you can crimp). Fold any overhang from the bottom crust over this edge.
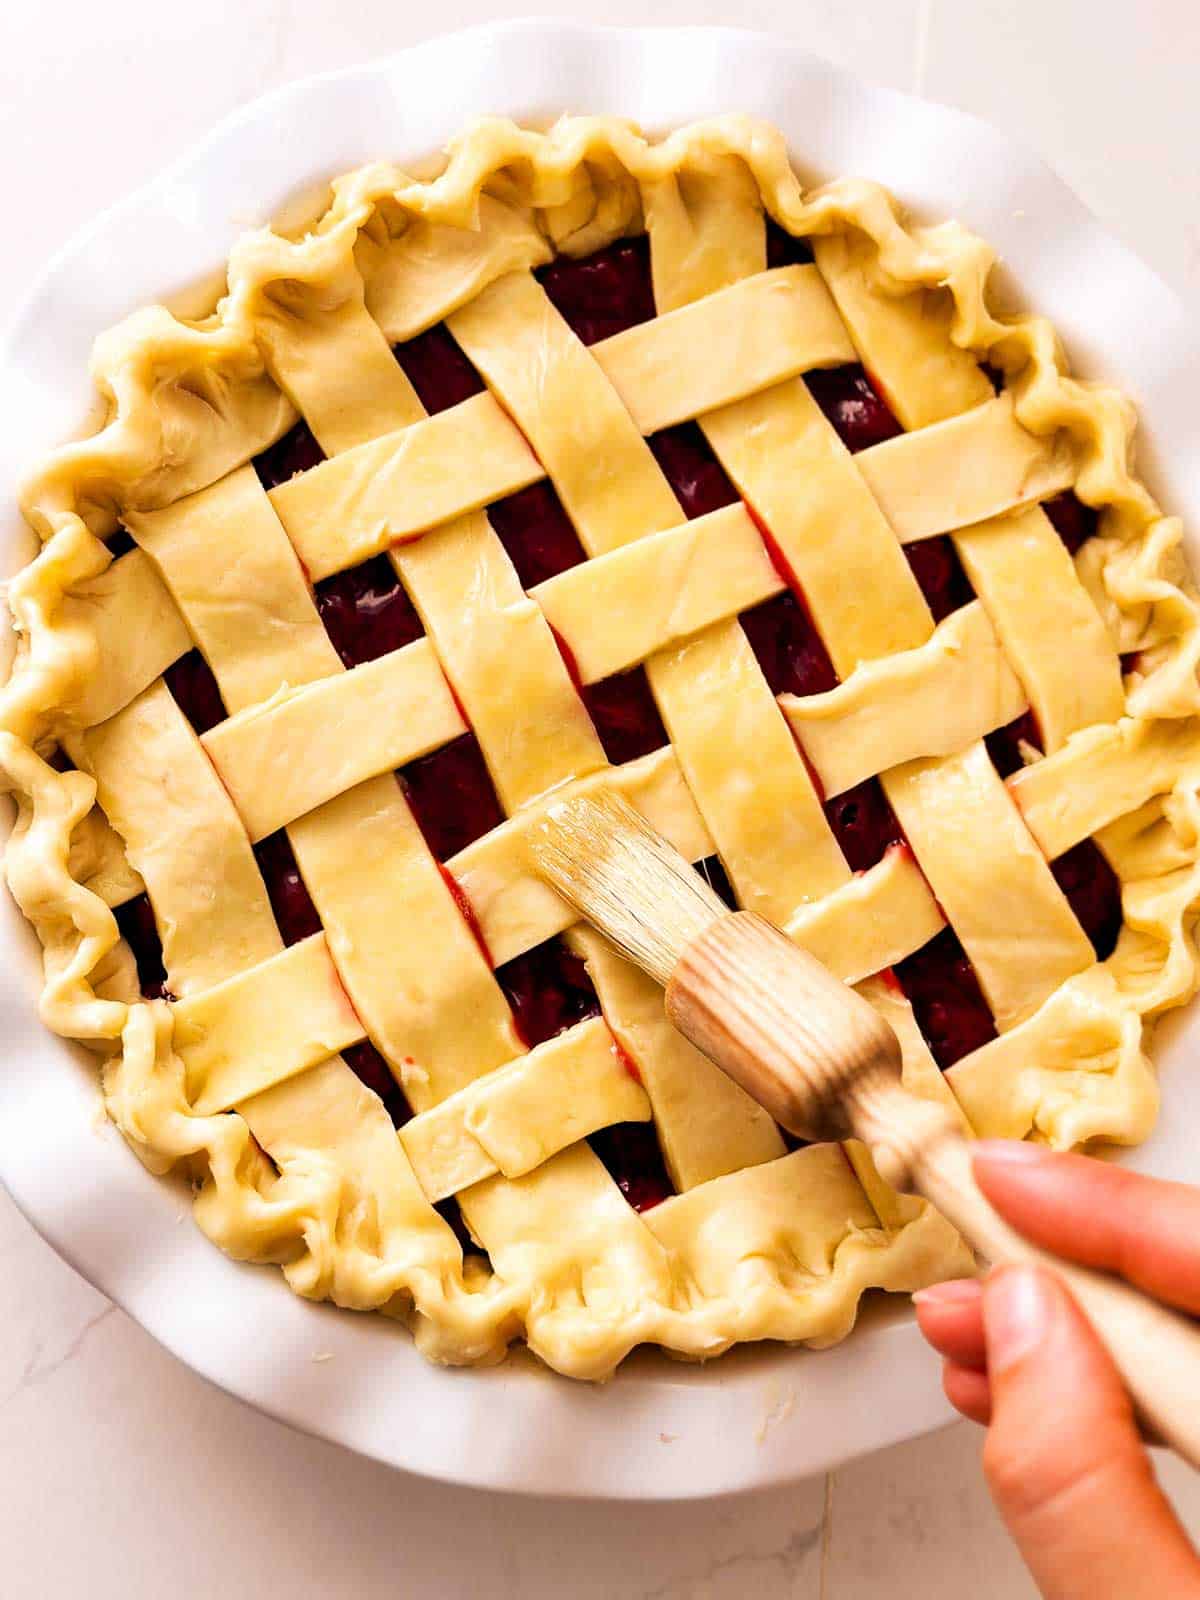
Crimp the edge all around, then brush the lattice and the edge with egg white and sprinkle with a little bit of granulated sugar.
Bake and cool the pie
Baking
Baking and cooling the pie correctly is about as important as keeping the pastry chilled! Don’t chill the filled pie, you’ll want it in the oven ASAP or the bottom crust will get soft and soggy from the filling seeping into it.
Place your pie on the prepared baking sheet in the oven. Bake it at 425°F for 20 minutes, then reduce the heat without opening the oven door to 375°F and finish baking for 30-40 minutes.
After 20-30 minutes in the oven, you may notice the edges getting too brown – cover with foil or a pie shield to keep them from burning!
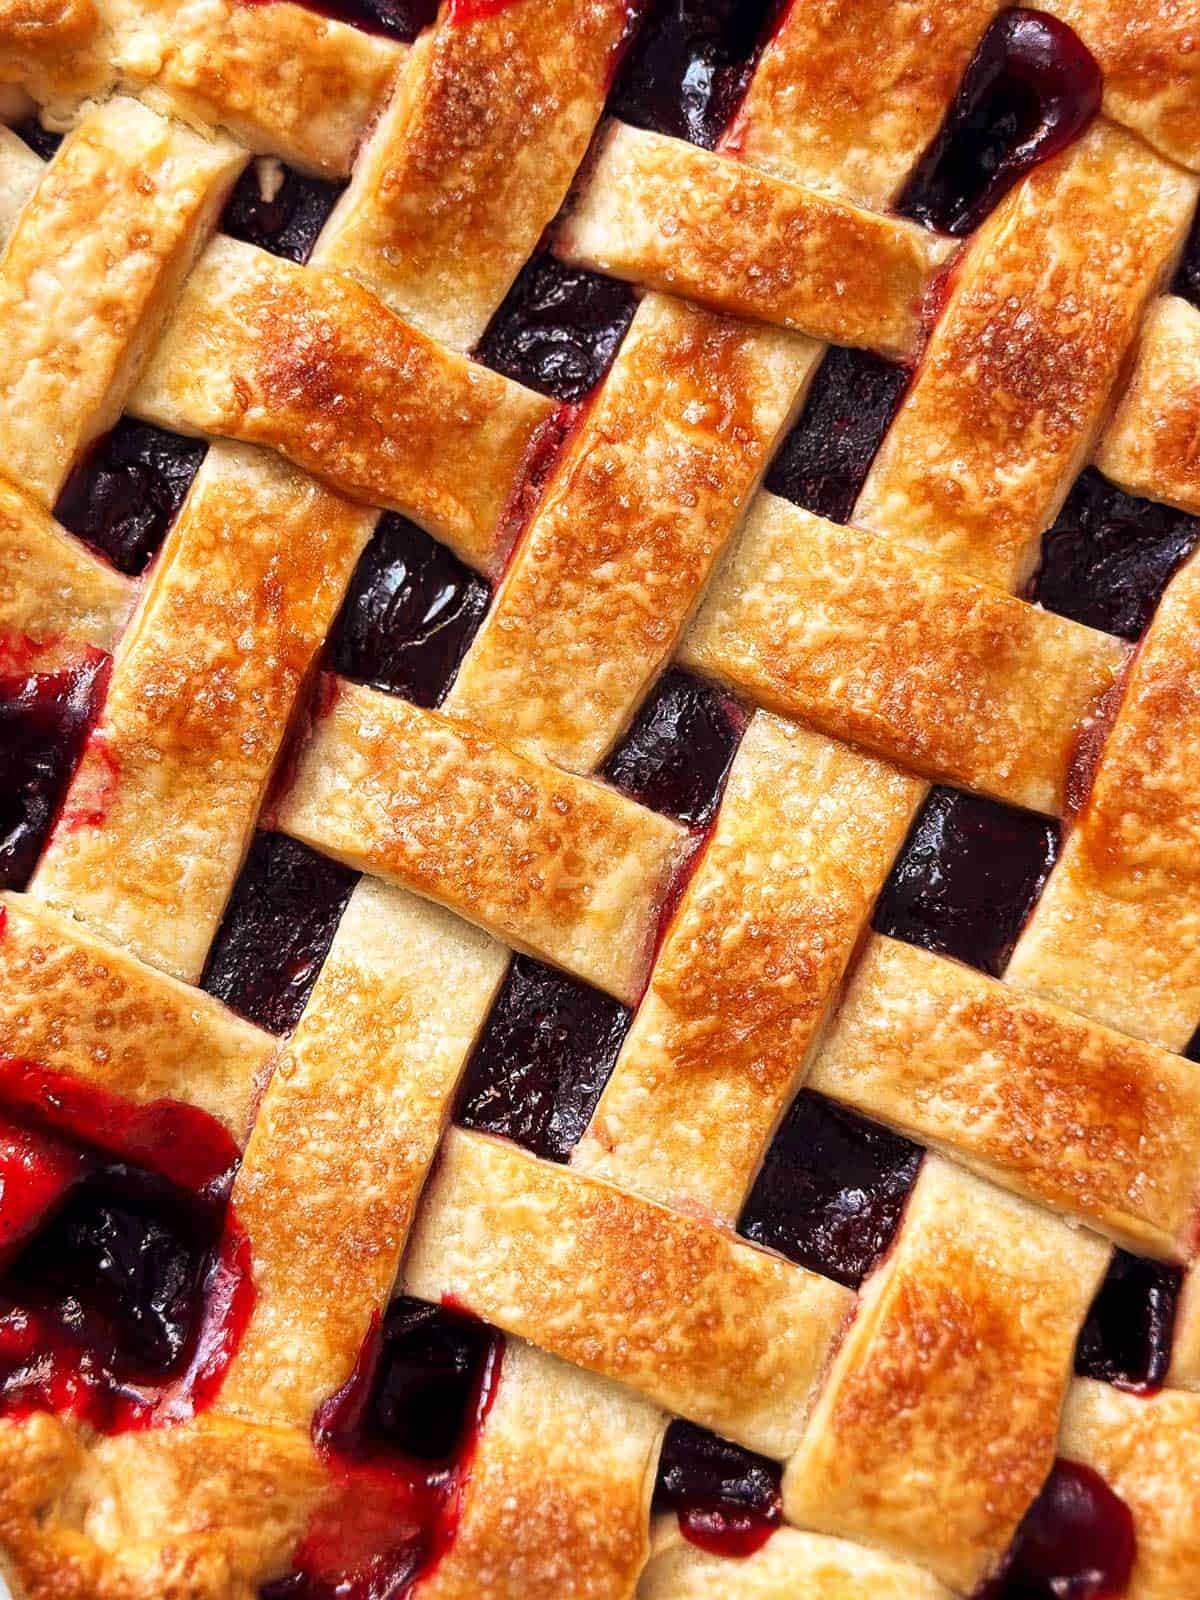
The pie is done when the crust is golden-brown, flaked up and the filling is starting to bubble up between the lattice around the edges.
Cooling
Once the pie is baked, turn off the oven and remove it using thick oven mitts. Remove any foil or pie shield (careful, hot!).
Place the pie on a cooling rack and allow it to cool for at least 2-3 hours. After about 2 hours it’s sliceable but still warm. For perfect slices, wait at least 4 hours before slicing to serve!
Top tips
- Keep the crust well-chilled: Pie crust only comes out flaky if you chill it well. The butter in the dough must remain solid until it melts in the oven, creating those perfect flaky layers. Chill the dough for at least 2 hours before rolling it out, the longer the better. Chill the pie dish before adding the crust. Once it’s rolled and in the dish, chill it again.
- Don’t use warm filling: Make sure your filling has completely cooled to room temperature before adding it to the unbaked crust, or it will soften and warm up the crust, resulting in a soggy bottom and tears in the crust.
- Follow the baking directions exactly: Make sure to place the pie on a hot baking sheet in the lower ⅓ of your oven (pie needs more heat from the bottom than from the top). Bake at 425°F for the first 20 minutes, then reduce the heat 375°F without opening the oven and finish baking for 30-40 minutes.
- Keep pie from browning too much: Your cherry pie is ready when the crust is golden and the filling has just started bubbling up around the edges. Cover the pie crust edge with foil or a pie shield after 20-30 minutes in the oven. If you notice the lattice crust browning too much before the pie is ready, tent the entire pie with foil. This shields the crust from direct heat and prevents over-browning while allowing the pie to cook through.
- Cool pie on a cooling rack: You must place the pie on a cooling rack to allow hot air to escape on the bottom. Otherwise, the bottom crust may get soggy.
- Allow enough cooling time: For the easiest slicing and to avoid a runny filling, let the pie cool completely before cutting. Ideally, allow it to cool for 4 hours, but if time is tight, a minimum of 2 hours will be enough. Slicing into a too-warm pie can cause the filling to ooze out, so resist the temptation to dig in too soon!
Helpful hints
Leftovers
Keep leftovers covered on the counter for up to 2 days.
Make ahead
You can prepare the pie dough and filling ahead of time if needed:
- Pie crust: Wrap the prepared pastry tightly in plastic wrap and store it in the fridge. It will stay fresh for up to 2 days, ready for rolling out whenever you’re ready to assemble your pie.
- Cherry Filling: After cooking the filling, cool it for 30 minutes to room temperature. Transfer it to an airtight container and refrigerate. It will keep well for up to 4 days.
Then, you can easily assemble and bake your pie the day-of. This is especially great for special occasions and holidays!
Freezer storage
You can freeze a fully baked and cooled cherry pie, preserving its deliciousness for up to 3 months.
- Wrap it tightly in plastic wrap, and then in foil.
- Label with the name and use-by date.
- Freeze for up to 3 months.
To serve, thaw it overnight in the fridge and let it come to room temperature before slicing and serving. This way, you can enjoy a freshly baked pie whenever you like!
Serving tips
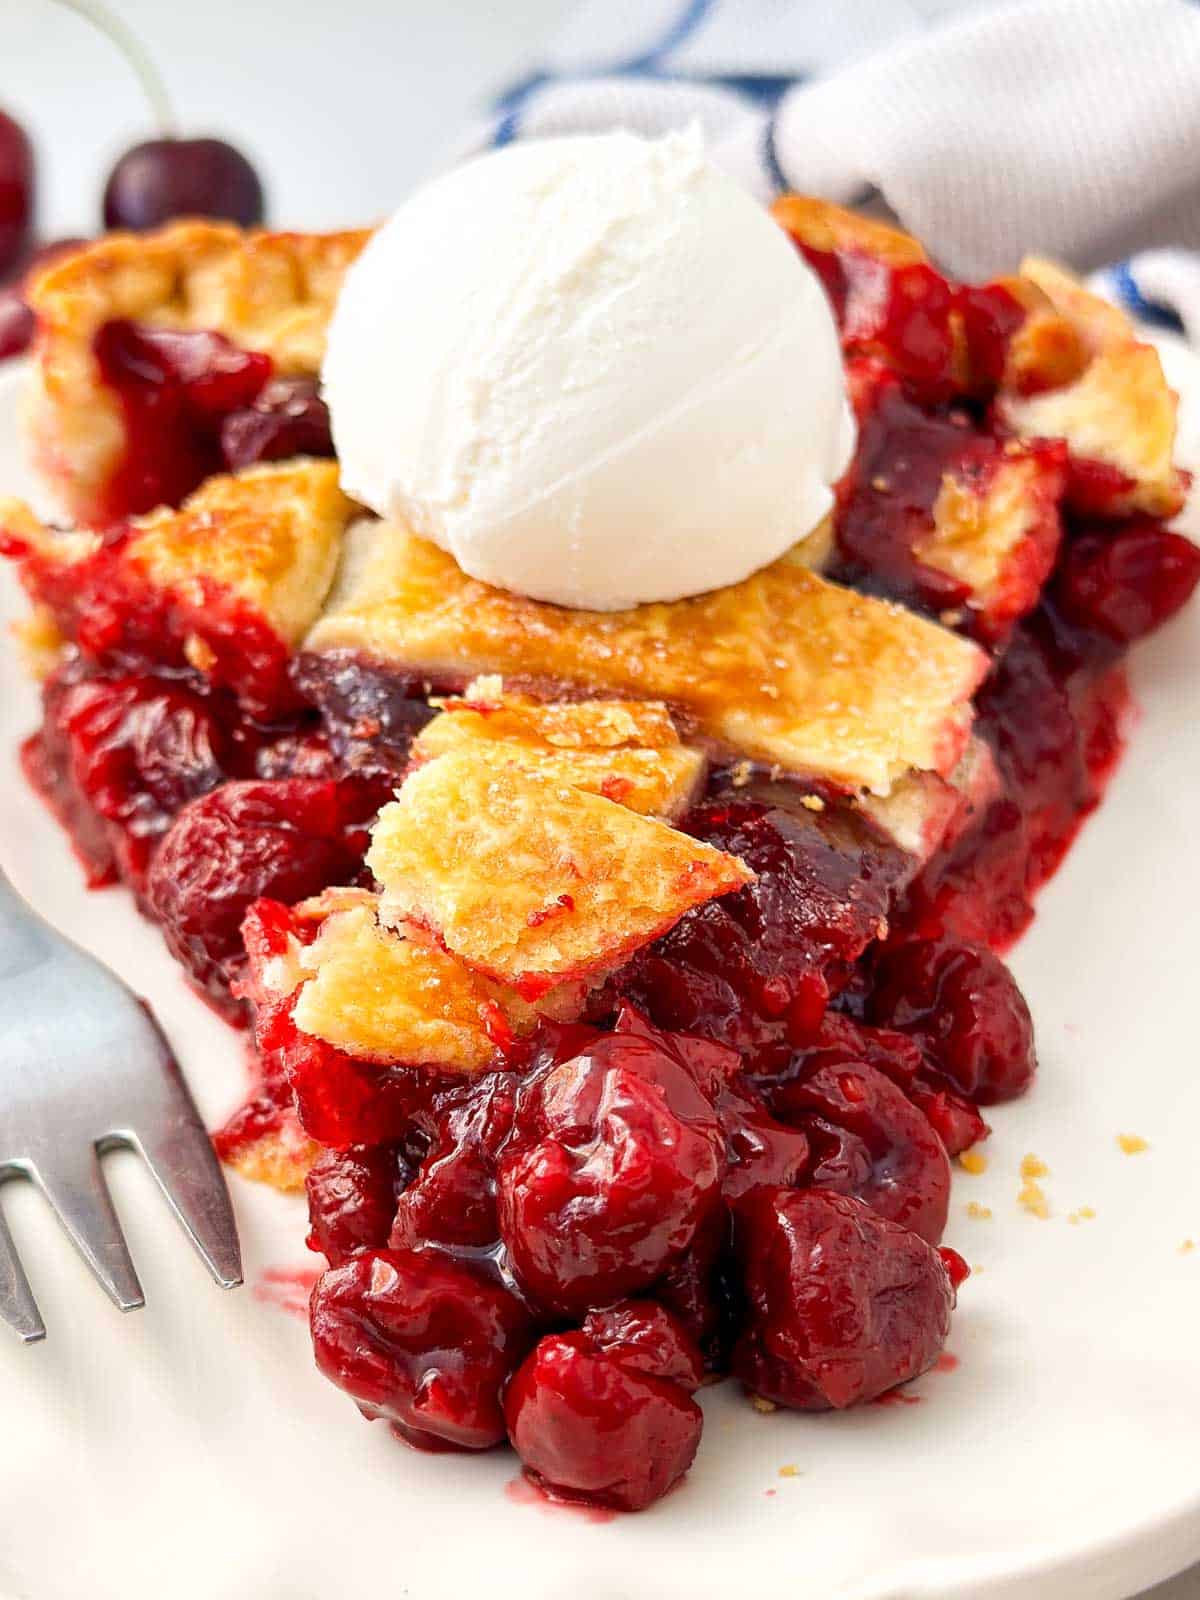
A scoop of vanilla ice cream is a classic pairing for cherry pie, but a little bit of whipped cream is just as delicious. Sometimes I like to have a scoop of vanilla Greek yogurt with my slice, especially if I’m eating some leftover pie as a snack 😉
If you’re baking a cherry pie for a fall or winter celebration, warm vanilla custard is really good, too.
PS If you try this recipe, please leave a review in the comment section and add a star rating in the recipe card – I appreciate your feedback! Follow along on Pinterest, Facebook or Instagram.
Printable recipe
Classic Cherry Pie
Recipe details
Ingredients
- 1 pie crust for double crust pie homemade or store-bought
- 5 cups pitted sweet or sour cherries about 1.5-2 lbs; OR 1.5lbs frozen; OR 3 (14.5-oz) cans cherries; see notes for using canned!
- 1 cup sugar for sweet cherries use ¾ cup
- 1 teaspoon vanilla extract
- ⅛ teaspoon almond extract optional
- ½ teaspoon ground cinnamon optional
- ⅛ teaspoon salt
- ¼ cup cornstarch or more as needed
- 4 tablespoons cool water
- 2 tablespoons lemon juice
- 1 egg white mixed with 1 teaspoon water; brush pastry with heavy cream if not wanting to use egg
- 1 teaspoon granulated sugar or more to taste
Instructions
- Note about crust: If making homemade crust, make at least 2 hours in advance to ensure adequate chilling time!
Make filling
- Cook cherries: Place cherries in wide pan with sugar, vanilla extract, almond extract, cinnamon (if using) and salt. Bring to a boil over medium-high heat, then reduce heat to medium-low and simmer, uncovered, for 5-10 minutes until cherries have released juices.
- Thicken filling: Whisk cornstarch into water to make a slurry. Take pan with cherries off the heat, then quickly stir in cornstarch slurry, stirring constantly until fully incorporated into juices. Place pan back over medium-low heat and simmer filling until juices have thickened, about 2-3 minutes.
- Taste and adjust: Taste filling, add lemon juice to taste (tart cherries may not need any). If filling is too thick, thin out with 1-2 tablespoons water. If filling is too thin, thicken with a little more cornstarch slurry (please note that filling thickens as it cools; consistency should be jammy or filling will be too thick and unpleasant to eat).
- Cool filling: Allow filling to cool completely to room temperature. If needed, transfer to a wide shallow bowl to fasten cooling time, stirring from time to time.
Assemble pie
- Bottom crust: Once pie crust has chilled at least 2 hours, and filling is at room temperature, assemble pie. Before you begin, place a well-buttered 9-inch pie dish in freezer for 15 minutes. Then roll out bottom crust between two sheets of baking parchment or plastic wrap to a circle 10 inches in diameter. Fit into pie dish, leaving any overhang attached. Place dish in fridge to chill for 15 minutes.
- Prep oven: While bottom crust is chilling, place a foil-lined baking sheet in lower ⅓ of your oven. Turn on oven and preheat to 425°F.
- Top crust: Roll top crust into a circle 10 inches in diameter the same way as bottom crust. Cut into strips ⅓ – ½ inch wide. Place in fridge until ready to use.
- Assemble: Remove chilled dish with bottom crust from fridge. Spread pie filling in bottom crust, making sure to remove any air bubbles or gaps. Arrange top crust strips in a lattice weave on top of filling (see post for image instructions). Fold any overhang from bottom crust and lattice weave over to create edge, crimp to seal. Brush thinly with egg white wash and sprinkle with granulated sugar.
Bake pie
- Bake: Place pie dish on prepared baking sheet in oven. Bake at 425°F for 15-20 minutes. Reduce heat to 375°F without opening oven door and finish baking for 30-40 minutes. Edges may get too dark after 20-30 minutes in oven, cover with foil or pie shield as needed. If lattice gets too dark, tent entire pie with foil. Pie is done when crust is flaky, golden brown and filling is starting to bubble up to crust around edges.
- Cool: Once pie is done, turn off oven and remove pie using thick oven mitts. Remove any pie shield or foil (careful, hot!). Place pie on cooling rack to cool at least 2 hours or longer until at room temperature before slicing to serve.
Notes
Ingredient notes
- Crust: My go-to is my homemade pie crust, and store-bought crusts can be tricky to use with fruit fillings because they tend to be a little thin. If you’re in a hurry and need to use a store-bought crust, just be mindful of using it well-chilled and make sure to not stretch it out when adding it to the pie dish.
Canned cherries
Strain cherries, catching juice, then place juice in a wide pan, reserving ⅓ cup. Add extracts, cinnamon and pinch of salt. Add sugar to taste (some cherries come in sweetened juice, be sure to adjust). Bring to a boil. Dissolve ⅓ cup cornstarch in ⅓ cup reserved juice. Take pan off the heat and whisk in cornstarch slurry until fully incorporated. Put pan back over medium-low heat, stirring constantly, until thickened. Stir in lemon juice (if needed) and butter. Stir in cherries, adjust for taste and texture as described in recipe and allow to fully cool to room temperature. A deep dish pie dish may be needed when using canned cherries.Recipe tips
- Follow instructions to keep crust well chilled for best, flakiest results
- Cool filling to room temperature before using in crust
- Follow baking directions exactly for the most even baking
- Keep pie from browning too much by using a pie shield or tenting with foil if needed
- Cool pie on a cooling rack to avoid a soggy bottom
- Be patient and allow adequate cooling before slicing into pie
Storage
- Make ahead: Filling and crust can both be made ahead 2 days in advance, keeping both chilled in fridge until ready to use.
- Leftovers: Keep leftovers covered on counter for up to 2 days.
- Freezer: Freeze baked pie well wrapped in plastic wrap and foil for up to 3 months. Thaw in fridge overnight, allow to come to room temperature before serving.





Comments
No Comments