
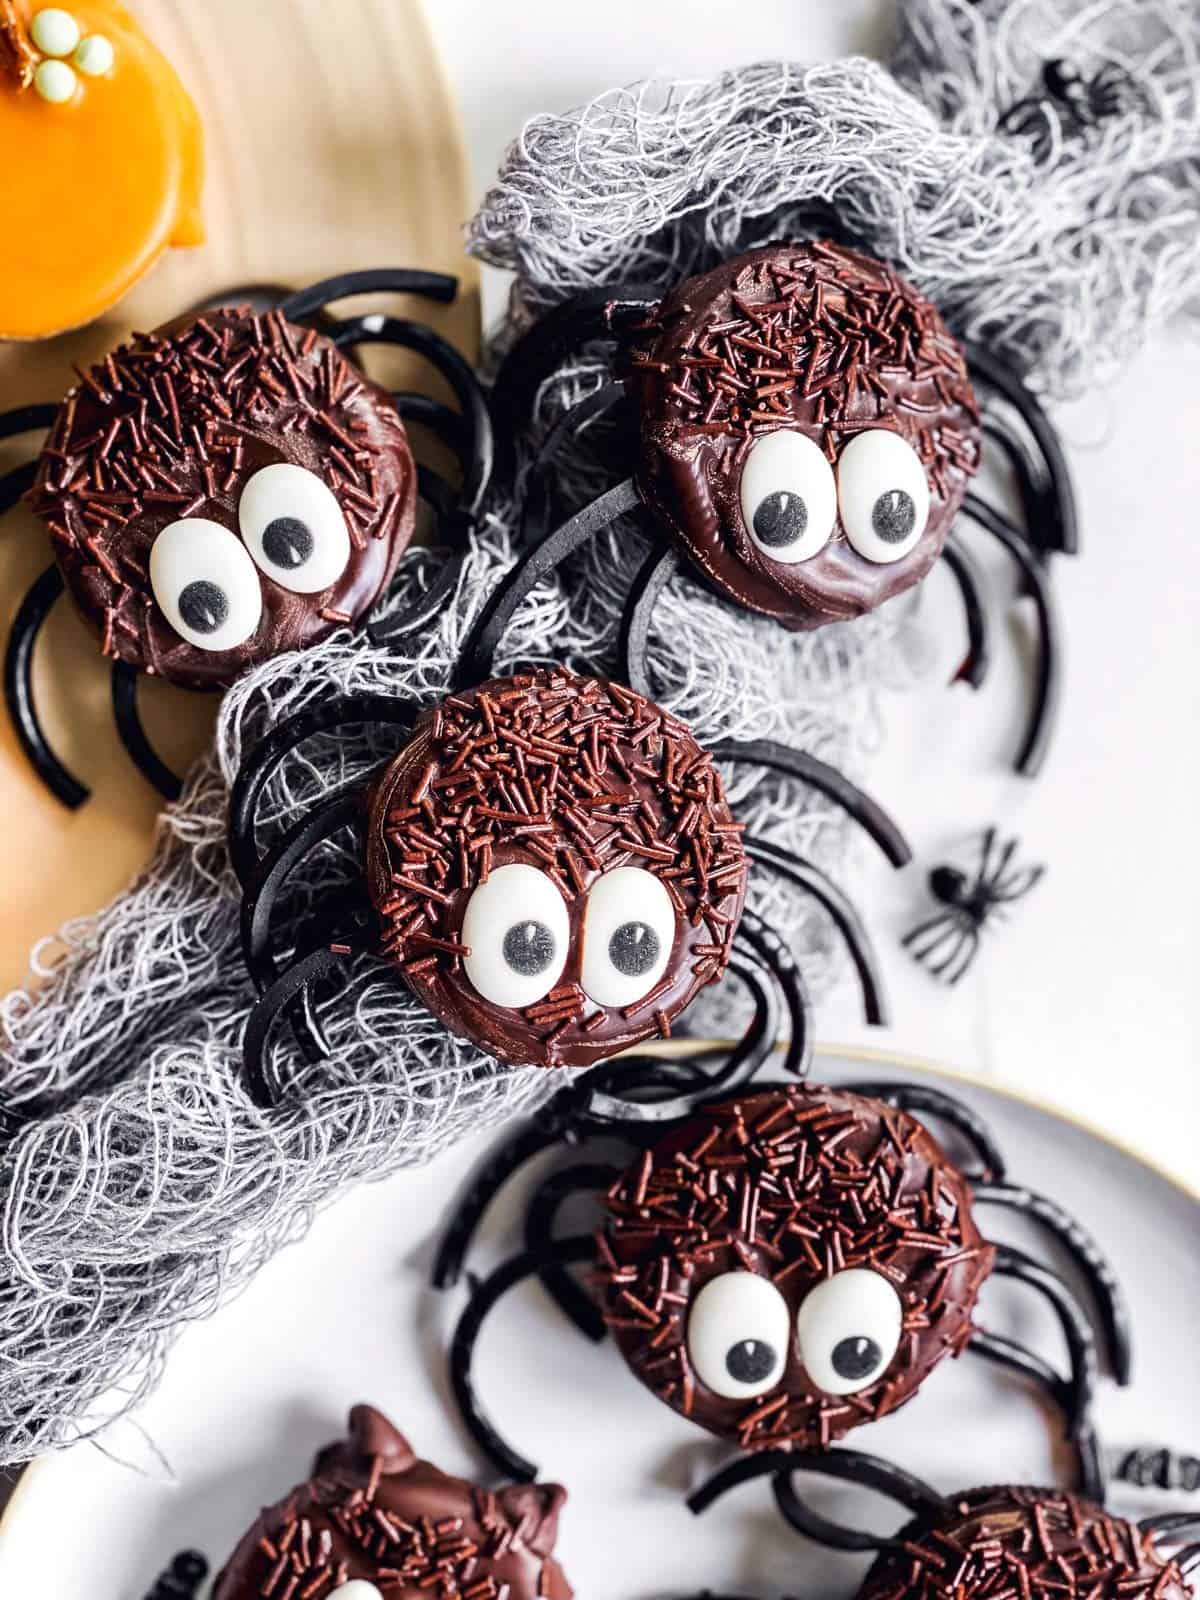
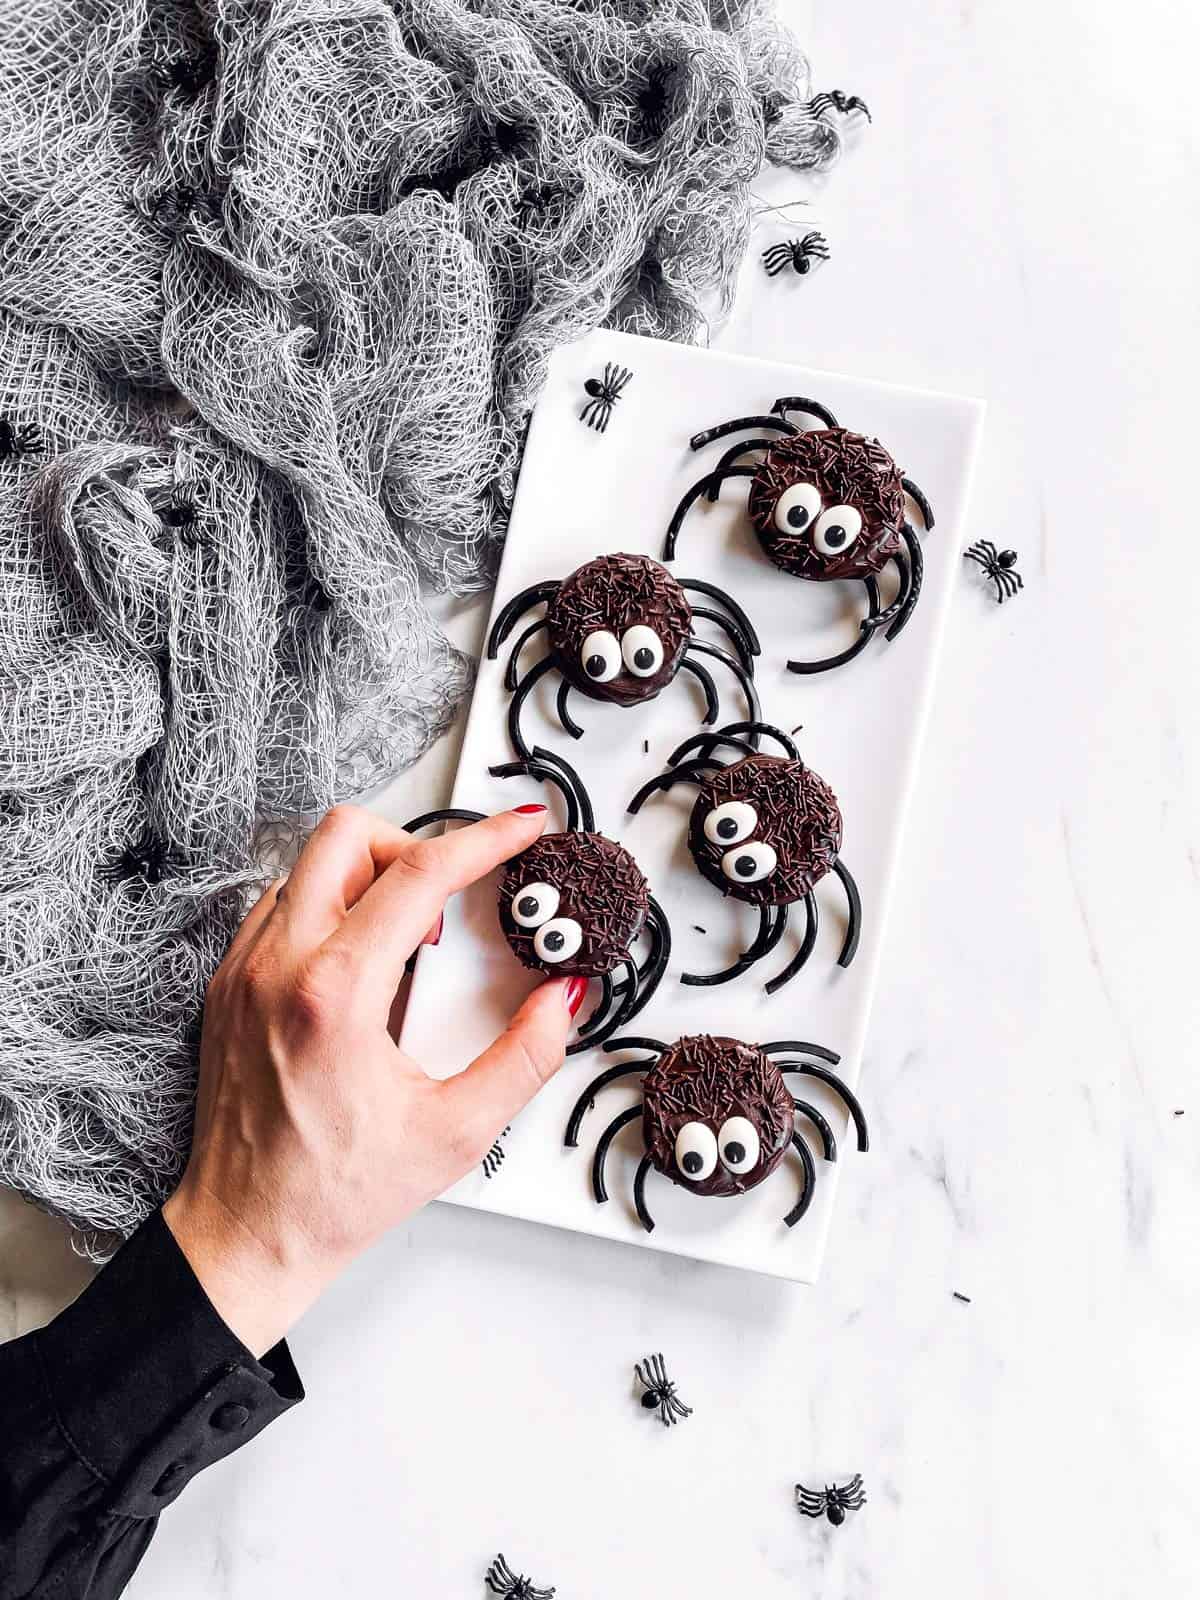
The ultimate easy Halloween treat: Hairy Spiders made with just 5 simple ingredients! These chocolate covered Oreos are quick to assemble and great to make with the kids for Halloween.
If there’s one treat I can never resist… It would be anything made with Oreos. I honestly rarely take the time to decorate them this much (usually it’s plain old Oreo Truffles for me ?) – but Halloween warrants something special!
Don’t let the spider’s adorable look fool you though: This Halloween treat only needs 5 ingredients and is actually easy to assemble. No fussing around here!
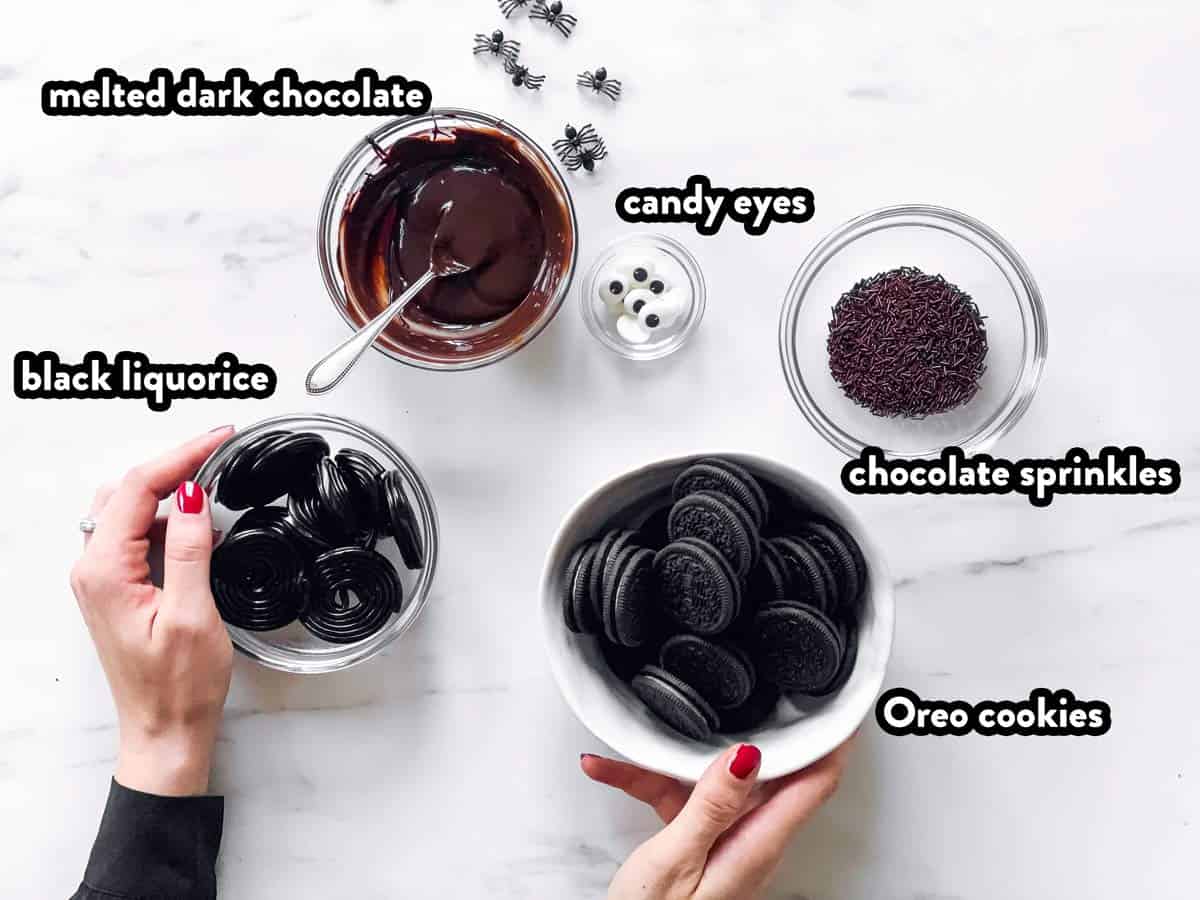
Ingredients you’ll need
Here is a visual overview of the ingredients in the recipe. Scroll down to the printable recipe card at the bottom of this post for quantities!
Ingredient notes
- Oreos: Regular or double stuf both work. You can use any flavor you like, but I do prefer using ones with a dark cookie for a better look.
- Licorice: Straight licorice works as well, but the rolled up one will give you the best creepy-cute spider legs look.
- Dark chocolate: I just melted down a chocolate bar, but you could also use chocolate chips specifically made for melting, or dark candy melts.
- Chocolate sprinkles: These are a must for the perfect hairy spider look! You could also go for black colored sugar if you want a more sparkly look.
- Candy eyes: I used large eyes to make the spiders look cuter, but you can use the creepiest candy eyes you can find if you prefer ?
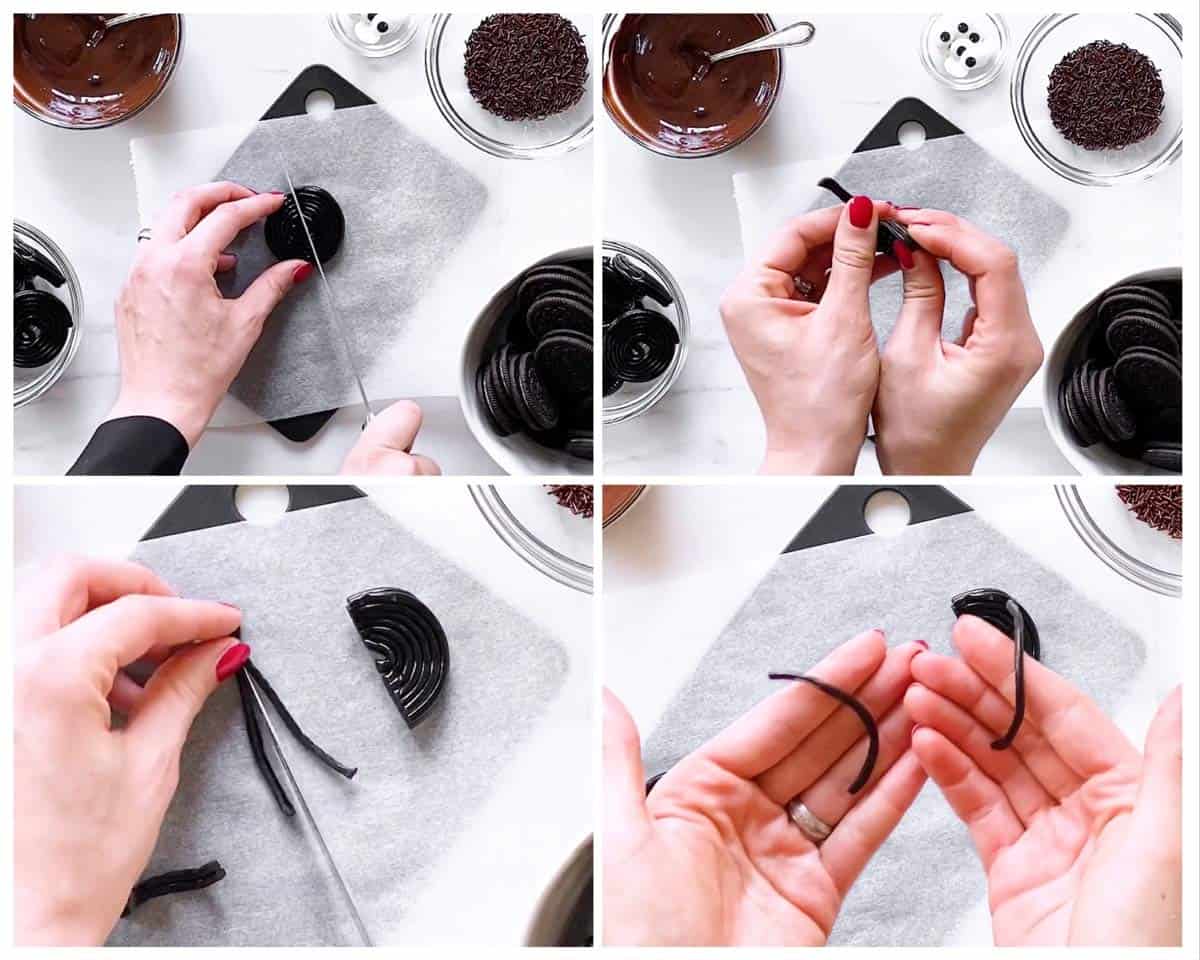
Step by step photos
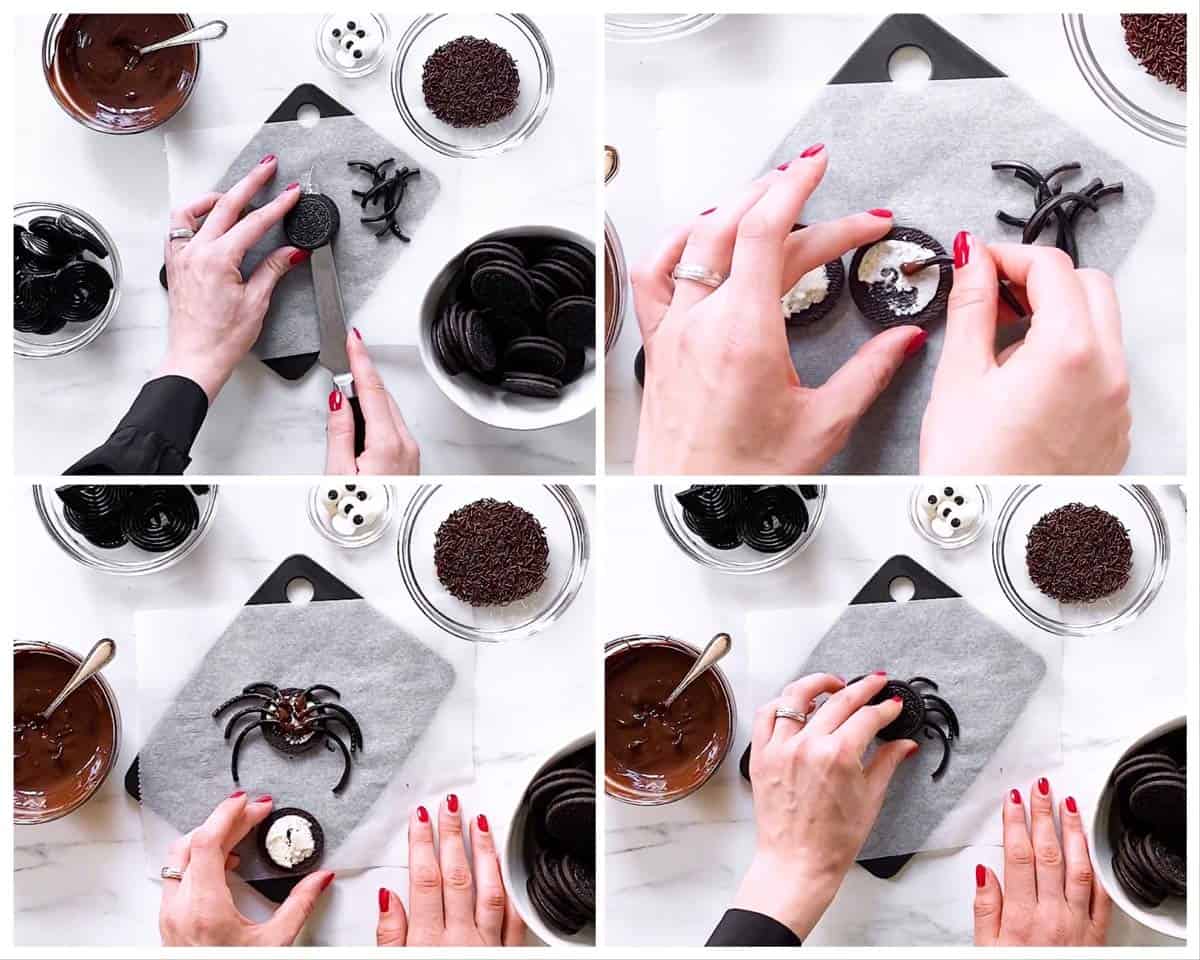
Prepare the “spider legs”:
Add the legs to the Oreo cookies:
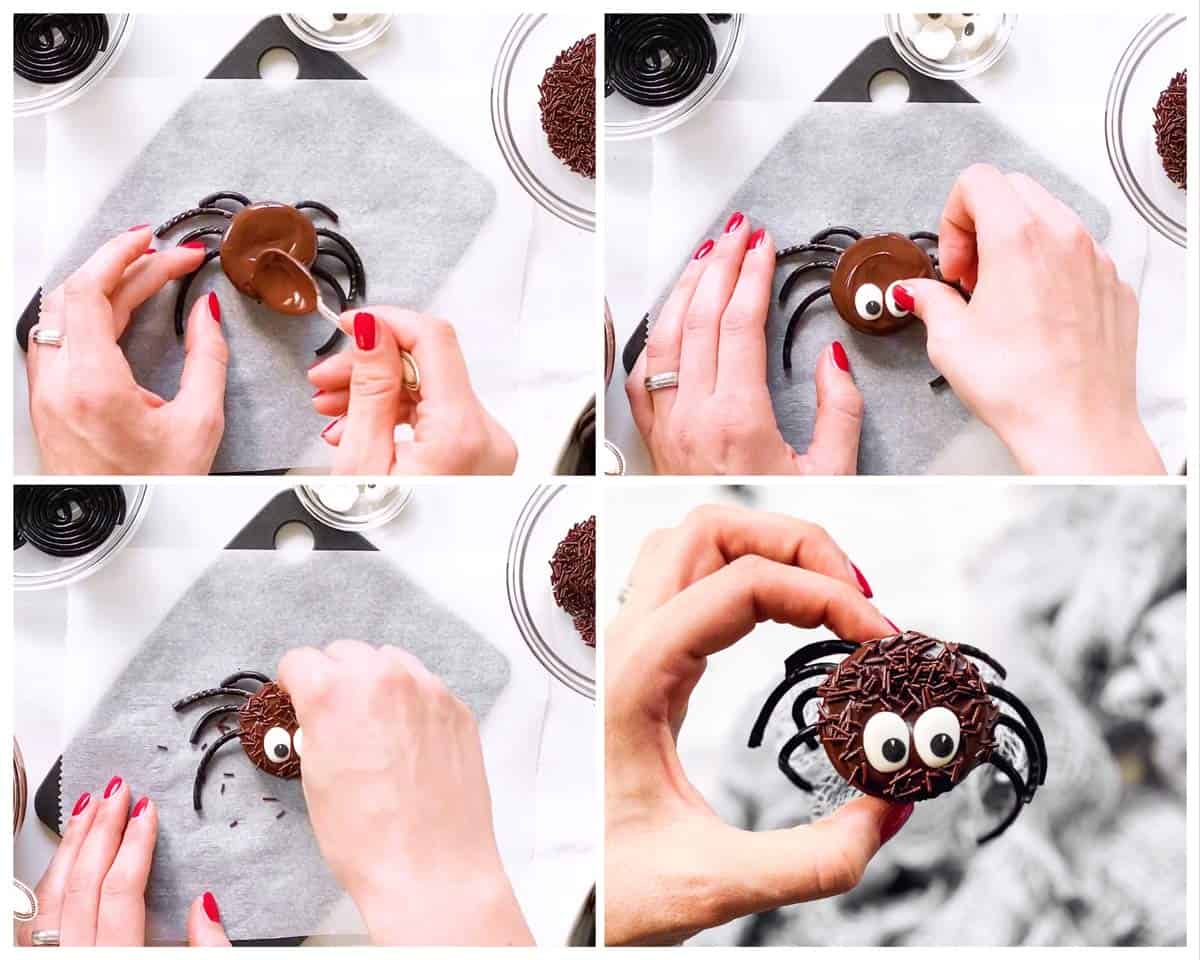
To decorate the cookie:
Recipe tips
- I recommend letting the chocolate cool for 10-15 minutes, to make sure it’s not too runny anymore. It should be spreadable, but you’ll want it fairly thick so it doesn’t all run down the sides of the cookies.
- Slicing the licorice and splitting the Oreos is a little finicky and definitely a job for the grown up if you’re making these with kids!
- I always assemble these on some sheets of baking parchment for easy release and less cleanup.
- I strongly recommend moving the spiders to a clean piece of parchment about 15 minutes after assembling them. This will remove some of the chocolate dripping down the sides and give you a cleaner look with a sharper edge. Use an offset spatula to make the transfer easier.
- Allow the spider decorated cookies to fully dry before touching them with your hands! I recommend at least a few hours, better overnight.
Storage tips
These should be stored in a single layer in cookie tins for up to a week.
I store them in the cupboard in a space as cool as possible. Do not recommend refrigerating these, as the chocolate can turn dull. But if you live in a very hot climate, do go ahead and refrigerate them if you notice they’re getting melty!
More easy Halloween treats
Try my Monster Oreos or my Monster Cookies if you’re looking for more fuss-free treat ideas!
PS If you try this recipe, please leave a review in the comment section and add a star rating in the recipe card – I appreciate your feedback! Follow along on Pinterest, Facebook or Instagram.
Printable recipe
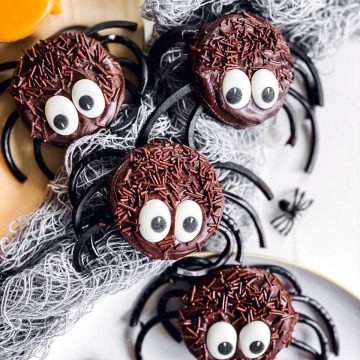
Hairy Spider Decorated Oreos
Recipe details
Ingredients
- 15 licorice wheels
- 1 package Oreo cookies 14oz regular or 15oz double stuf both work
- 12 oz dark chocolate for melting OR dark candy melts; melted according to package instructions and slightly cooled
- 60 edible candy eyes
- 1 cup chocolate sprinkles
Instructions
- Prepare the licorice: Cut a licorice wheel in half. Peel off 4 strands of licorice, then cut each strand in half down the middle to make two long and skinny spider legs.
- Add legs to cookie: Split an Oreo cookie in the middle. Place on a sheet of baking parchment. Dip the end of each licorice leg in chocolate and place them on one half of the split Oreo cookie. Sandwich the other half back on.
- Decorate the cookie: Spread a spoonful of melted chocolate over the assembled Oreo cookie and slightly down the sides. Stick two candy eyes on top and sprinkle with chocolate sprinkles all over.
- Dry: Using an offset spatula, transfer the decorated Oreos to a clean sheet of baking parchment about 15 minutes after assembling them. Let them fully dry for a few hours, better overnight. Store in a single layer in cookie tins at room temperature for up to a week.


Lennerd says
Is there a way to make it so the black licorice is easier to pull out for those kids who don’t care for that flavour? I think if you pull out the legs you will lose all of the Oreo filling.
Nora says
Lennerd, I’m thinking this is too late now – but next time you could use something else in place of the licorice. Small pretzel sticks, cut up Pocky Sticks or gummy candies like Twizzlers work well.