
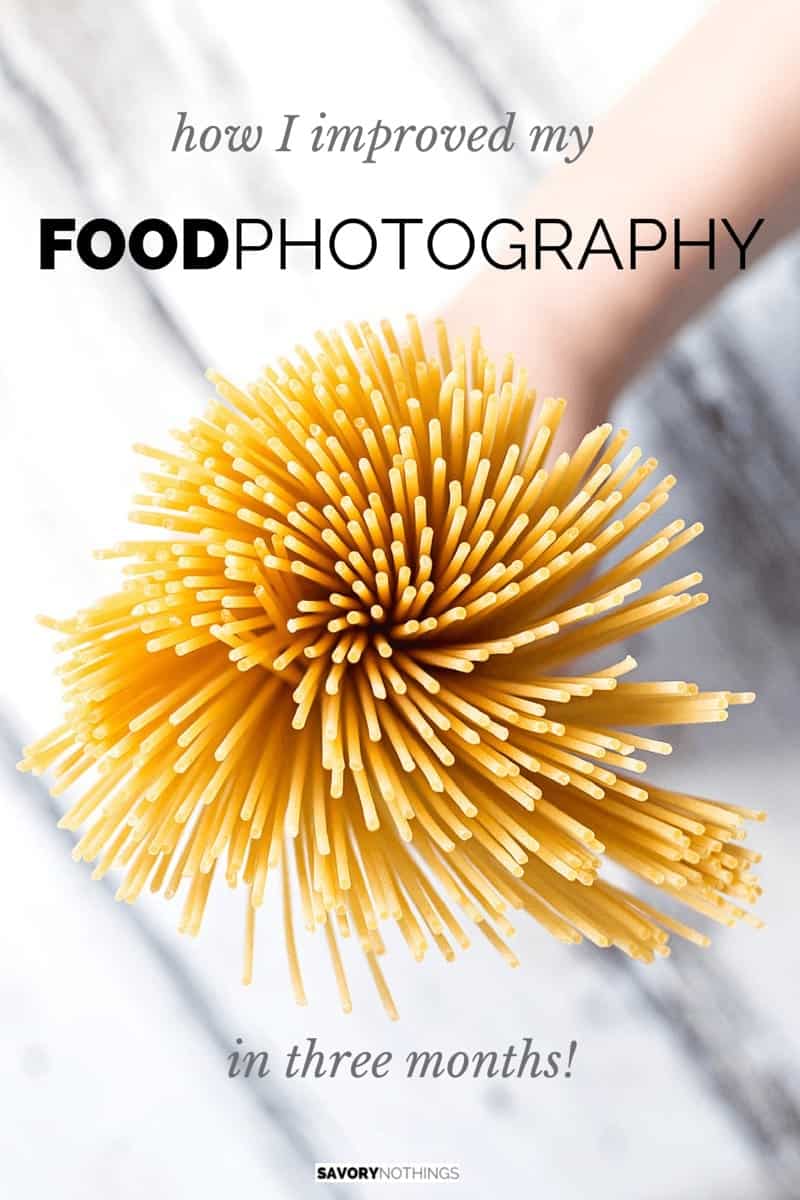
Just a word in advance: I’m by no means an expert in food (or any for that matter) photography. I just want to share my experiences from the first three months of using a DSLR, composing pictures and post production – so you can learn from my rookie mistakes if you’re new to food photography! And FIY: This post contains affiliate links and I earn a commission for purchases made after clicking through.
Let’s start off then, shall we?
1. THE BACKGROUND DOES MATTER
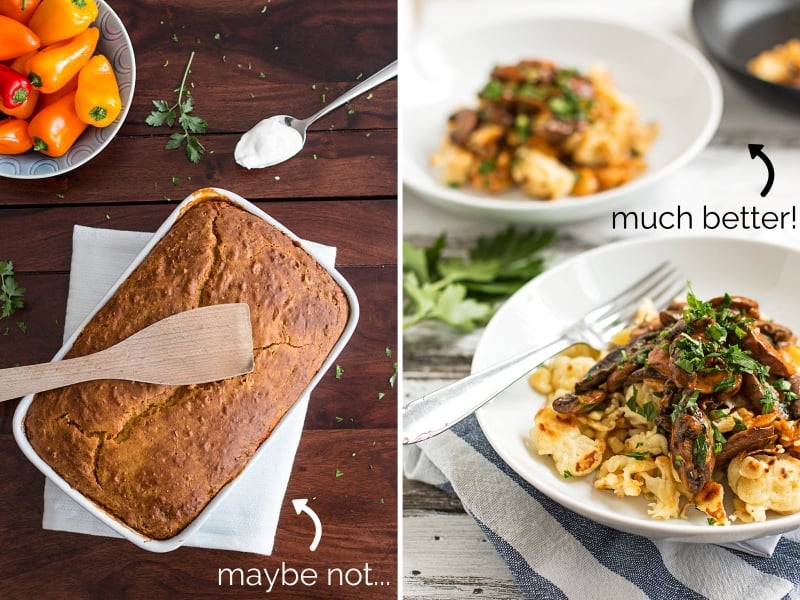
When I started taking pictures for Savory Nothings I used my couch table as a backdrop.
Now while it might look gorgeous in my living room it was not made for food photography! The wooden surface is very smooth and shiny which – unless it’s a solid color – I don’t like in pictures at all.
Making a backdrop is relatively easy and cheap. All you need are a few old pieces of wood and some paint if you want your wood to be a certain color. It will make a huge difference in what your pictures look like!
If you have a really nice farmhouse table at home though – lucky you!
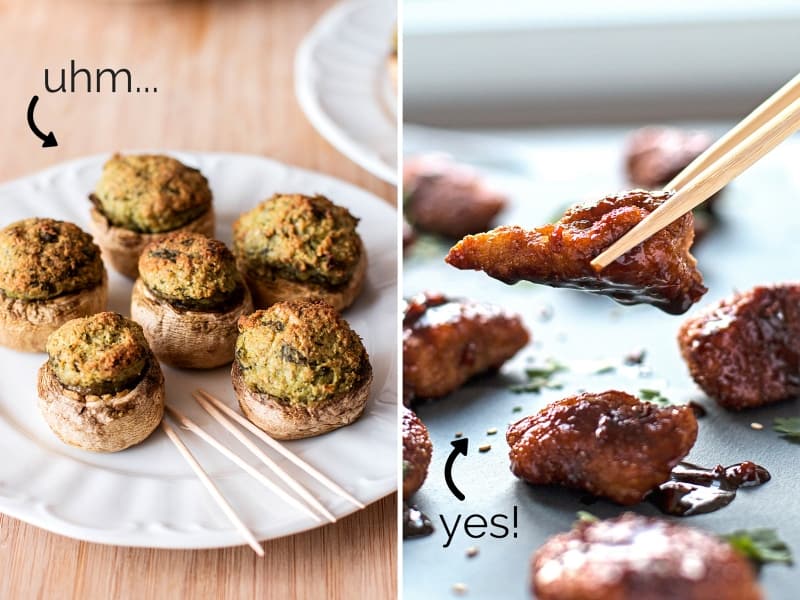
2. TOO MANY PROPS ARE UNNECESSARY
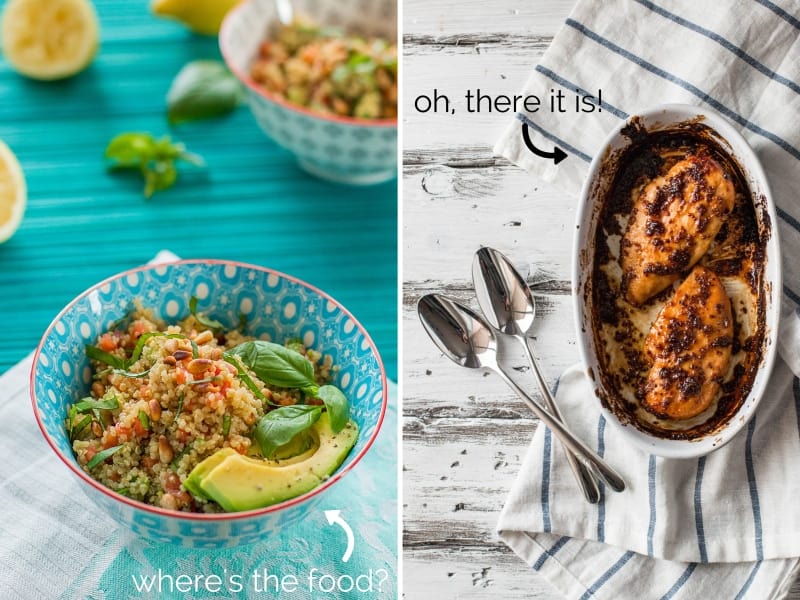
When I first started blogging I went and bought every cute and colorful dish and towel on the planet. What a waste of money!
Most really colorful and patterned things draw attention away from the food which is something you absolutely want to avoid – you’re trying to get people excited about your food after all!
While a little pop of color certainly is nice, I prefer my color to come from my food or from an ingredient I’m using as a prop. Let the food shine!
You still need nice dishes to photograph your food on but chances are you’ve already got a pretty set of white dinnerware – it’s all you need to start out!
Check out Tasty Food Photography on more tips for food styling.
(Though I have to confess: owning some beautiful vintage cutlery is really helpful to get a nice composition together!)
3. READ, READ, READ AND THEN READ SOME MORE!
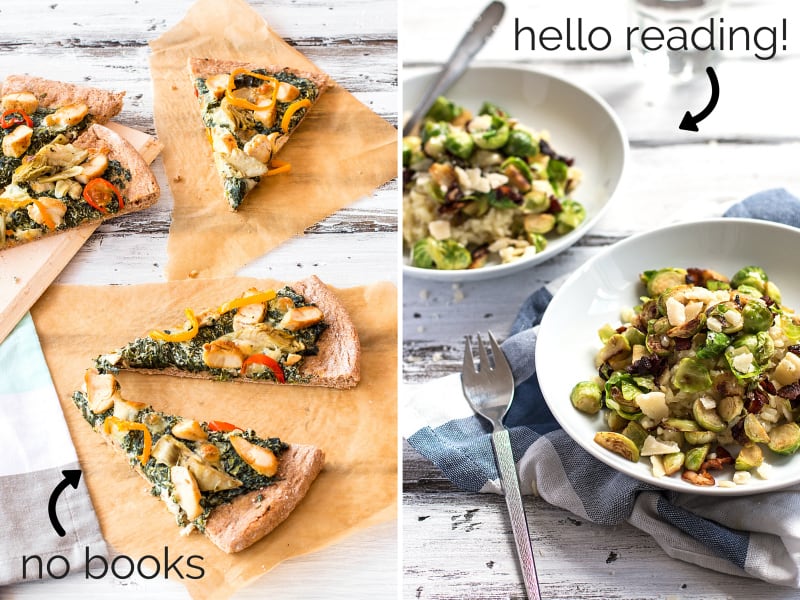
I used to think I’d just learn everything by myself on the go. Wrong!
It’s not ten years ago when new food bloggers had to figure out how to take pictures without a professional studio and professional equipment.
There’s so much information out there regarding food photography for food bloggers nowadays – to help you with everything from taking pictures with your phone to setting the white balance in Photoshop. And I suggest you start reading yesterday rather than today!
I was very stubborn with this one because I really wanted to figure out everything by myself – but don’t!
I noticed a big change in my pictures once I finally sat down to read Tasty Food Photography* by Lindsay from Pinch of Yum cover to cover – I wish I had done it right at the beginning of my blogging adventure!
4. FIGURE OUT LIGHT
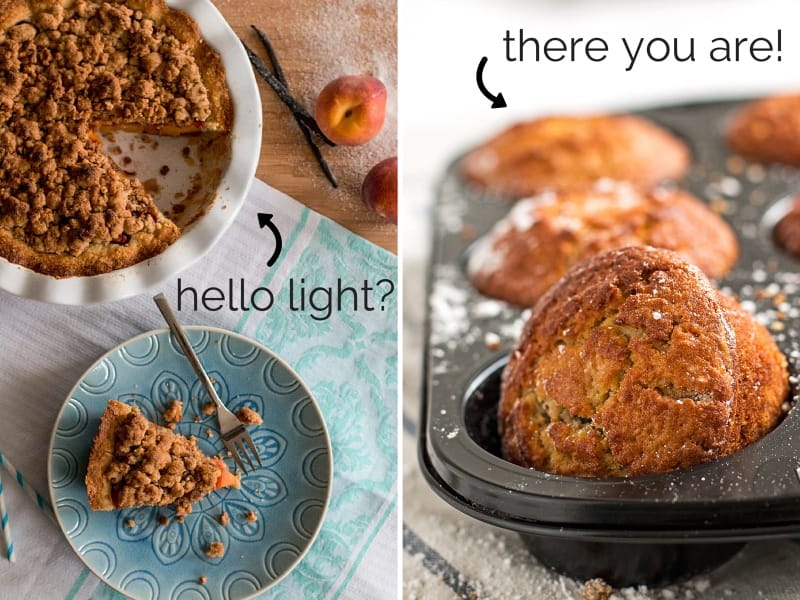
This is a total cliché but oh so true. You need to figure out how light works in photography to take decent pictures of your food.
I didn’t pay attention to light at all until I read Tasty Food Photography and I’m still at the very bottom of the learning curve – but just knowing what techniques there are and what to look for has already helped me tremendously.
On top of that you need to figure out which window in your house works best for pictures – and if it’s your bathroom window so be it!
I also started using my tripod. This one applies especially to all of you who have to take pictures in low lightning conditions – in that case it’s a total game changer!
If you’re using a DSLR you can use a very slow shutter speed with the tripod which will result in much brighter pictures without having to crank up your ISO to 2000. This was probably one of the best ways to improve the quality of my pictures.
5. LEARN HOW TO EDIT YOUR PICTURES
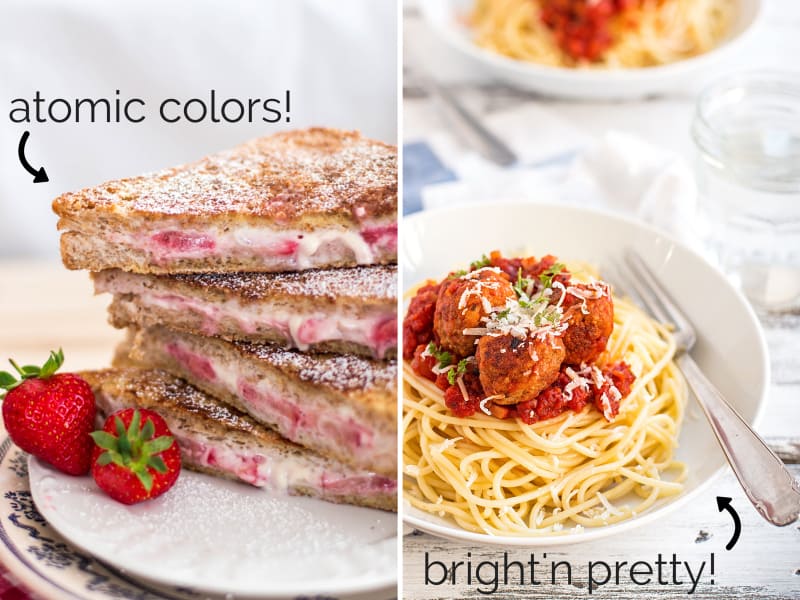
When I started out with blogging I hardly retouched my pictures in Photoshop – I had no clue what I was doing after all (because remember: I’d refused to read up on it)!
Then I went through a phase where everything I did was over-saturate, underexpose, you name it.
I eventually started watching tutorials on YouTube on how to handle the basic functions in Lightroom and Photoshop and I feel a lot more comfortable editing.
But I still sit in front of my computer a lot of times, trying to figure out what edit this particular picture needs to look good!
If you sign up for Food Blogger Pro, there are helpful videos about editing photos. Click here to sign up now.
6. CONSTANTLY REVIEW AND IMPROVE
This last point was probably also the most important one for me over the past three months: Never stop evolving!
Even when you think that last shoot turned out so perfect and you finally “got” this – go back in a few days and review your pictures. I guarantee you will find something you don’t like about them!
Change that in the next pictures you take and see how they turn out.
The only way to get better is with a lot of practice! Use your camera every day, and if it’s just to snap a quick picture of your dinner under the orange kitchen light – you can still practice arranging your food in a way that’s aesthetically pleasing.
I cannot tell you how important this was for me in bringing my photography to where it is now within just three months – I took pictures almost every. single. day.
And then I gave birth to our wonderful baby girl and went on a one week break – the first photo shoot after? Yeah, I almost didn’t know what I was doing anymore.
Practice, practice, practice! It’s what makes perfect.
So there you have it.
That’s what I feel played the most important part in helping me improve my food photography so far!
But just like I mentioned in Nr. 6 – I’m nowhere near done! This was just the beginning and I have a huge journey in front of me.
I still cringe when I look at the pictures from a week ago and my next goal is to get some kind of consistency in my photography.
I also want to get more comfortable with compositions and camera angles. I study the photography of other bloggers a lot while I’m awake with my baby sleeping across me at night (seriously, can anyone sleep like that? At least I can use the time to do something productive if I don’t get to sleep).
I read through Tasty Food Photography all the time when I need a tip.
And when I started out, the video tutorials in Food Blogger Pro were lifesavers.
Right, before I bore you to death I’m going to finish here. Now go forth and take beautiful pictures of thy food my friend!

Laura Healthy says
Love this! So many useful tips 🙂
Calum Lewis says
Ill definitely be using some of these tips, thanks!
Kylie says
Thank you so much for sharing your experience!!!
jess says
Such useful tips. Thanks!!!
Nora says
I’m glad you found them helpful, Jess!
Lauren says
Thank you for the wonderful tips! I just got my DSLR last year and have been practicing with it almost everyday. One area I really want/need to learn more about is food photography. Your post was very inspiring!
Nora says
Thank you so much for your kind words, Lauren! I’m glad you found the post helpful!
Sarah says
I’m reading this post a little late, but I’m glad I discovered it! Was Food Photography School worth the $99, or do you think I can find similar tutorials through Youtube videos, etc.? 🙂
Nora says
Hi Sarah, if I’m honest I haven’t spent that much time looking through the Food Photography School videos! Based on that I can’t really judge, sorry 🙂
Cherie @ FoodRecipesEasy says
Thanks for making a quick synopsis on improved photography.
Actually, I was looking for some basic inputs like composition.
Hope to find it soon.
Nora says
Thanks for reading, Cherie! I’m still learning about composition and don’t feel confident sharing tips about it yet. I hope someday I can 😉
Katy says
Wow you did an amazing job in just 3 months! I am only on week 1 of my blog and learning so much from fellow bloggers! (P.S. I think the “before” photos look incredible too for a beginner!)
Nora says
Thanks Katy! Your blog looks gorgeous – love the cupcake pictures!
Katy says
Thanks so much! It means a lot!
Sara says
Thanks for posting this! I decided to join the food blogging world this just this weekend and I have NO IDEA what I am doing. Thanks for the great tips!
Nora says
I’m glad the post was helpful Sara! Your blog is off to a great start. Blogging can be immensely overwhelming at first but it gets easier every day 🙂
Cyndi – My Kitchen Craze says
I loooved this post Nora! Thank you! I cringe when I see my old pictures too. I hate them and am in the process of retaking them. 😉 I’m still a newbie and am learning as I go but I think photography is the hardest part of this job! The food and writing are the fun part. That’s any job though huh? 😉 thanks again sweetie!
Nora says
Thank you Cyndi! I agree, the photoraphy is the hardest (and most time consuming!!) part! There’s loads of pictures I never published because they were just so awful. Baby steps 🙂
Wendi Spraker says
Hello,
I just found your website and I think your photos are beautiful! Thank you so much for this post – I am really struggling with the photos for my blog and working hard to learn everything that I can. I hope you will give us a review of Food Photography School – sounds like a worthwhile investment! 🙂 Thanks! Wendi
Nora says
Thank you so much Wendi, it means a lot! I’ll definitely write about the Food Photography School once I’ve gotten through some more videos – my baby isn’t letting me practice that much at the moment 😉
Erin @ Texanerin Baking says
When I was on your homepage, I called in my husband to look at your pictures and I asked him why my pictures don’t look like yours and all the other bloggers. And then I saw this post. Nice! 🙂
But really… your before pictures are awesome. Do your pictures come off the camera looking that sharp and crisp? Or do you have lots and lots of light? I can’t for the life of me figure out what I’m doing wrong (I obviously don’t understand lighting) so I guess I’ll look into that some more!
Nora says
Awww thank you! But your pictures are so lovely!! I always look at other blogger’s pictures and cry to my husband about it 🙂
I started to always use a tripod! Because no, I have terrible lightning here. There’s one window with somewhat reasonable lightning but I still need to use a really low shutter speed. Hence the tripod! And I shoot in RAW, then up the clarity to about 30 in Photoshop (amongst other edits).
Mom’s Dish says
Absolutely wonderful post!!
Nora says
Thank you!
Nora says
I’m beyond happy that you liked the post Rebecca!
Diane says
Great post. Love the side by side post to drive home the point. Most importantly fantastic improvement.
Nora says
Thank you Diane! That means a lot!
Sarah Marchant says
Great post! The “after” photos look lovely, though the “before” photos really don’t seem that bad to me. 😉
Nora says
Thank you so much Sarah! Haha, I did have some reeeally bad pictures from the very beginning, though they never made it on the blog but right into the trash 😉
Liz @ Tip Top Shape says
This was a really great post!! I’m constantly trying to improve my photos. Thanks for the tips!!
Nora says
Thank you for your feedback, I wasn’t sure if I should really post it since I have only been around for three months… So I’m beyond glad you liked it 🙂